Tiny Food: Venezuelan Arepas (3 ways!)
If there’s one thing I could eat every-single-day, it is for sure, arepas. But wait, what are arepas? (if you’re not Venezuelan)
Is it an english muffin? not even close.
A bagel? no, no, hang in there
A breakfast sandwich? it is WAY better than any regular sandwich.
I’m just warning you in advance that you’re about to discover my passion for arepas and your life will never be the same. Do you remember the bollitos pelones recipe I shared a few weeks ago? I’m showing you today the key to achieving perfectly flavorful, crisp-on-the-outside, tender-and-fluffy-on-the-inside arepas!
The best part? You only need three ingredients. YES, three.
I get this question a lot: So, can I use cornmeal? No, it isn’t the same. Can I use any corn? No, you can’t.
The secret of arepas are cornmeal-like dough called harina precocida – pre-cooked corn flour, which is gluten free, does not contain any preservatives or artificial ingredients, yes, it is WAY healthier than eating bread.
Did you know they’re stuffed with every possible good thing ever? Chicken. Shredded beef. Slices of avocado. Chicken avocado mayo “reina pepiada”. vegetables. Halloumi, feta, any cheese. Ham. Turkey. Black beans. Fried plantains.
What about salsas? SO MANY! the typical: salsa rosada – equal part mayonnaise and ketchup, salsa verde (a Venezuelan-style tartar sauce), guacamole, garlic sauce, pico de gallo, and lots of butter.
Please stop me now, let’s start cooking.

The process: step-by step
You’ll only need one bowl and three ingredients: pre-cooked corn flour (Harina Pan), salt and water. Oil for cooking after you prepare the dough and that is it. The process is very very simple: Dissolve salt into the water and slowly add the Harina Pan until a loose dough forms, stirring with your hands.
Venezuelan tip: you can mix white and yellow Harina Pan, creating a nice golden colour. We usually prepare them white or yellow at home.

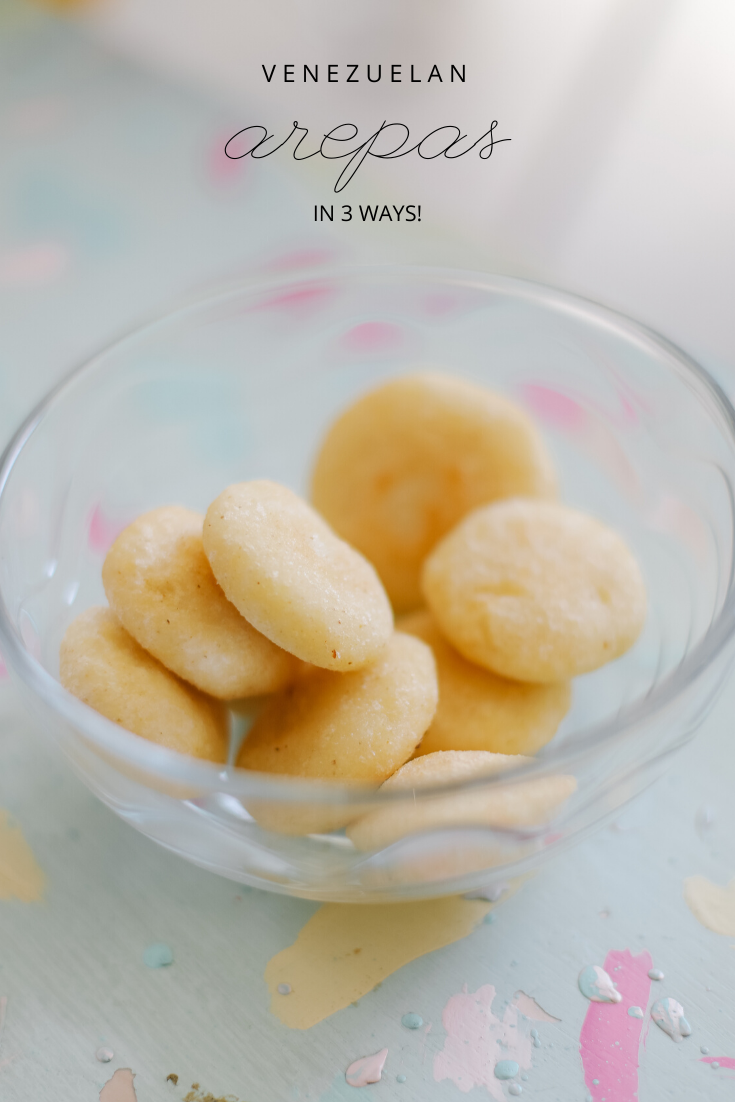
Mini fried arepas
Nico’s obsession. When I cook them, he can easily eat this entire bowl by himself (and no, he never shares). I grew up with arepas being the main part of all our family dishes, and I’m repeating the story with my little ones.
You can find this mini fried version in restaurants, as a main entrance and we usually prepare them with barbecues at home or for a very special brunch, Venezuelan breakfast!
You can for sure bake them, but my style is: let’s fry all the way of course (the OG way to eat them).
After you prepare the dough, just roll mini bowls and smash them into mini discs. I usually fry them using avocado oil (healthier option) for about 3 minutes each side.
Serve them hot and eat them with or without fillings, this are our fancy little arepas!
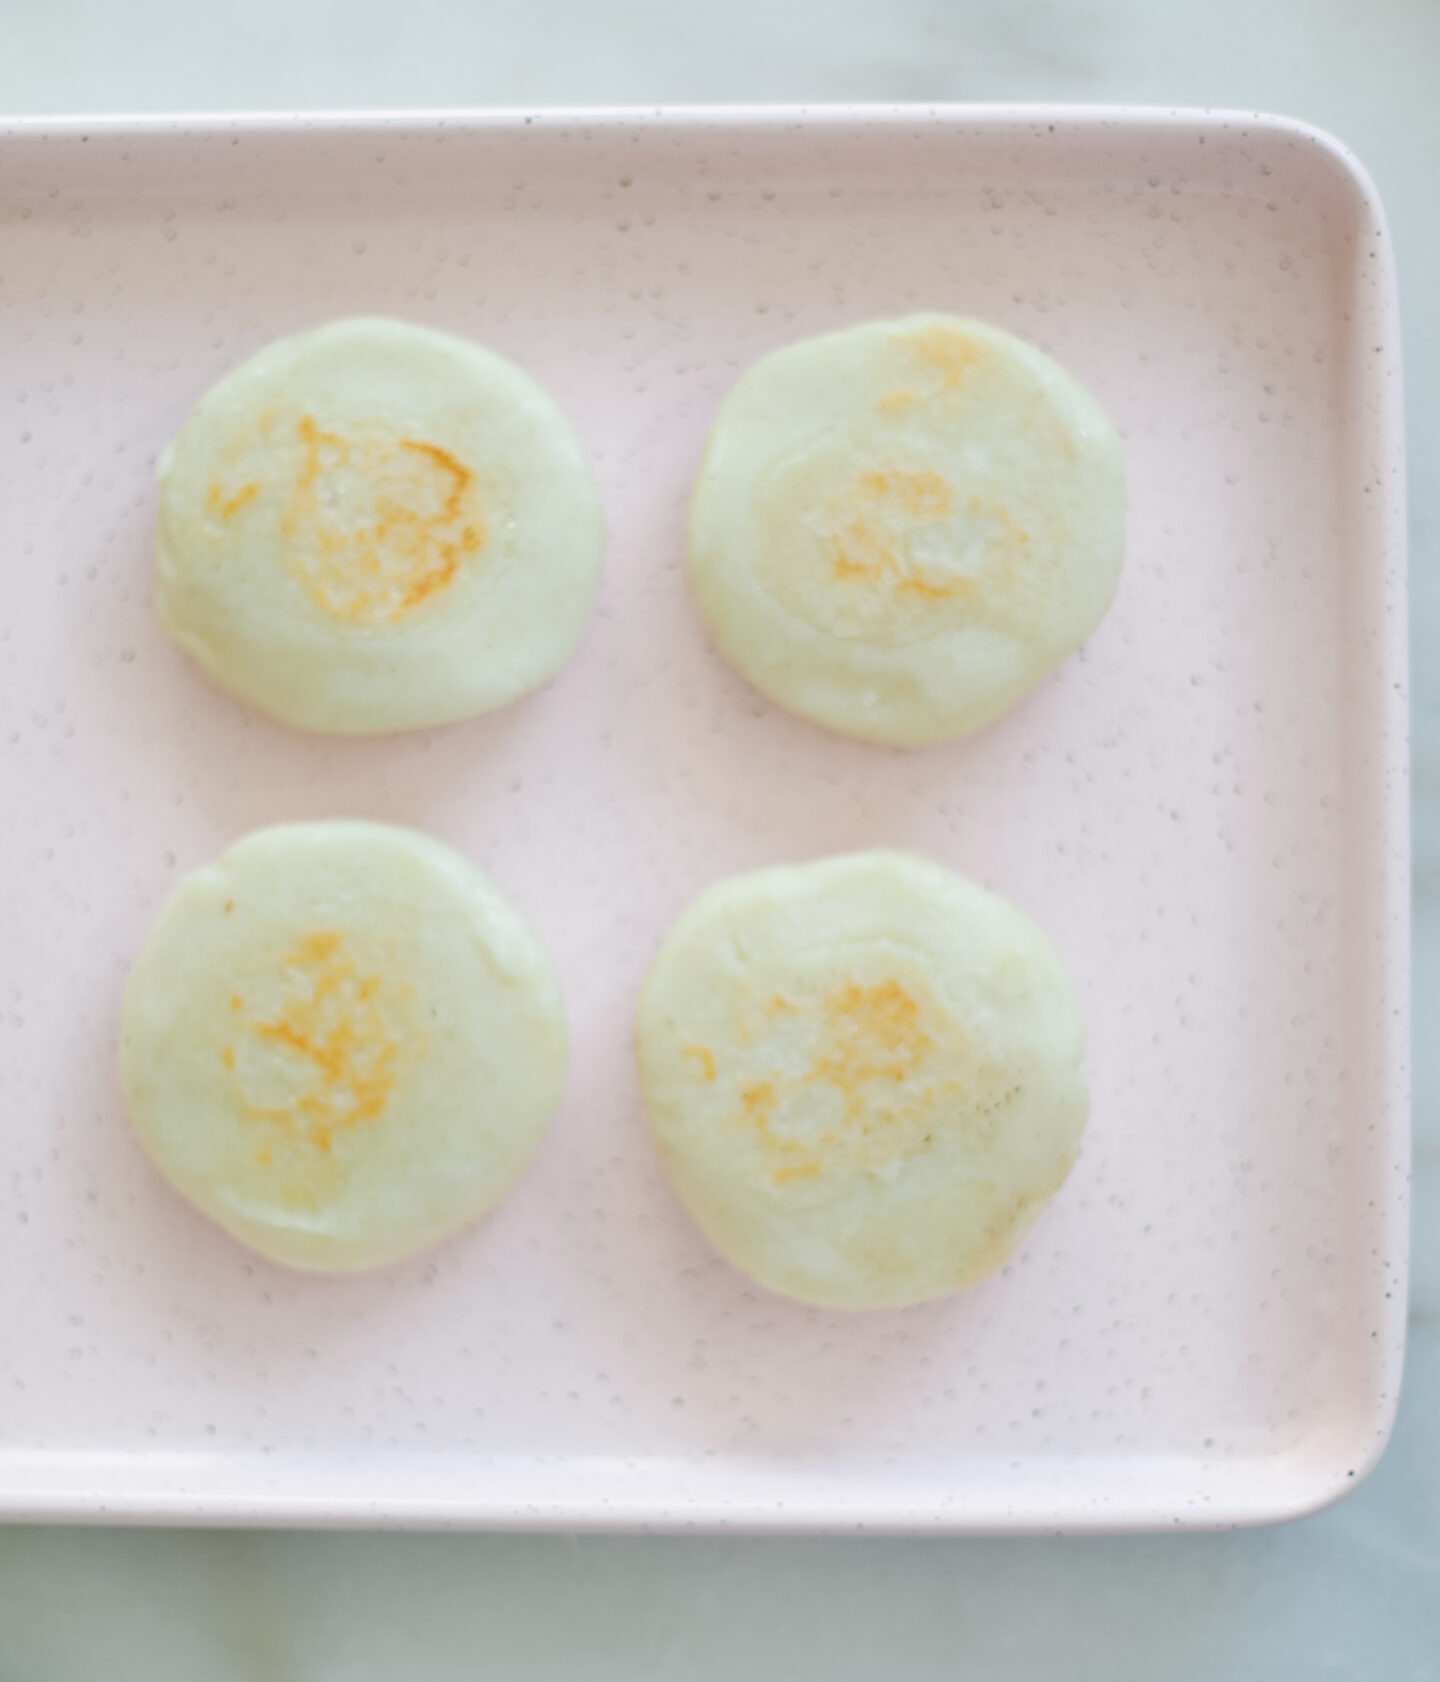
The classic baked arepas
We have them 90% of the time in this traditional form: baked in the oven. If you visit Caracas, the “areperas” will serve them like this, and will fill them with the most amazing options (already drooling over here).
Once your arepa dough is formed, there are two simple steps: you just need to roll into balls and gently forming smashing into discs.
Pan-fry these discs into a little oil to form a crust (see the yellow in the picture?), and then finish in the oven to ensure the arepa is toasted and cooked.
You can prepare them really thin and big, medium size and a bit thicker or big and thick – the forms vary depending where you grew up (more on this later with a ton more recipes here!)
Tip: If you feel the dough is too dry, just add a little more water to moisten. It’s a super simple dough to work with.
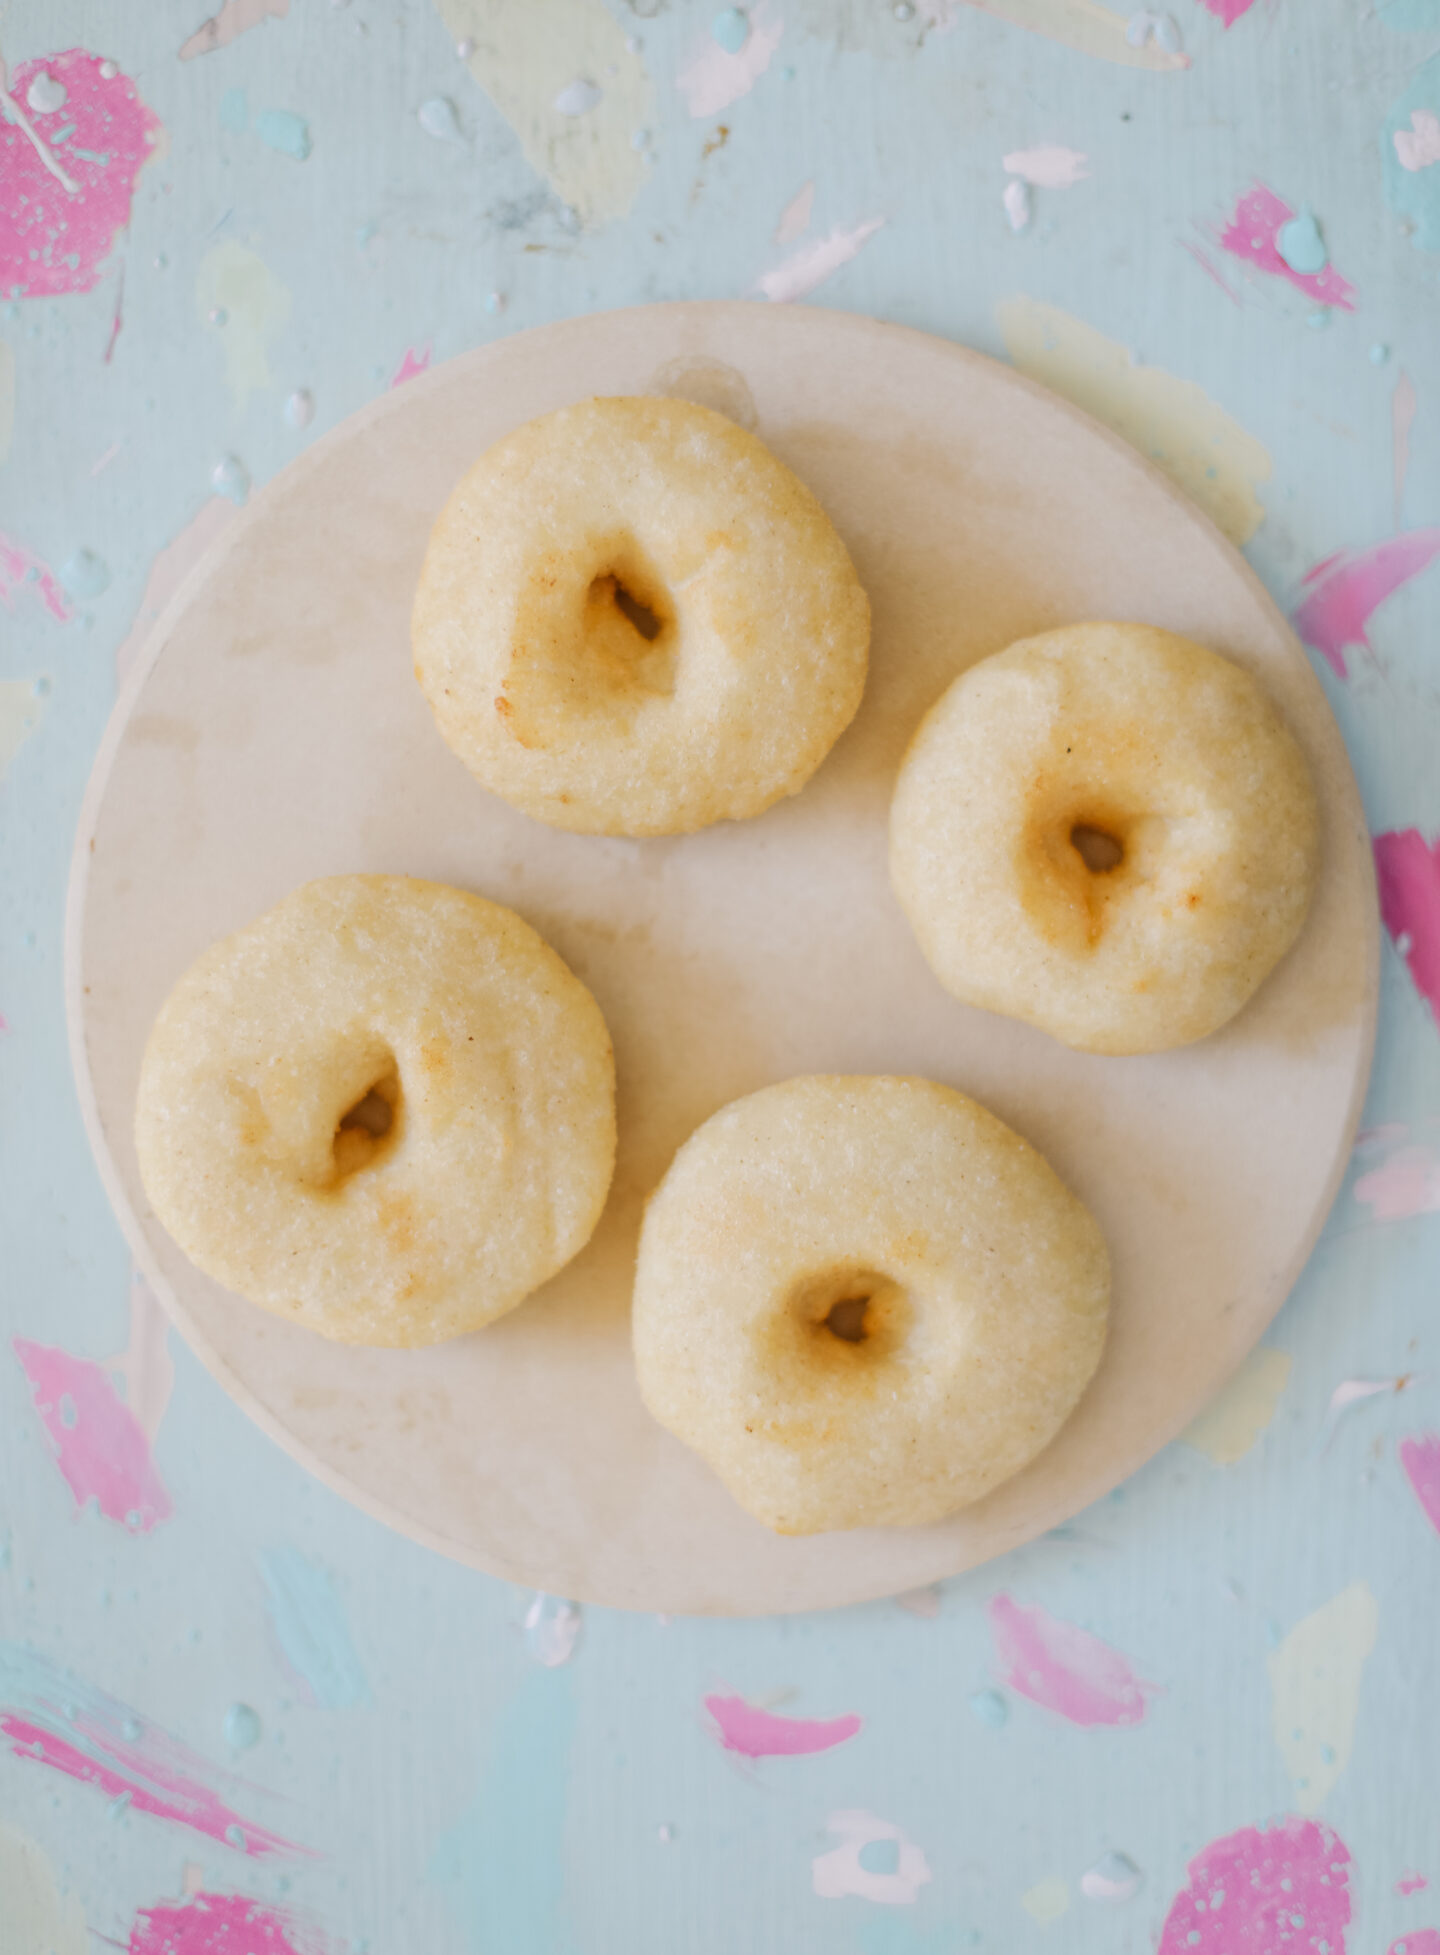
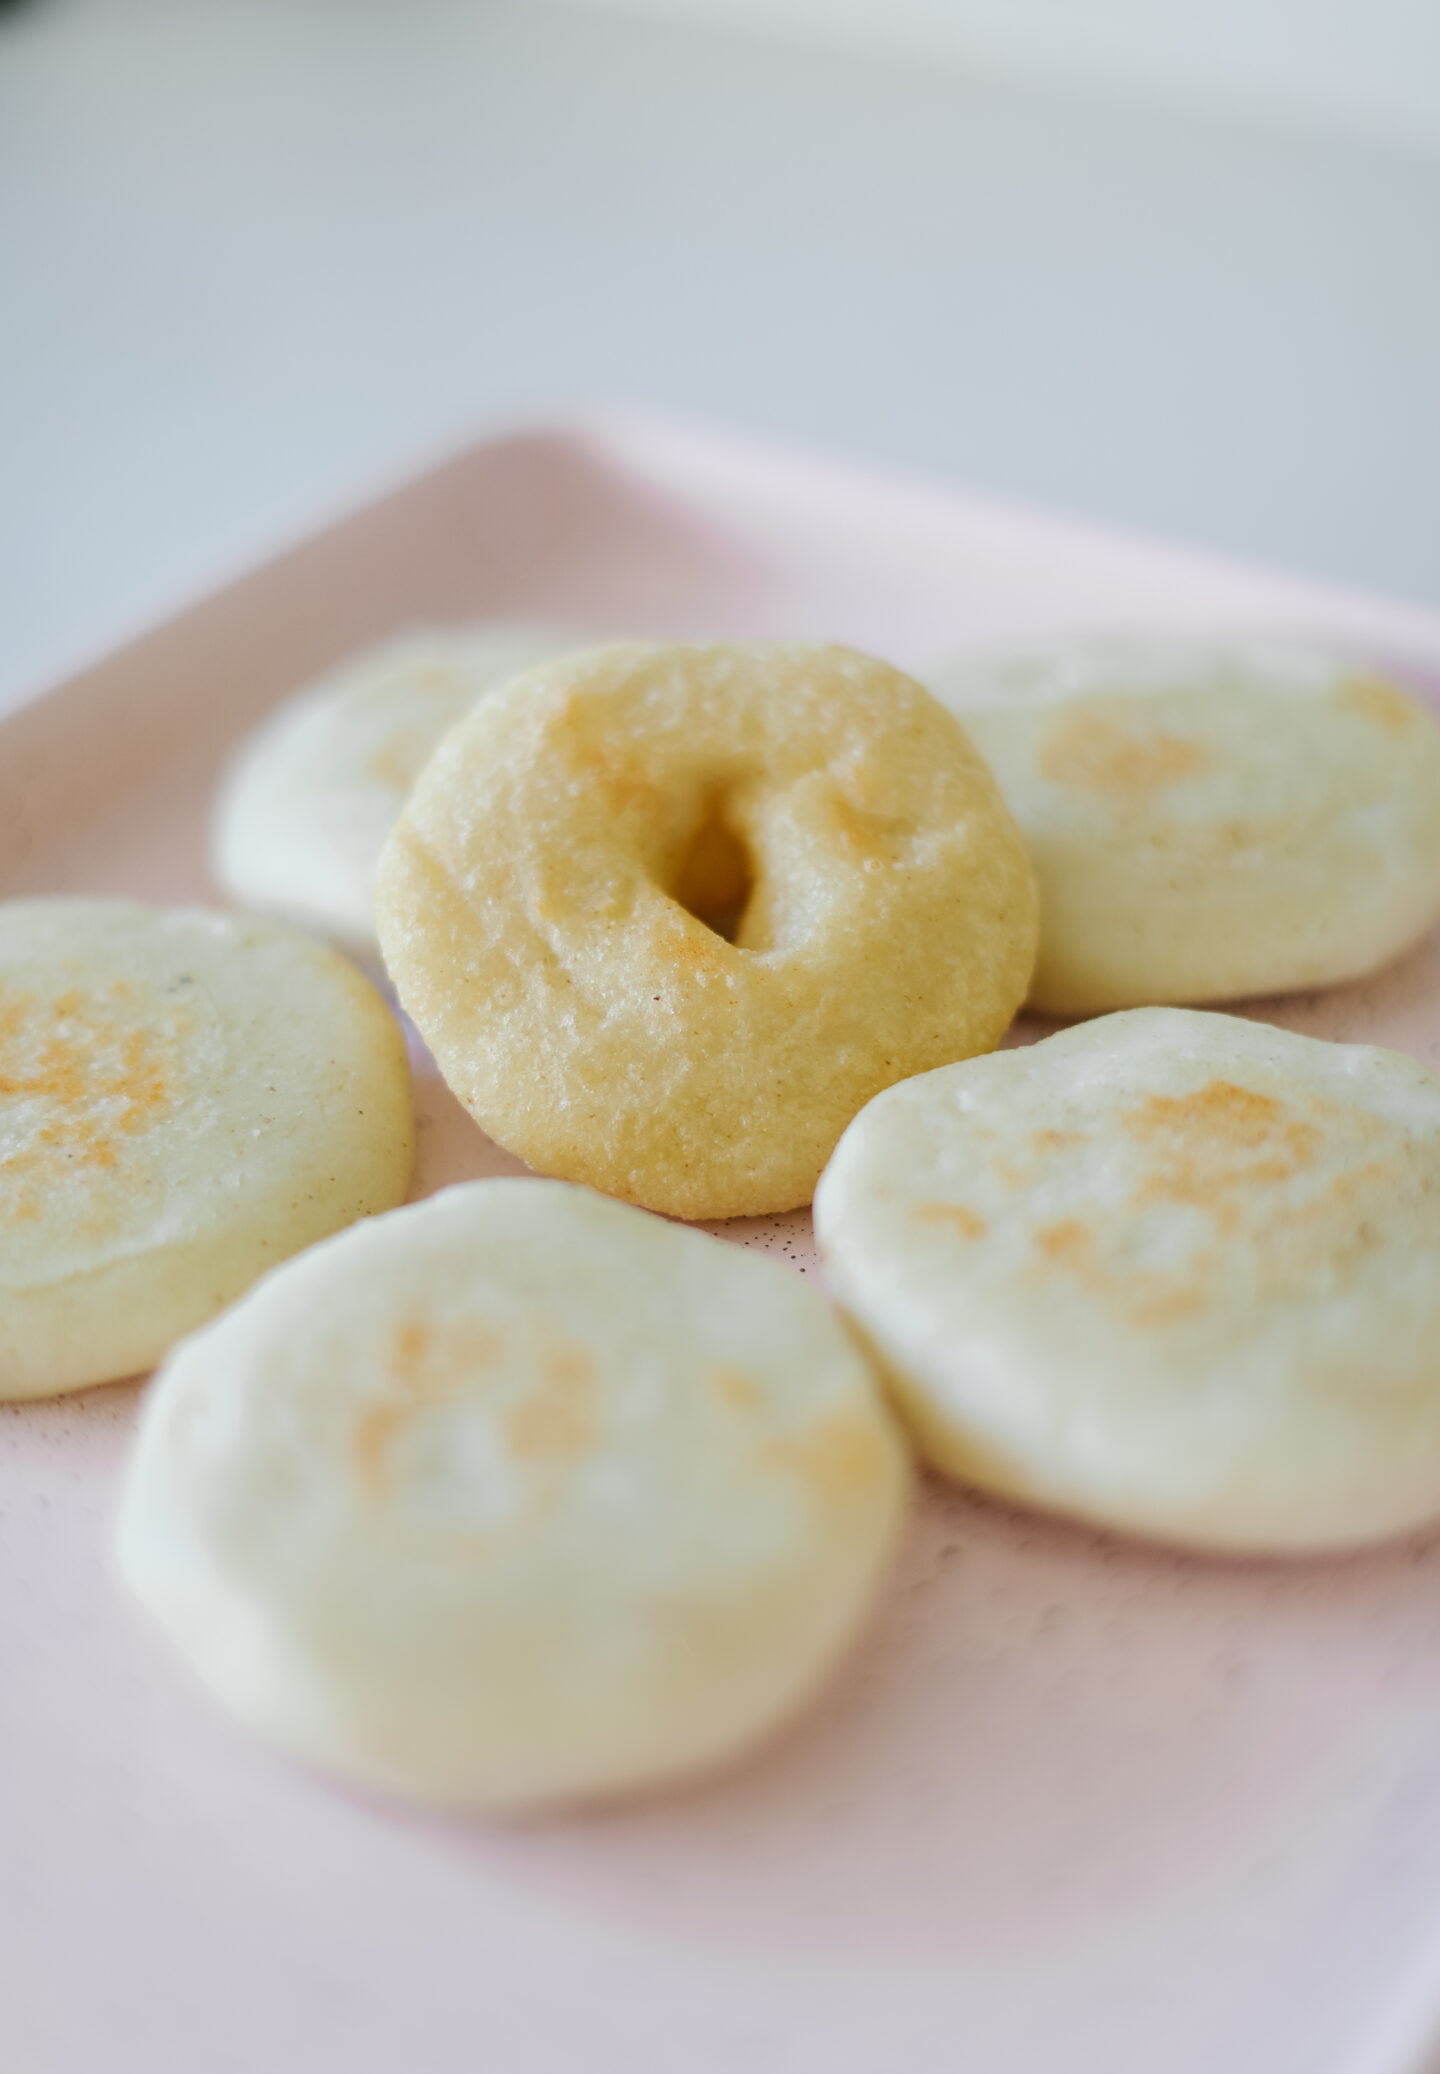
The fried Arepa with huequito
Waking up to a good arepa frita con huequito is the closest thing to heaven (ask my husband about it). This version, is the marriage between a regular baked arepa, with a simple hole in the middle, so the cooking process is way faster and easier.
When you finish the arepa dough, the steps are the same as before: roll a ball, smash them into a disc, and this time, with your finger, just form a hole in the middle of the arepa.
Deep fry them using your favourite oil (this version needs to be fried), right my Venezuelan friends?
Growing up, I used to love having them with cheese on the side and lots of butter (as Oli loves as well).
What’s your favourite version so far?
Easy Venezuelan Arepas
Method
- Using a large bowl pour water and add salt.
- Gradually, add the corn flour until you have a smooth dough formed. Let it rest for 3 minutes.
- Knead and separate dough into small balls. Press with your palms forming a large patty (disc) shape. You can pick the size you want them to be (thick, thin, large, mini, small, with a hole).
- Baked version: place them into a griddle over medium heat with a bit of oil, and heat 5 minutes on each side. Place them in the oven and toast them for 10 minutes.
- Deep fry version: Grab the patty shapes arepas and fry them using your favourite oil. Heat 4 to 5 minutes on each side and serve.