Your Friends Won’t Believe You DIYed This Adorable Wavy Wall Clock


I’ve been loving the wavy style we see everywhere in home decor lately, from shelves, coffee tables, mirrors, and so many unique pieces that are both adorable and stylish. My inspiration today was to try my very own DIY version of this trend and create a beautiful wall clock that fits my style and studio aesthetic (saaaay whaaaaaat!)
You won’t believe how easy it is to make, and it doesn’t even require any painting or pro experience to put this project together. I picked a bright palette that matches perfectly my studio kitchen decor.
Want to make and personalize a wall clock? Let me show you how incredibly easy it is to make a very unique one, so start scrolling.
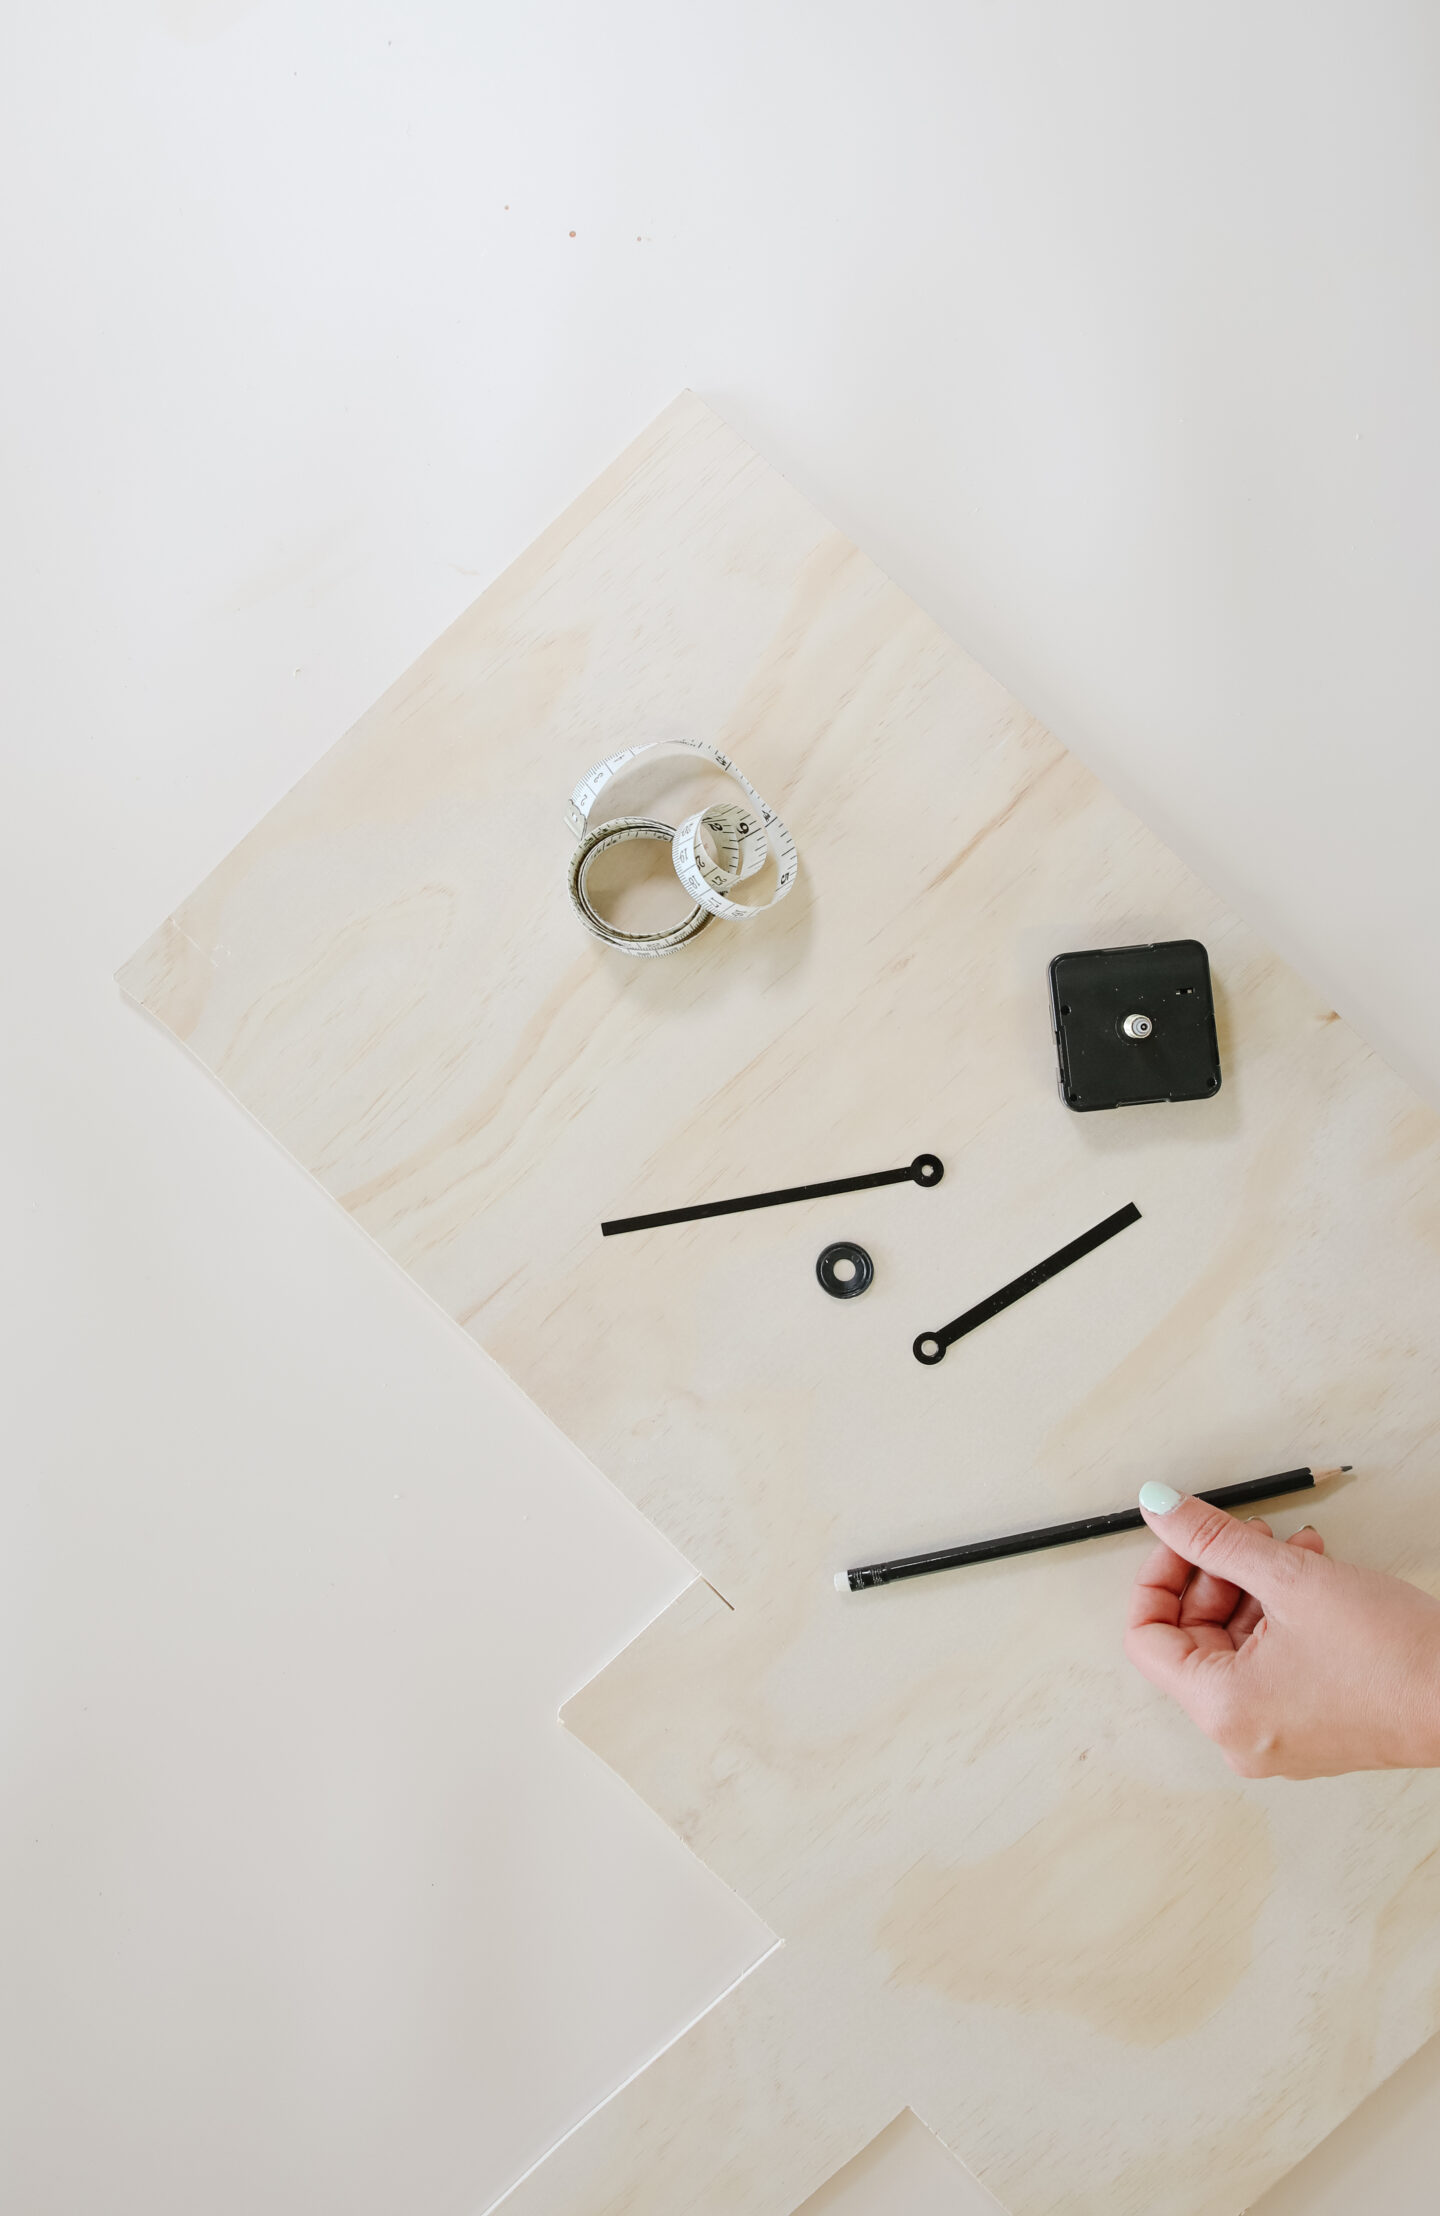
– Pine plywood (I used a 6mm panel so the clock is light and portable)
– Clock mechanism (this one is perfect and silent)
– Vinyl in different colours
– Drill
– Jigsaw
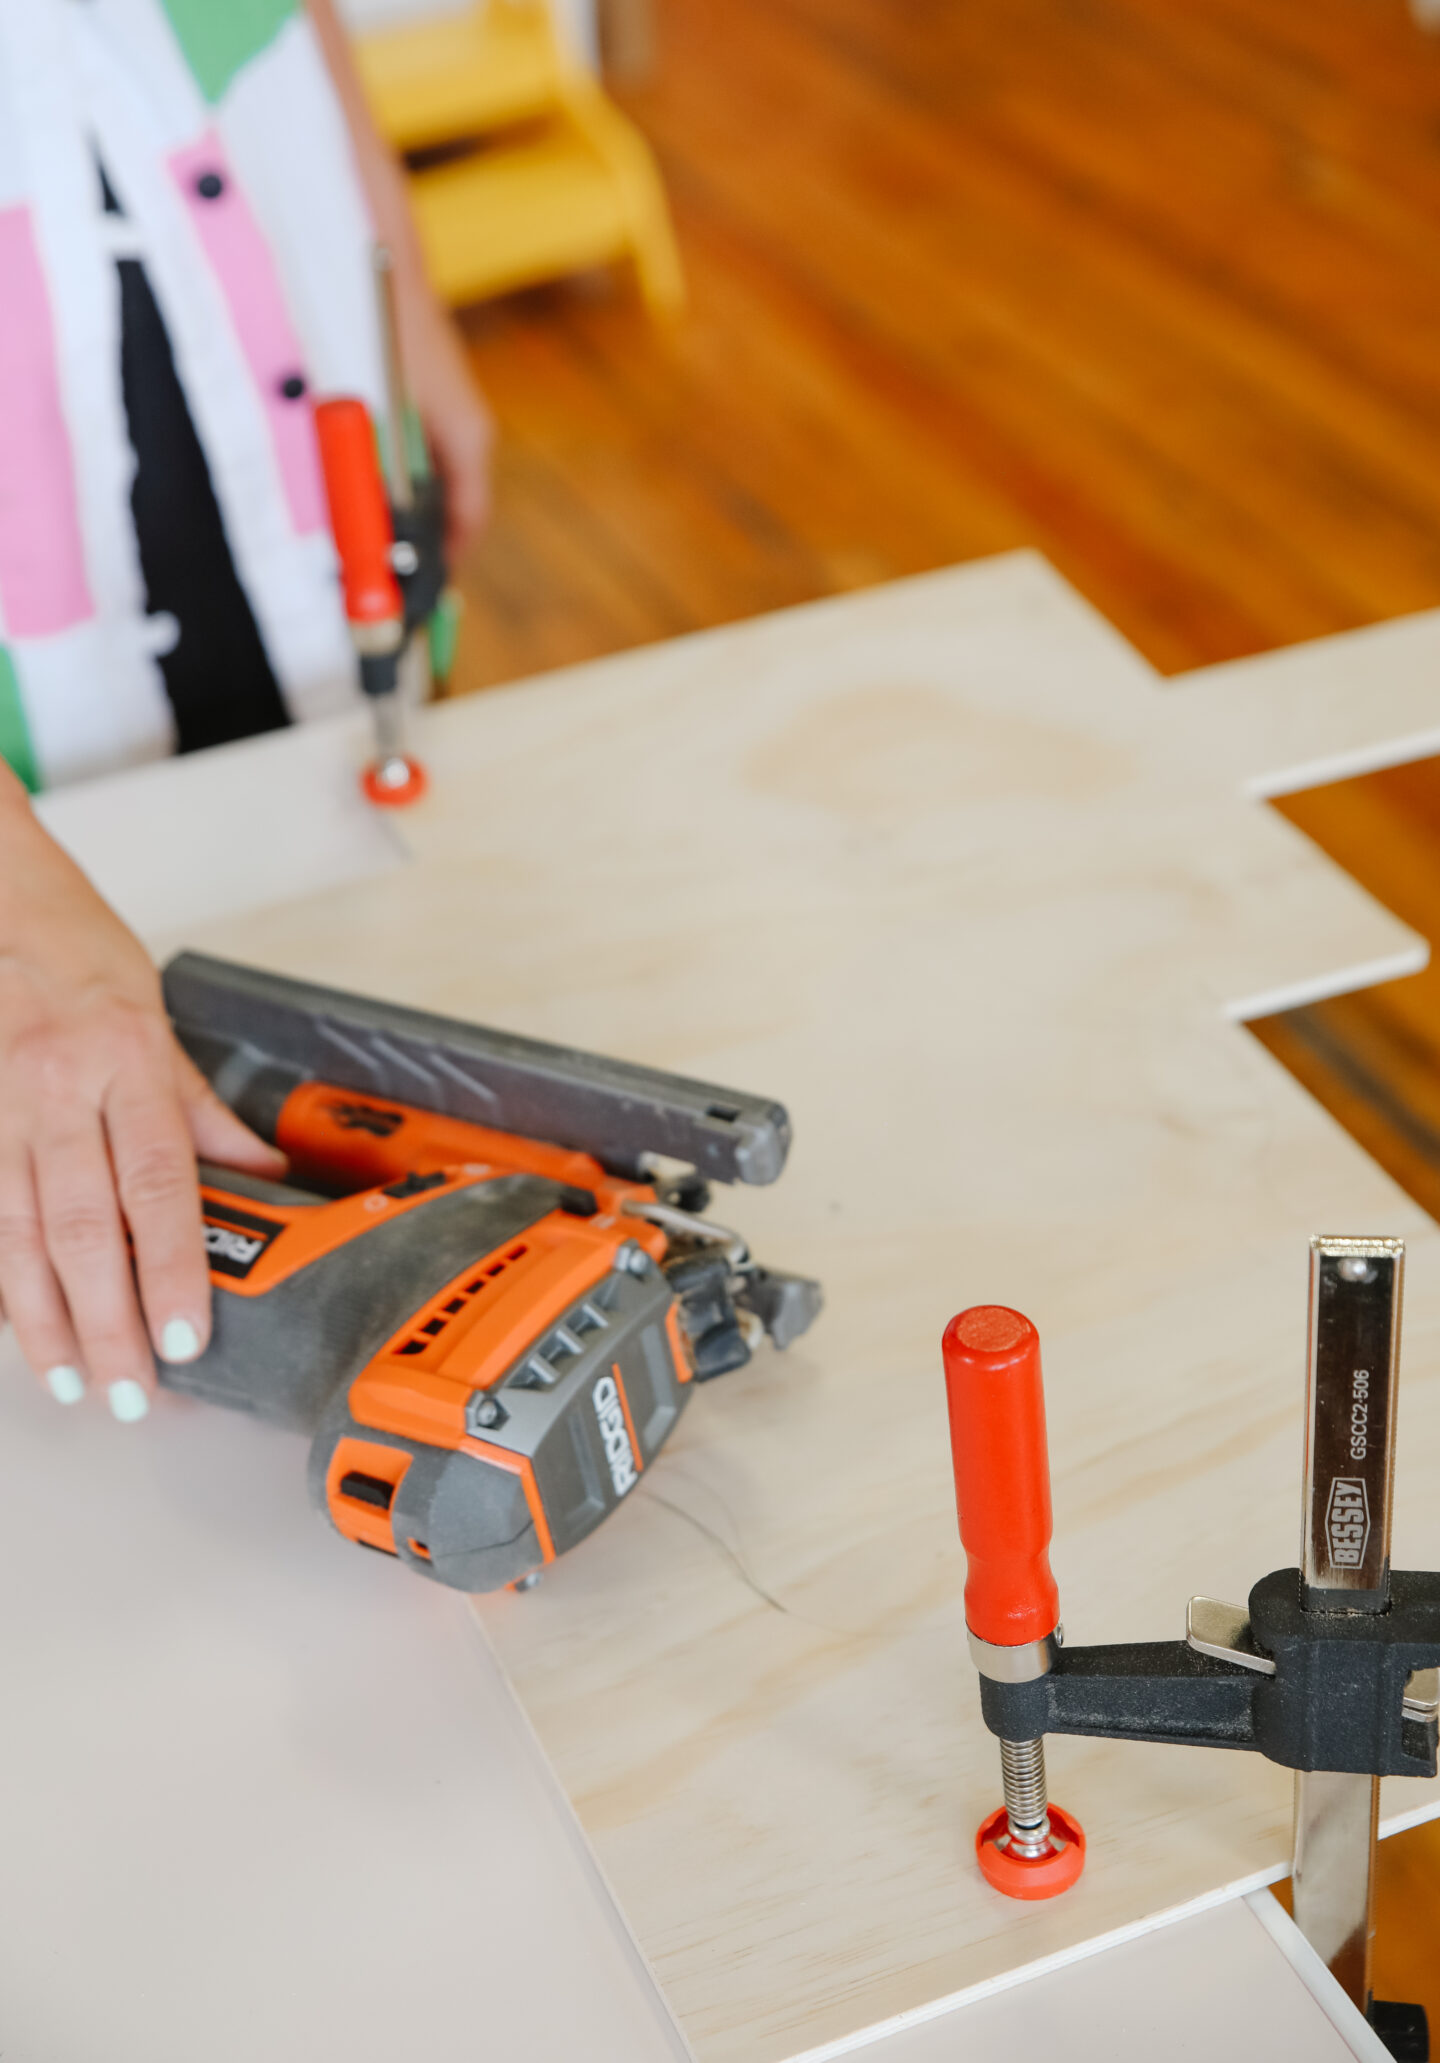
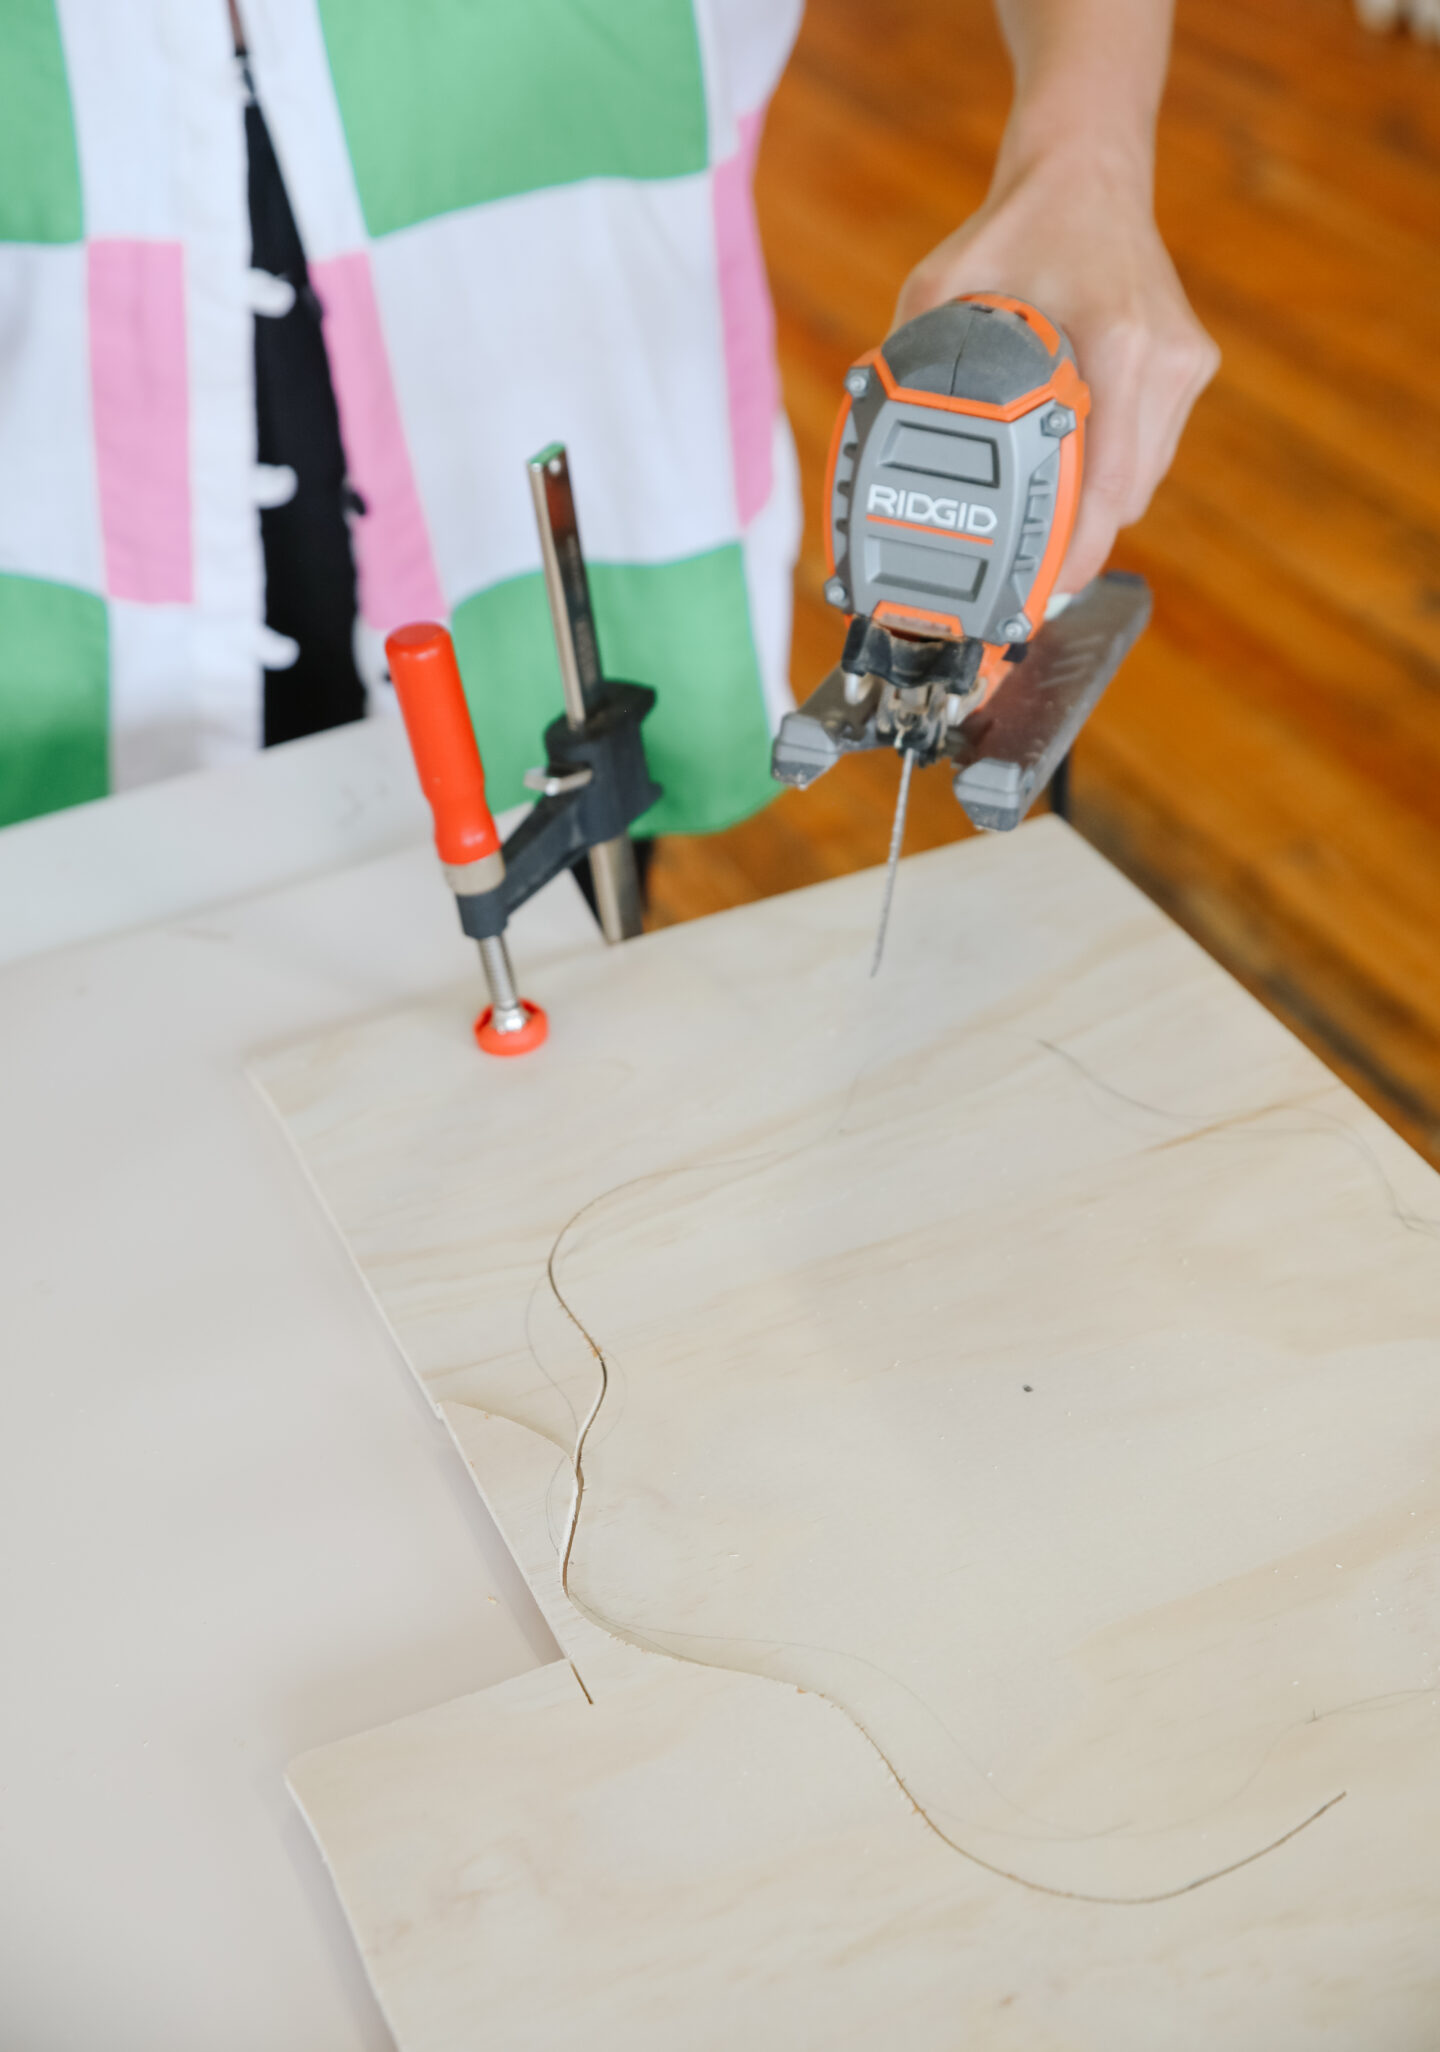
– Clamps
– Sand paper
– Measuring tape
– Pencil
– Scissors
I love this pine plywood colour and didn’t stain it, but if you would like to have a different wood colour, start by staining and wiping excess stain. Remember to let it dry for at least one hour before you work on it. If you don’t know how to stain wood, I show you the entire process over here.
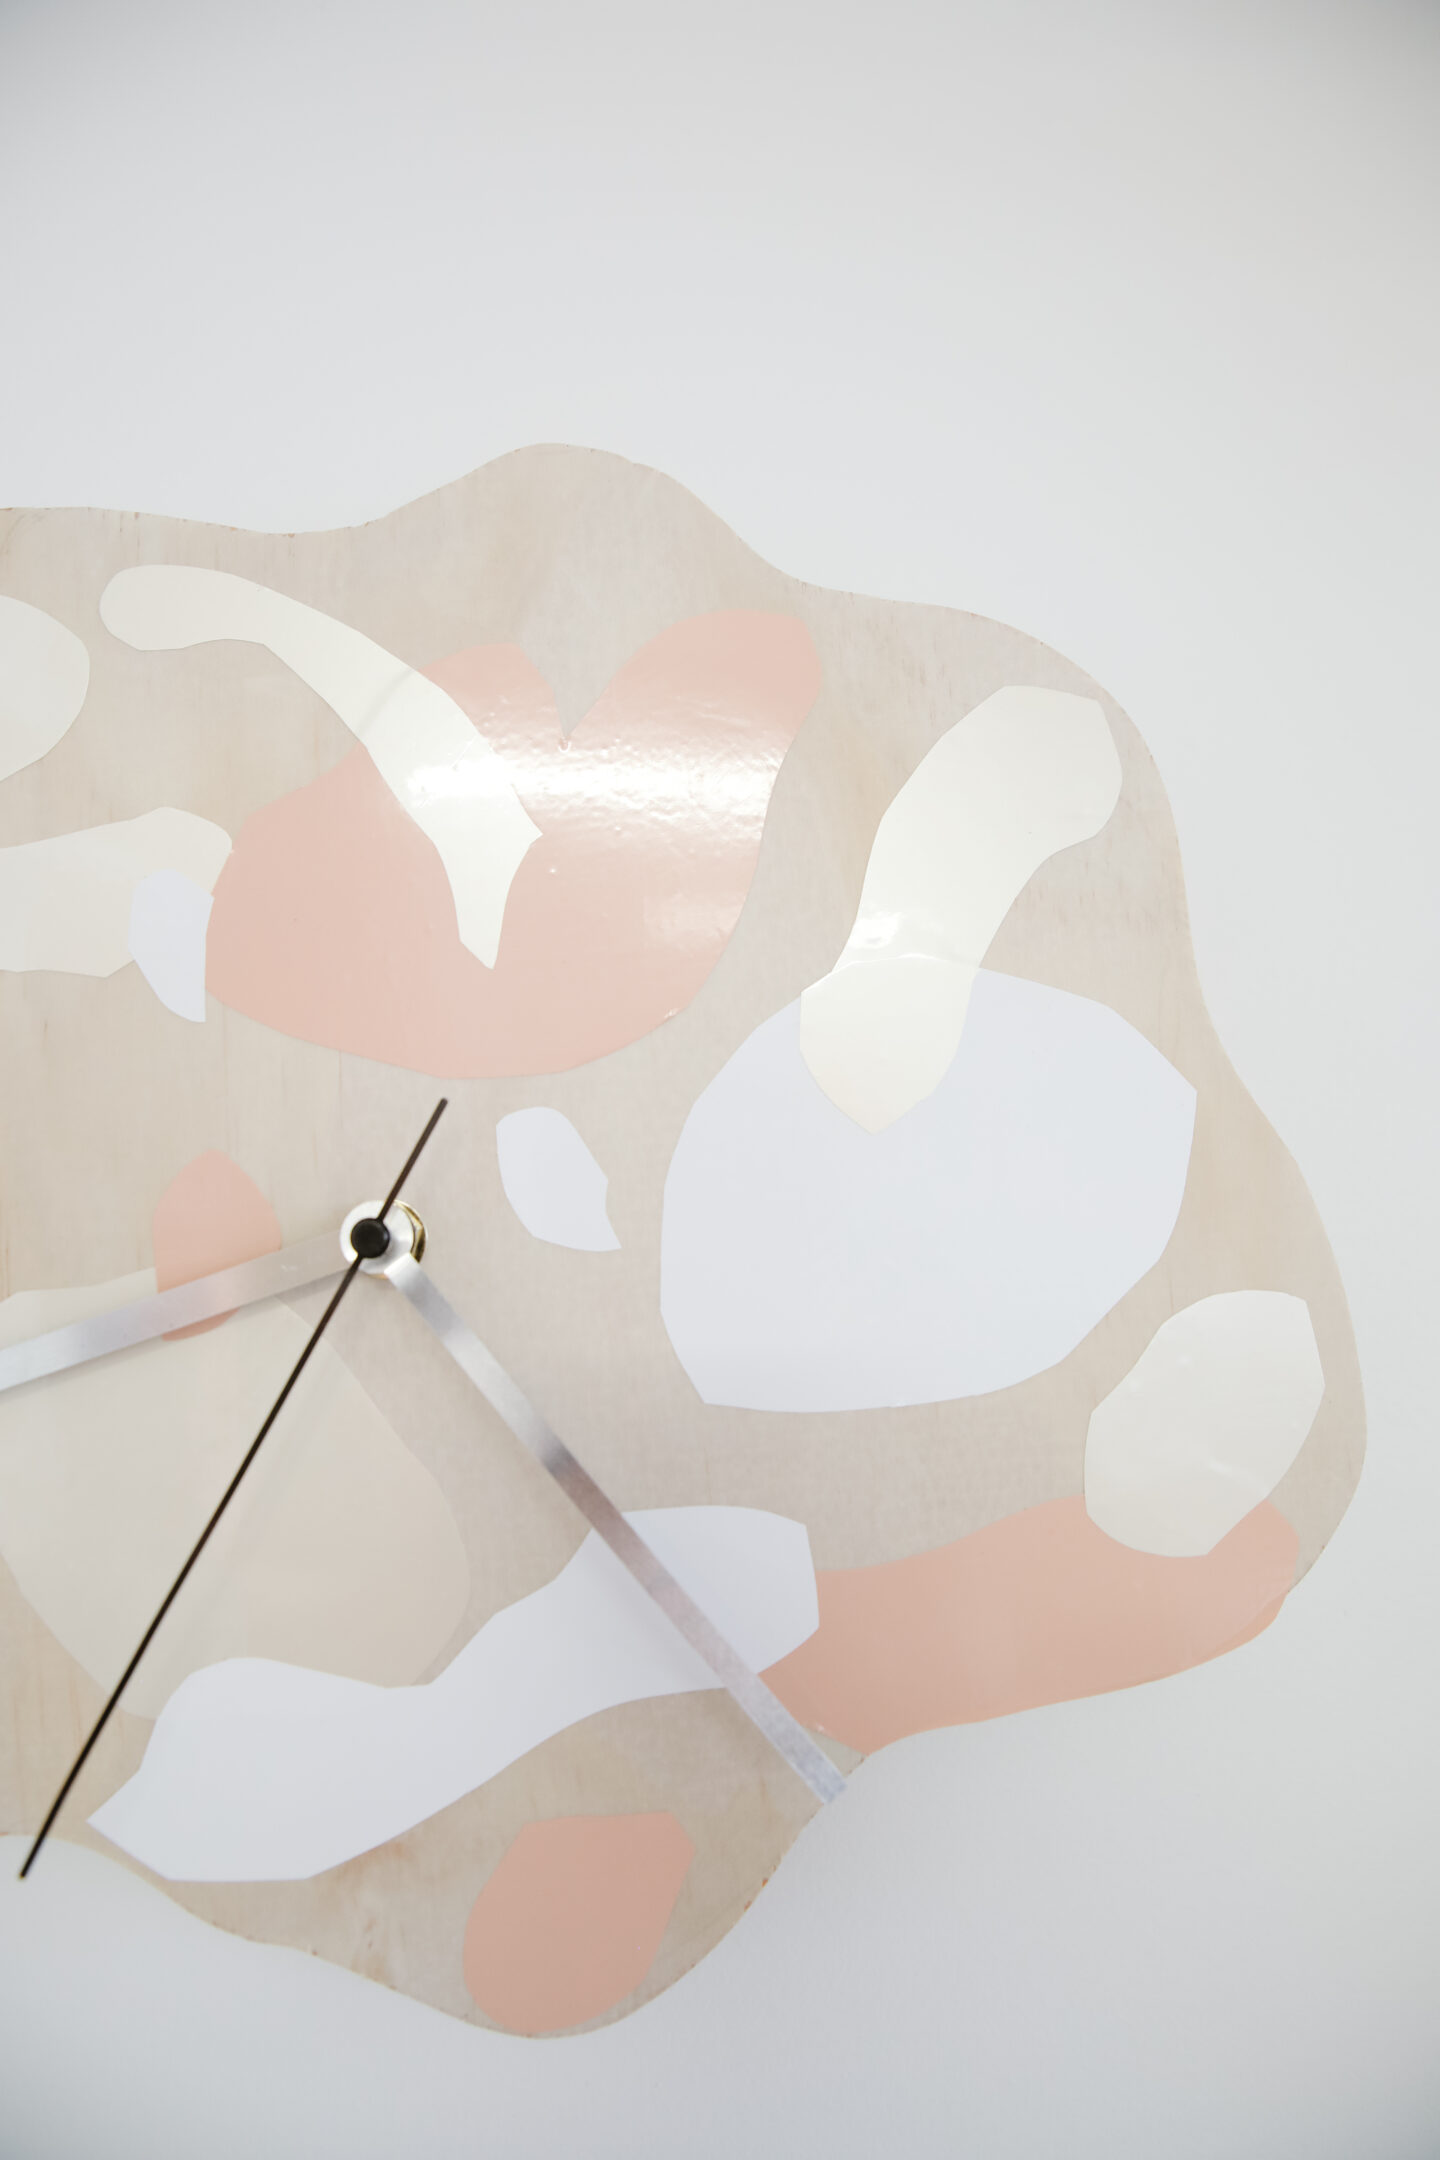
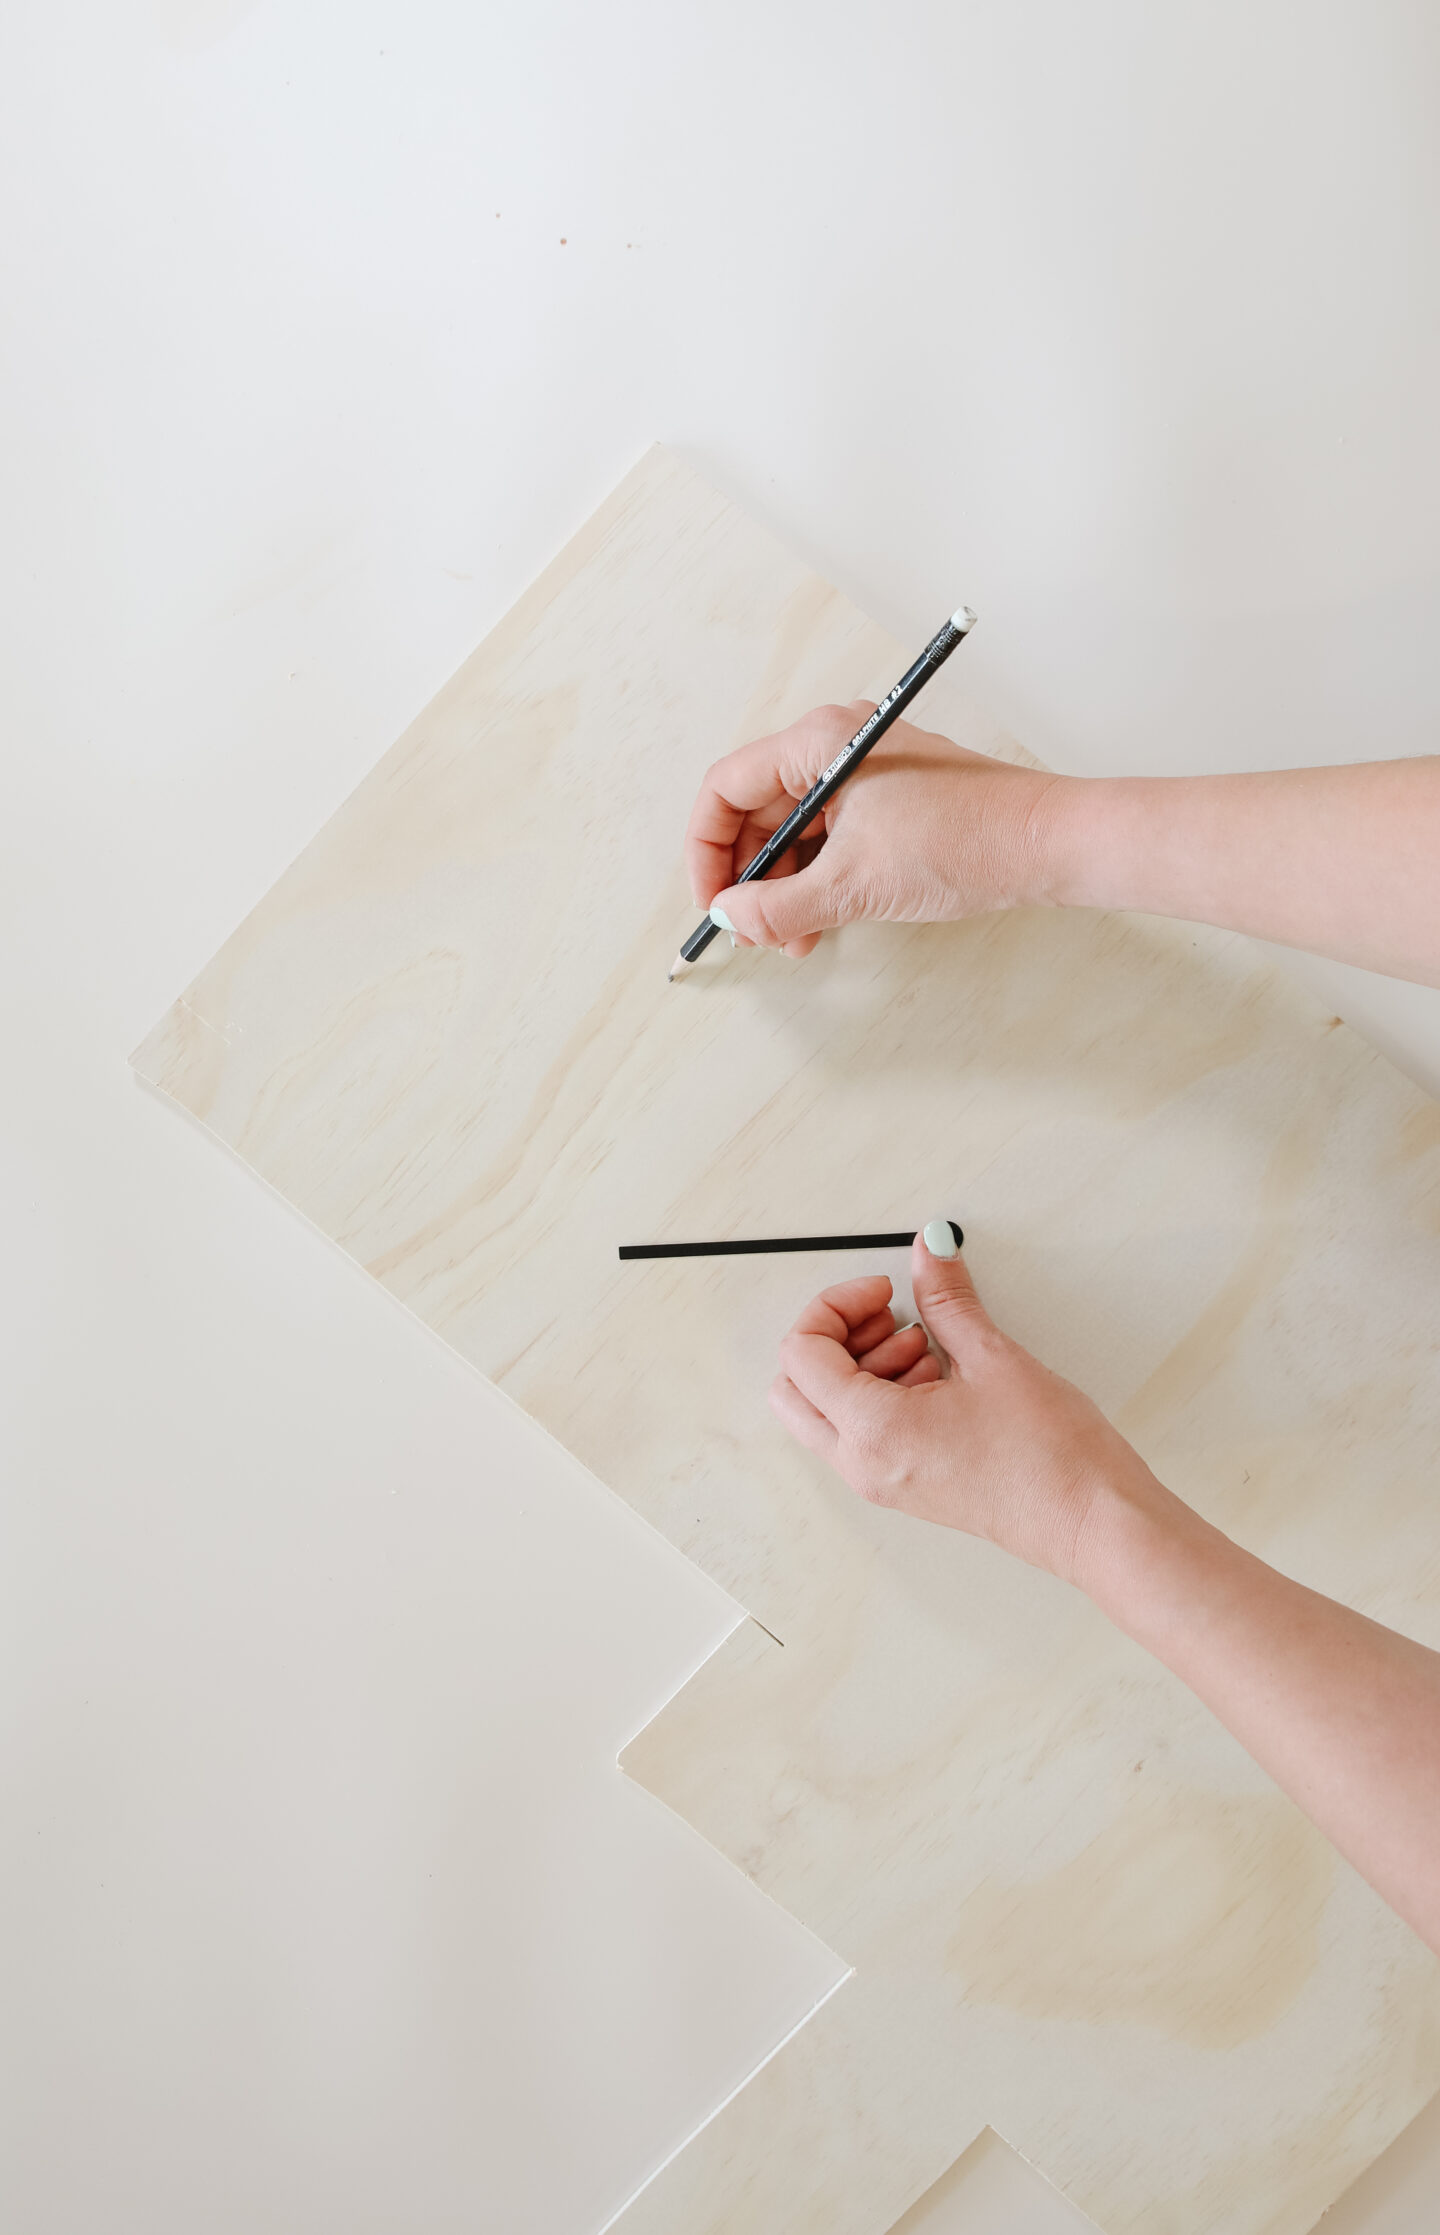
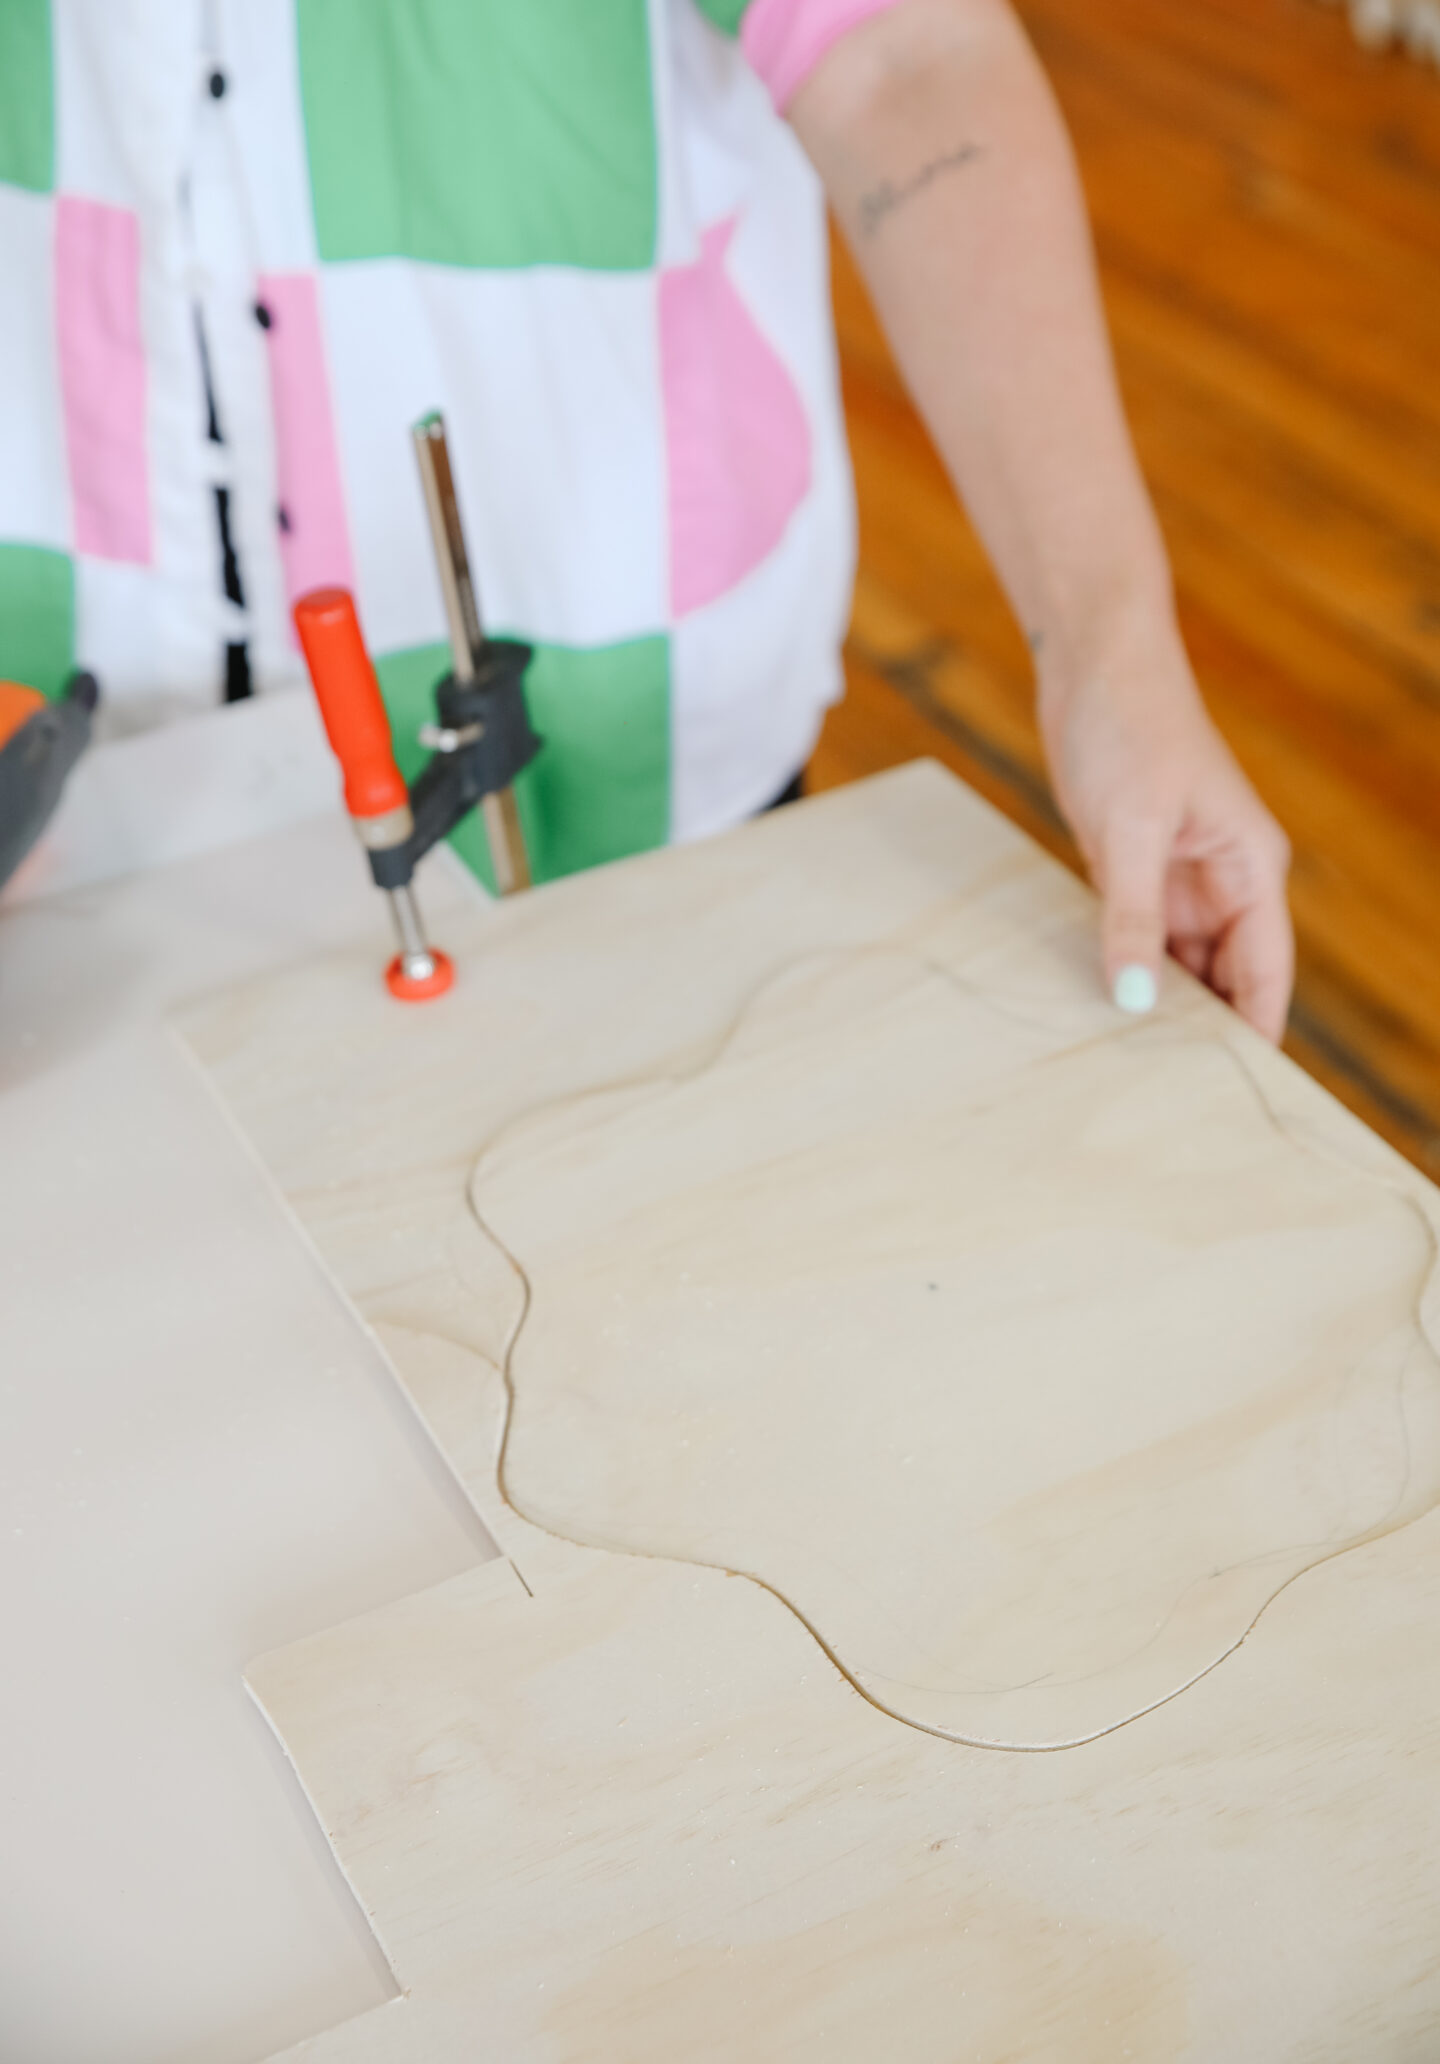
With a measuring tape, I placed the clock mechanism in the center and marked it with a pencil. Now that you know where’s your center and you’re sure the clock needle will stay inside the base, you can start drawing (freehand) a wavy shape with a pencil that will be the base.
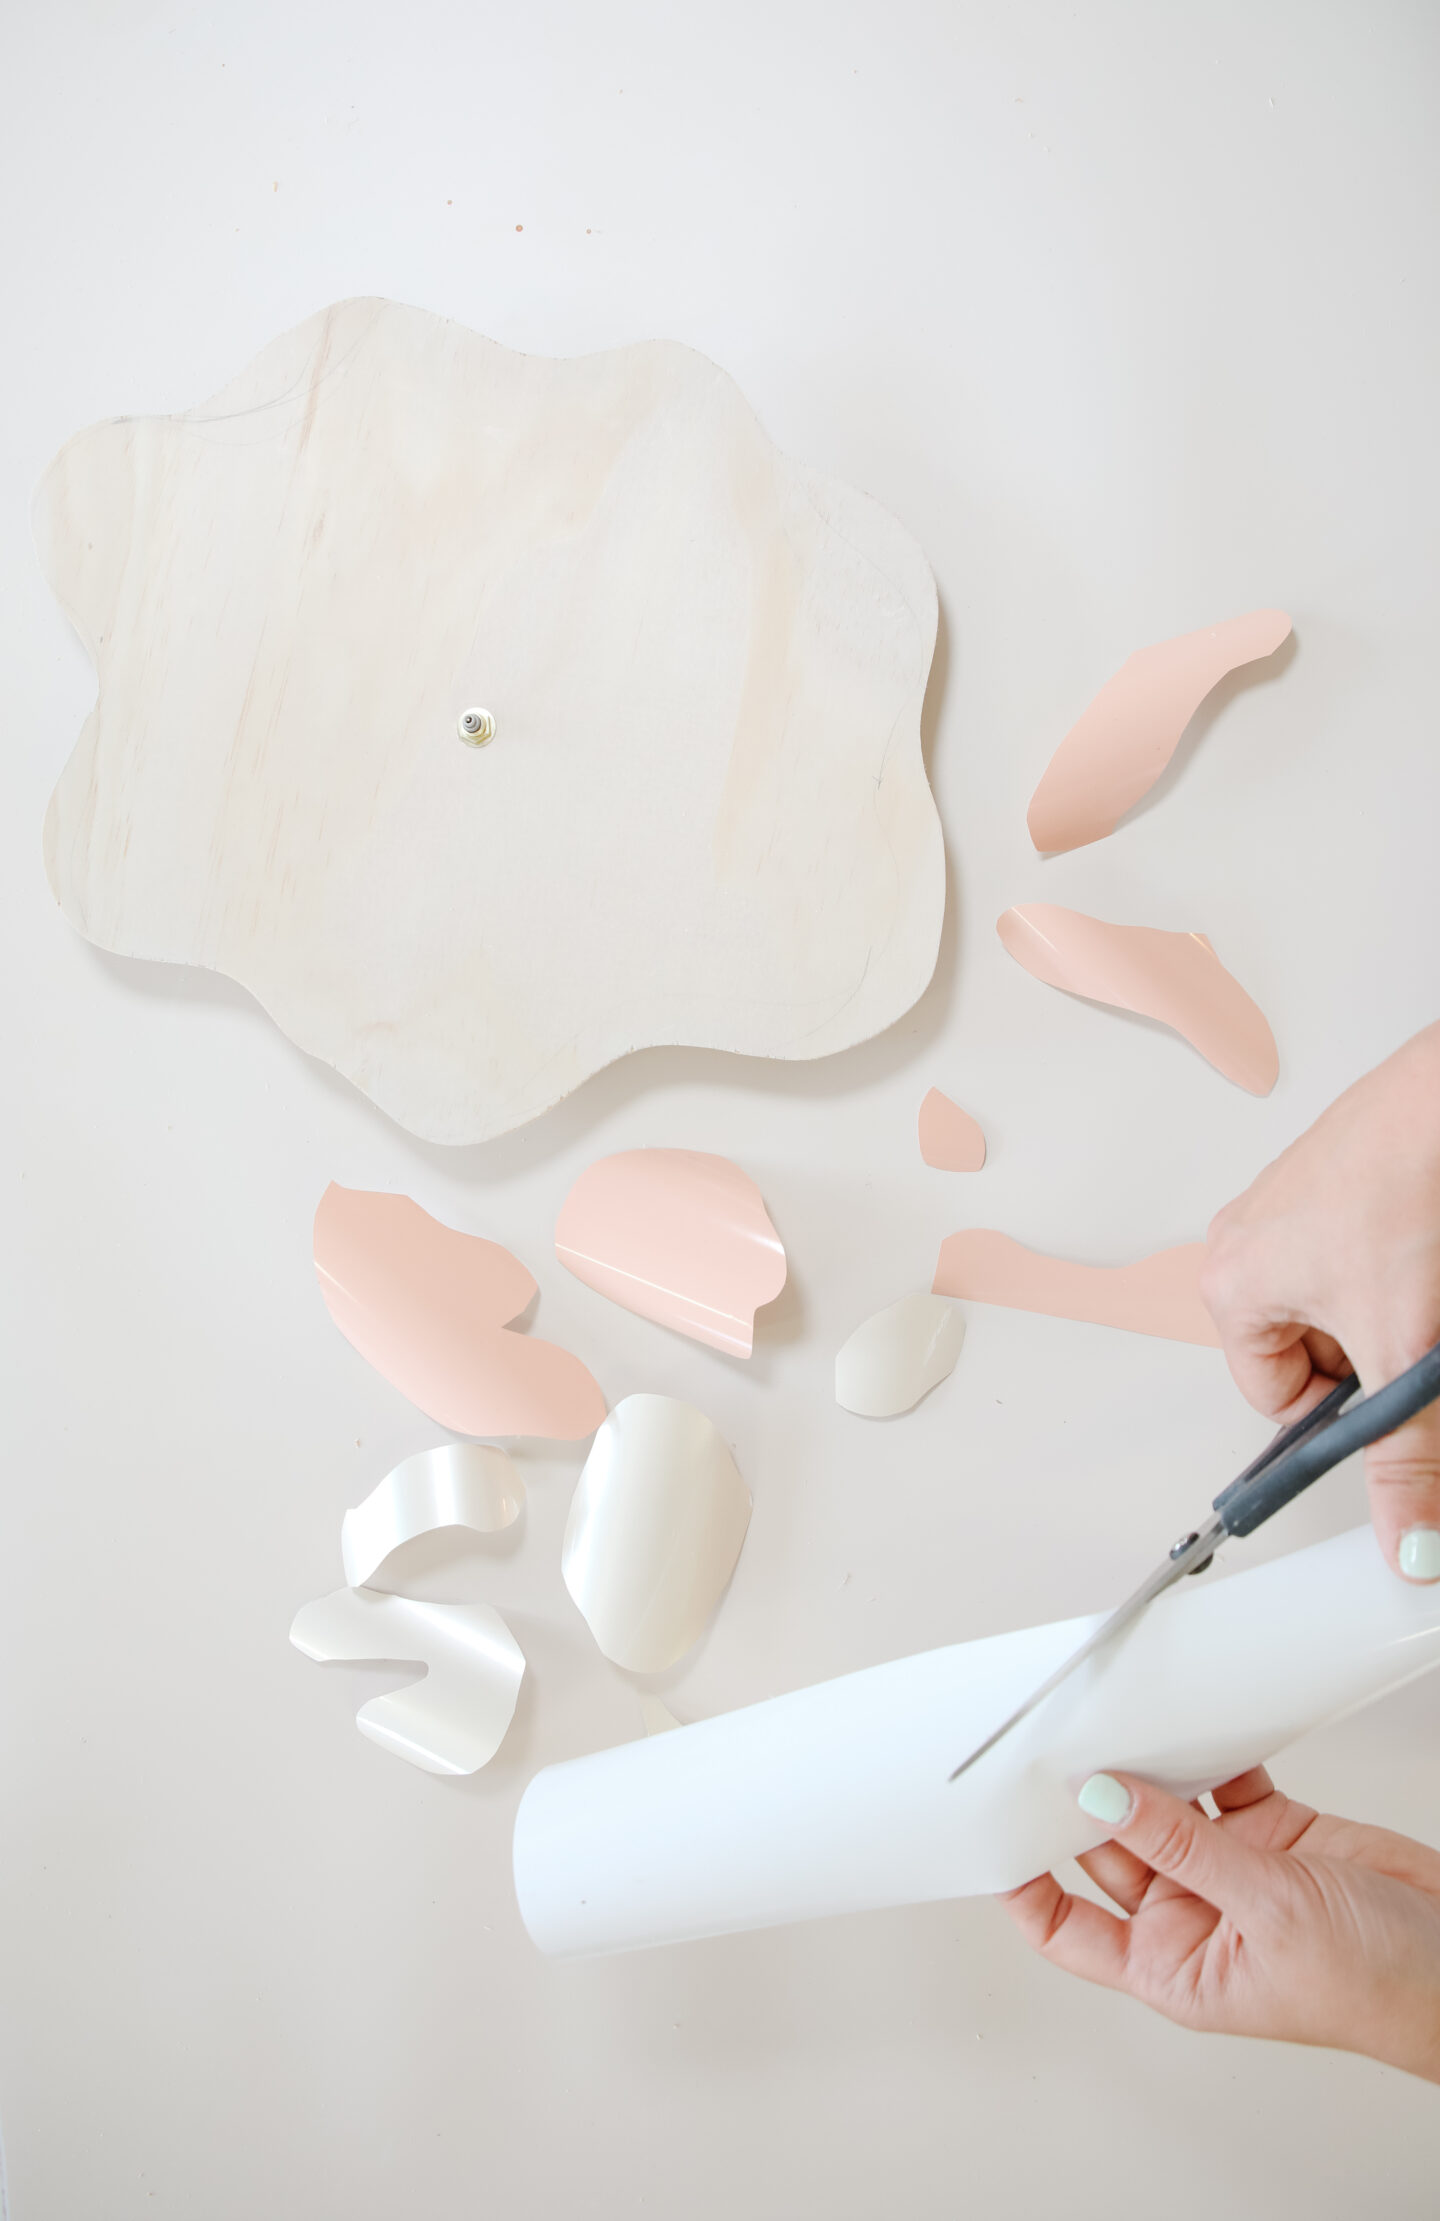
Grab your plywood and secure it to a working table with clamps. I had all the fun cutting this wavy base with my jigsaw, don’t worry if the cuts aren’t straight, that’s the style we want to achieve here.
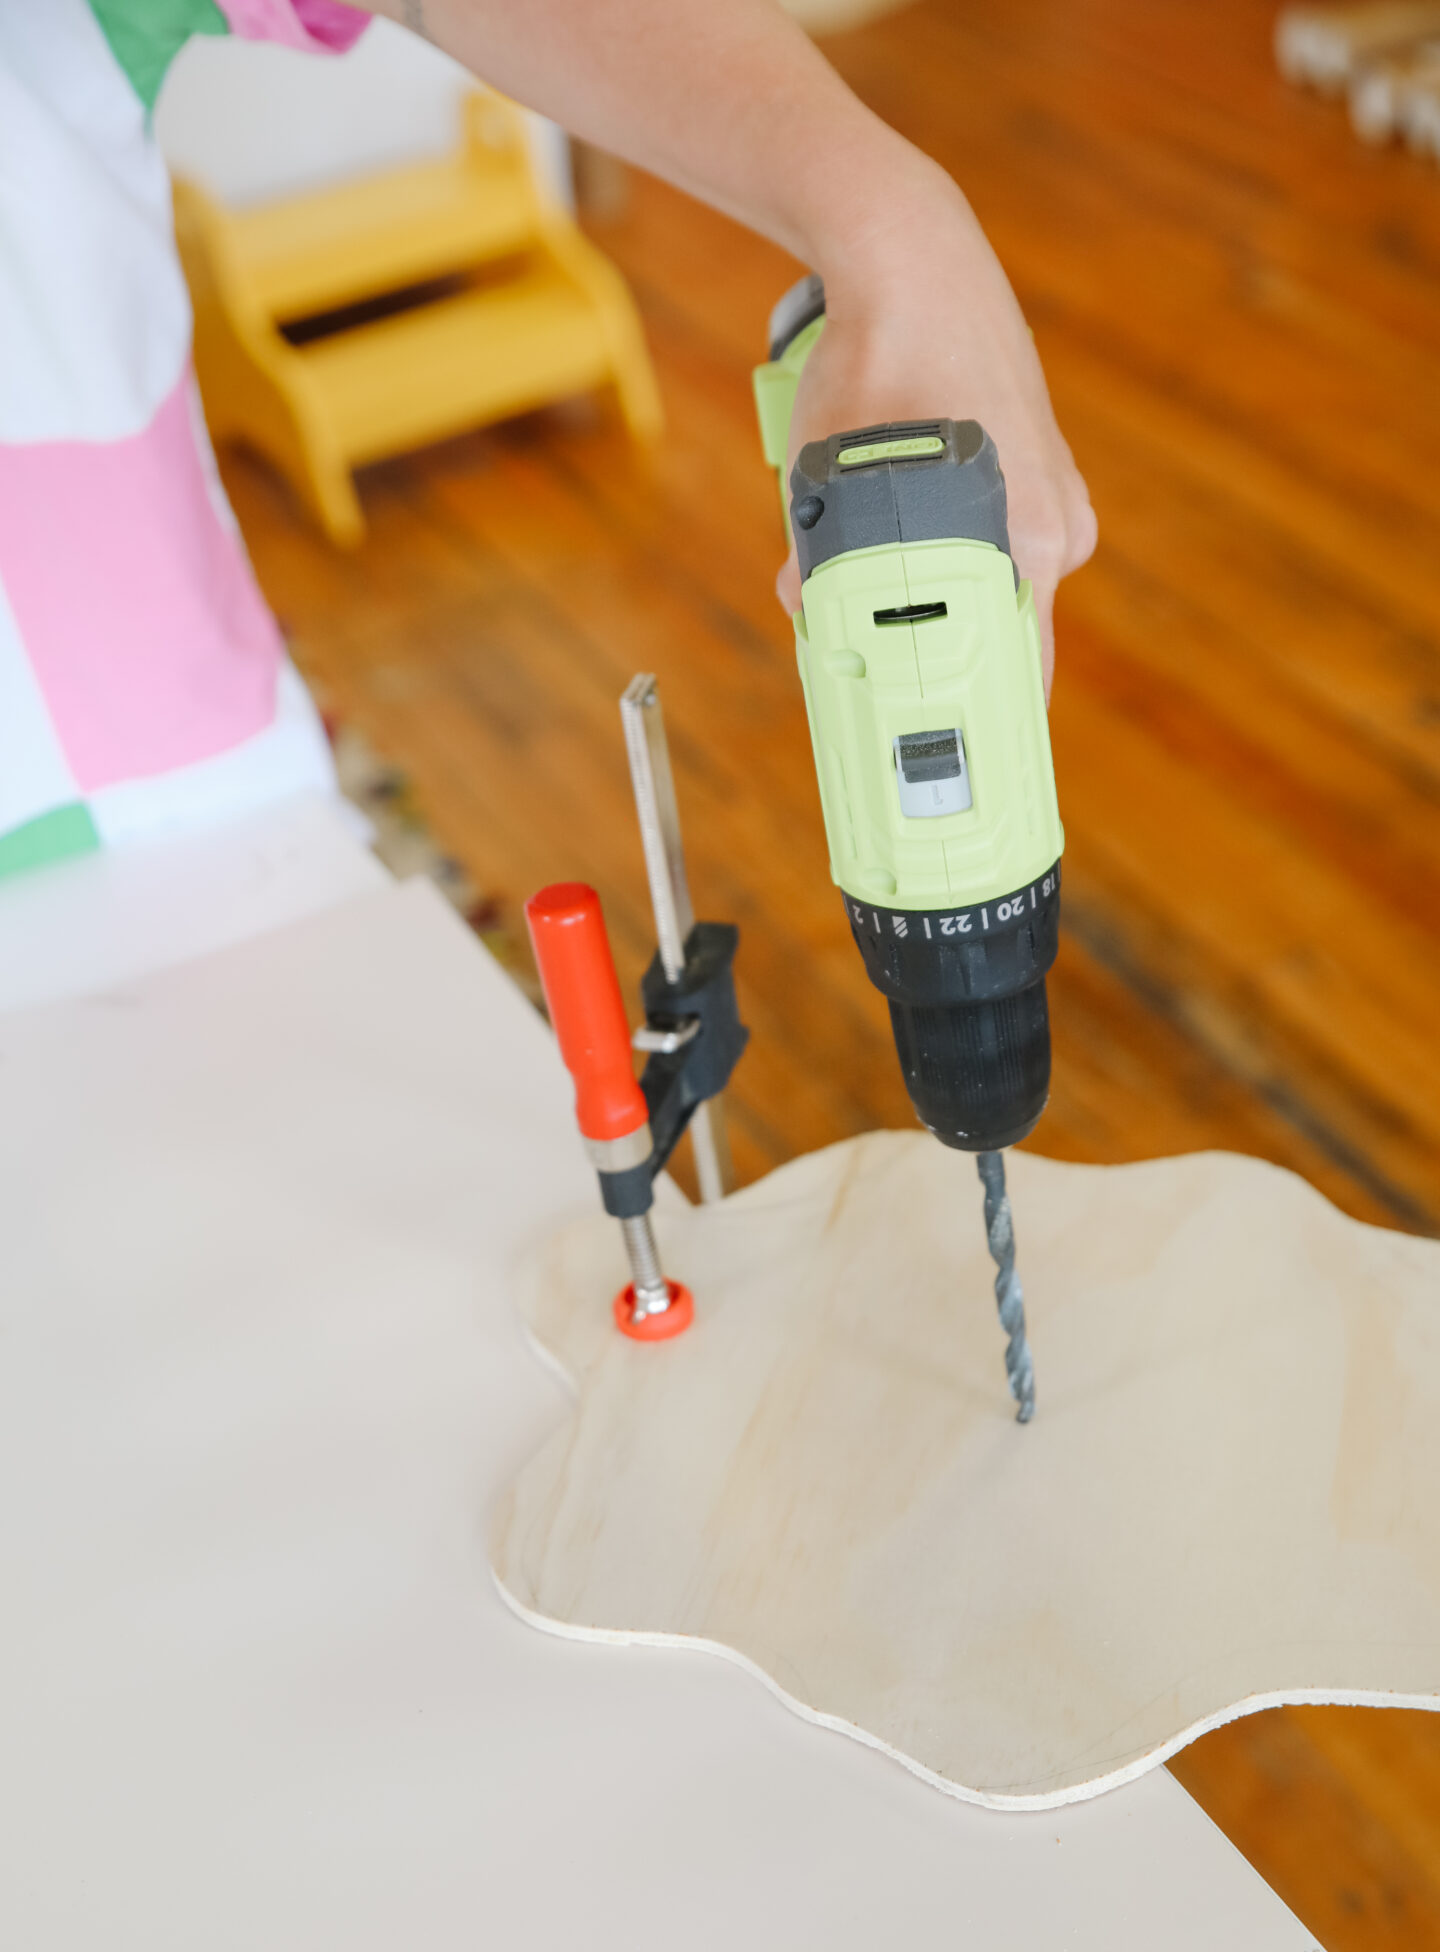
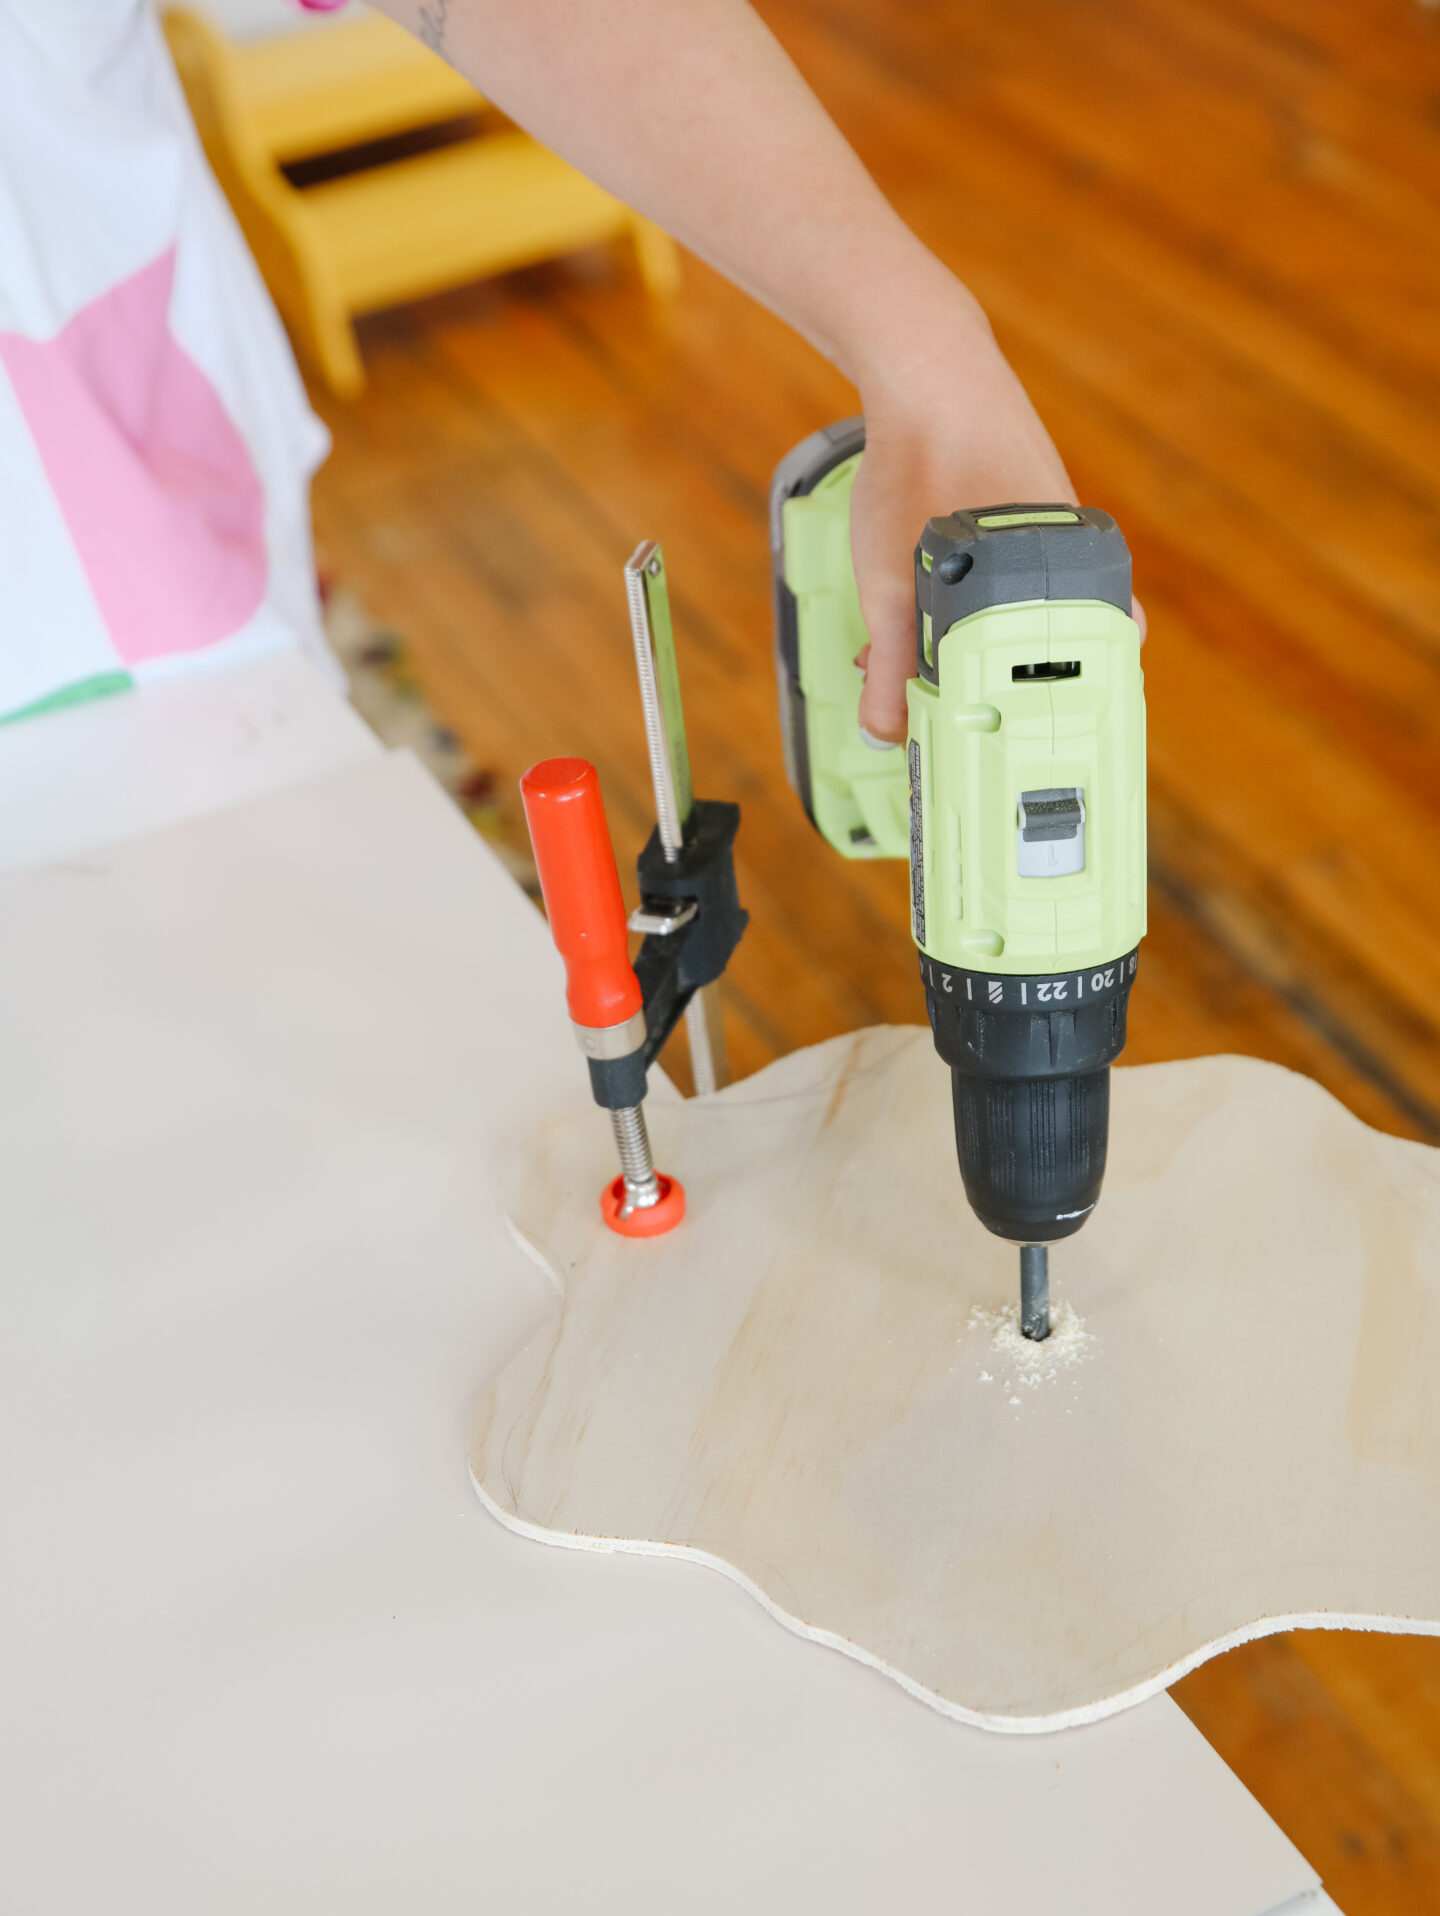
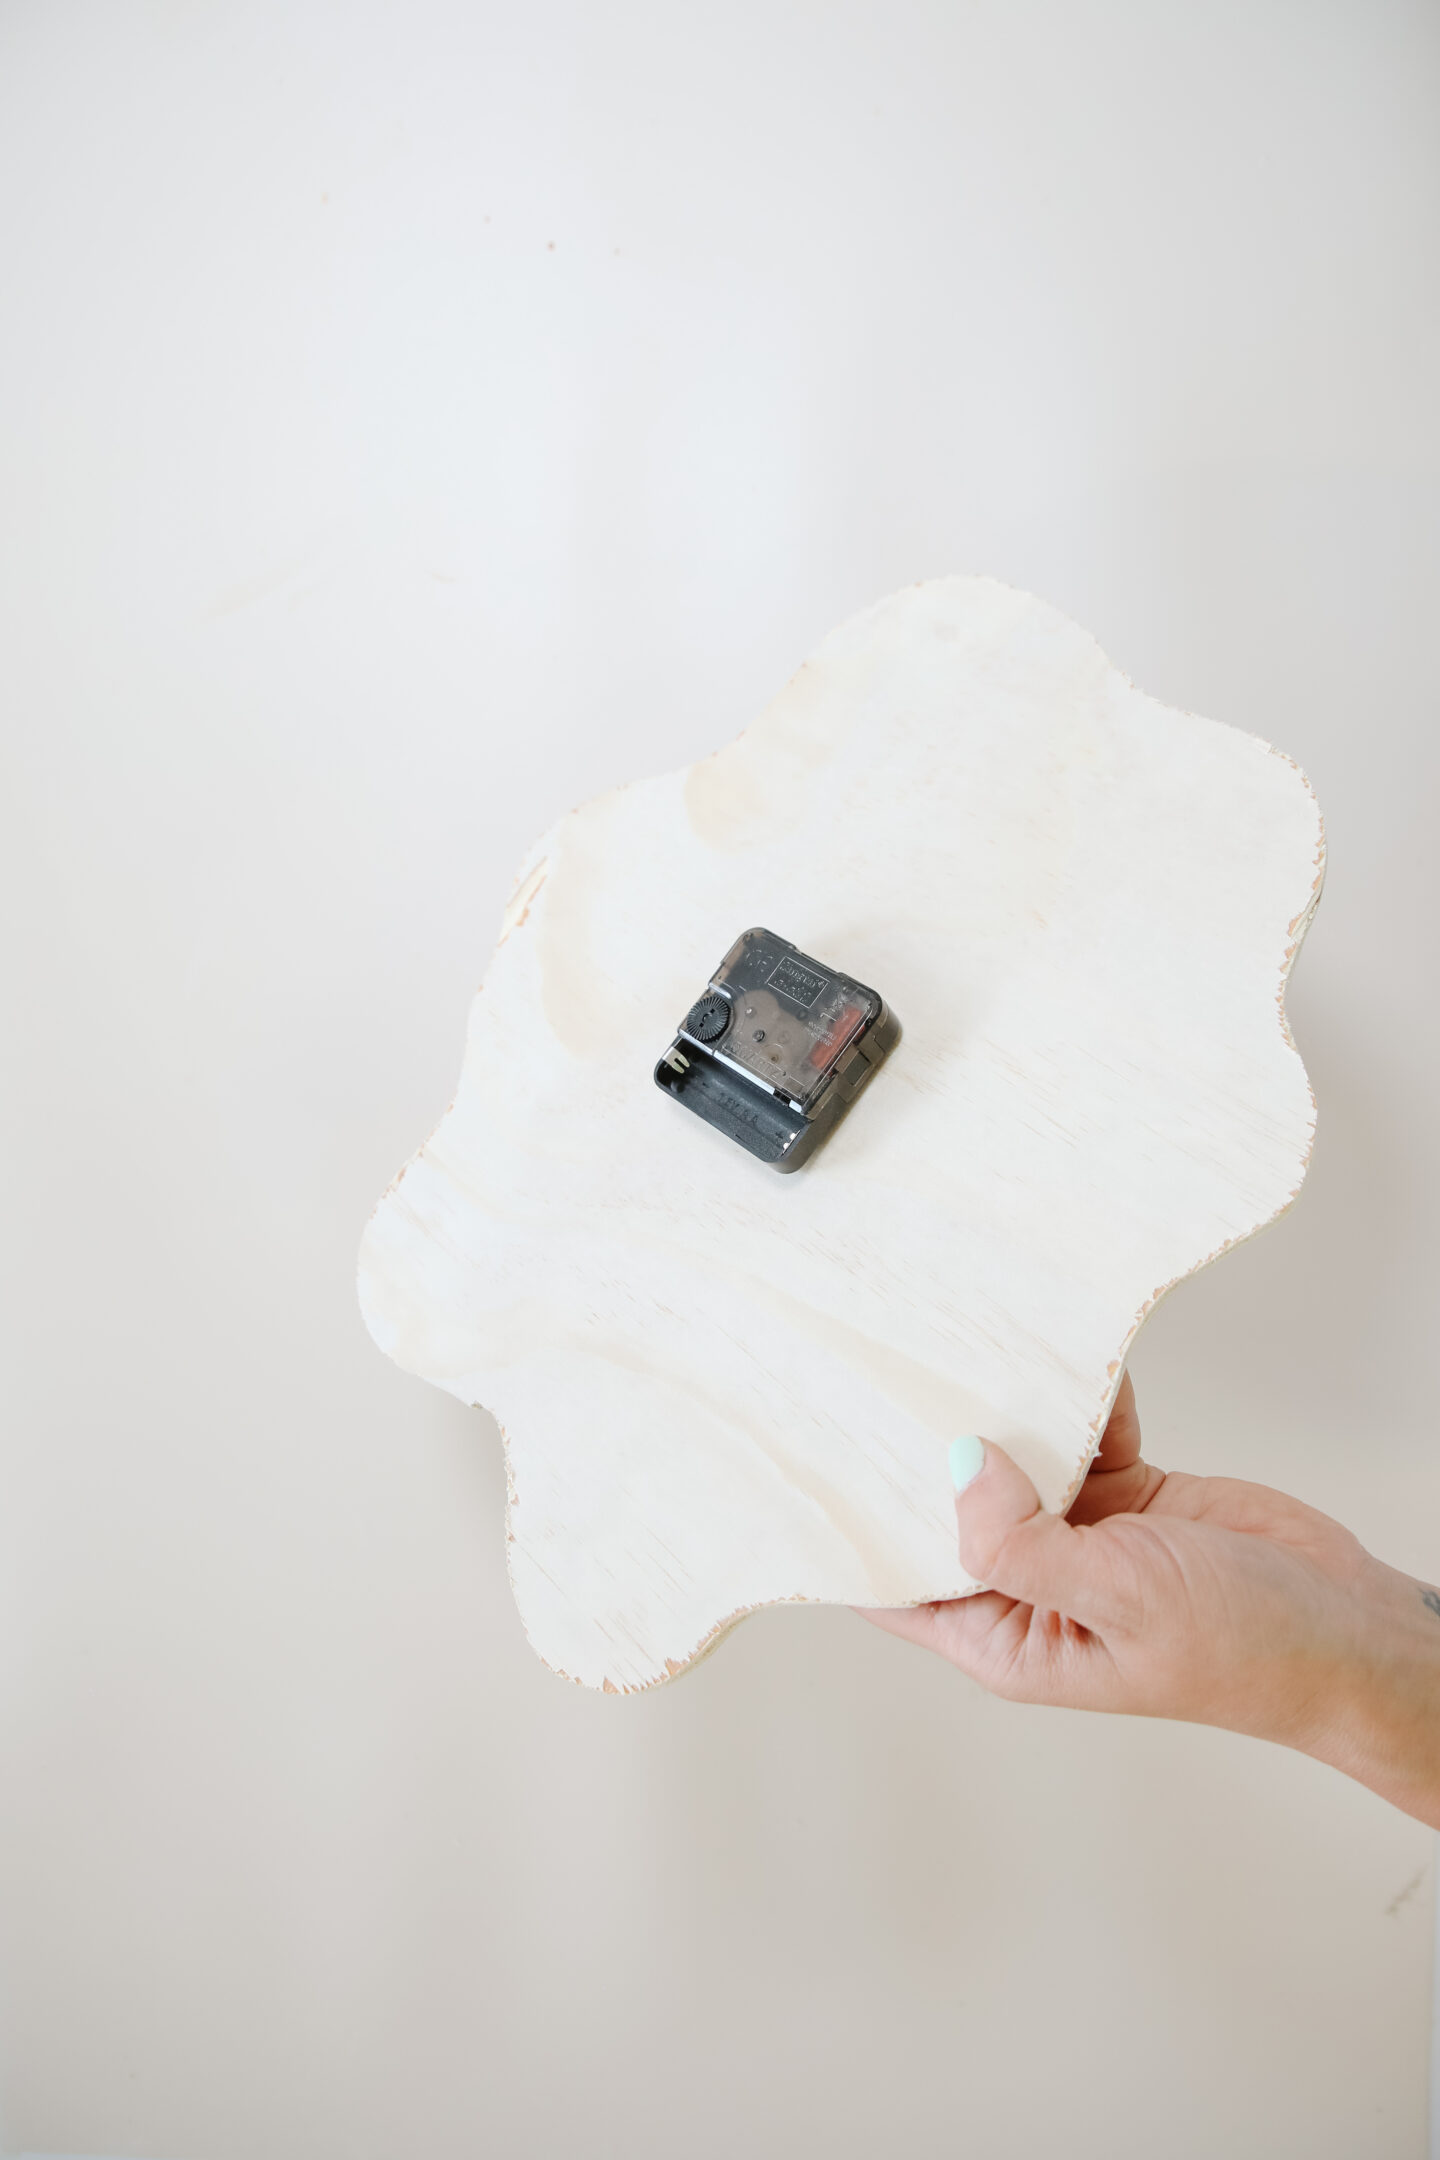
Now, let’s drill a hole in the center where we’ll assemble the clock mechanism. Remove all the dust when you finish the hole.
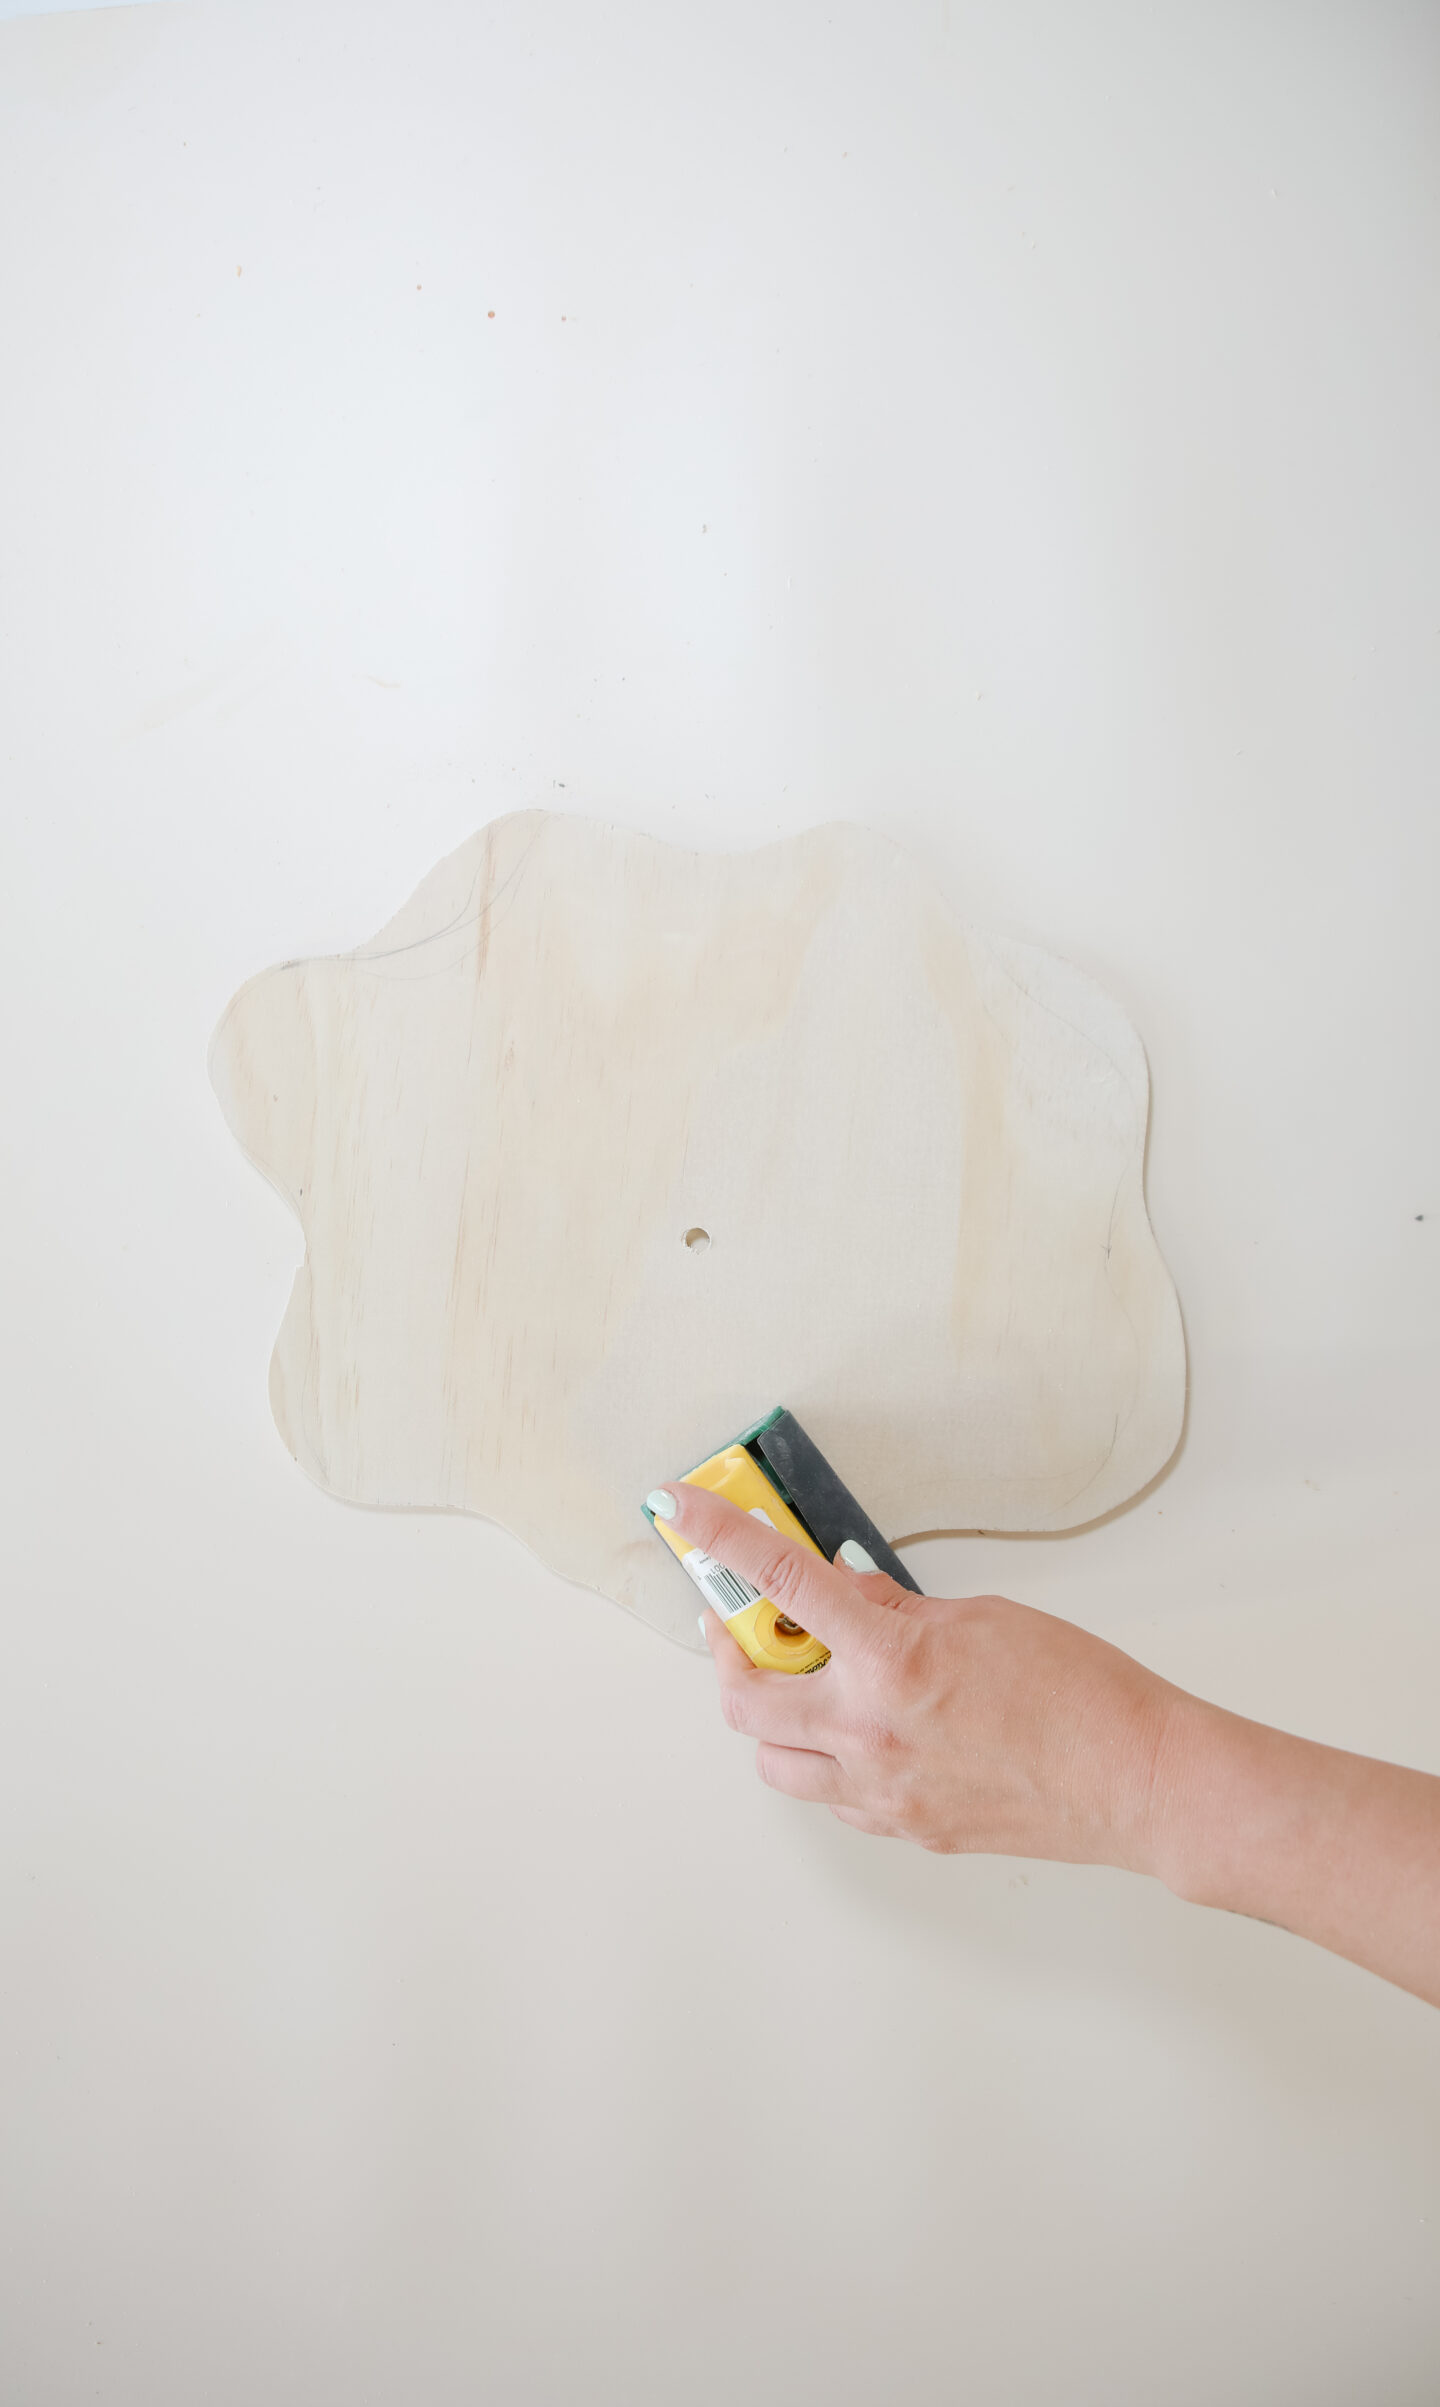
You’ll notice the base will need a bit of sanding as soon as you finish cutting. Grab a sandpaper and smooth out all the edges and the hole you just drilled. Remove all the dust excess and let’s move to the next step, adding our vinyl!
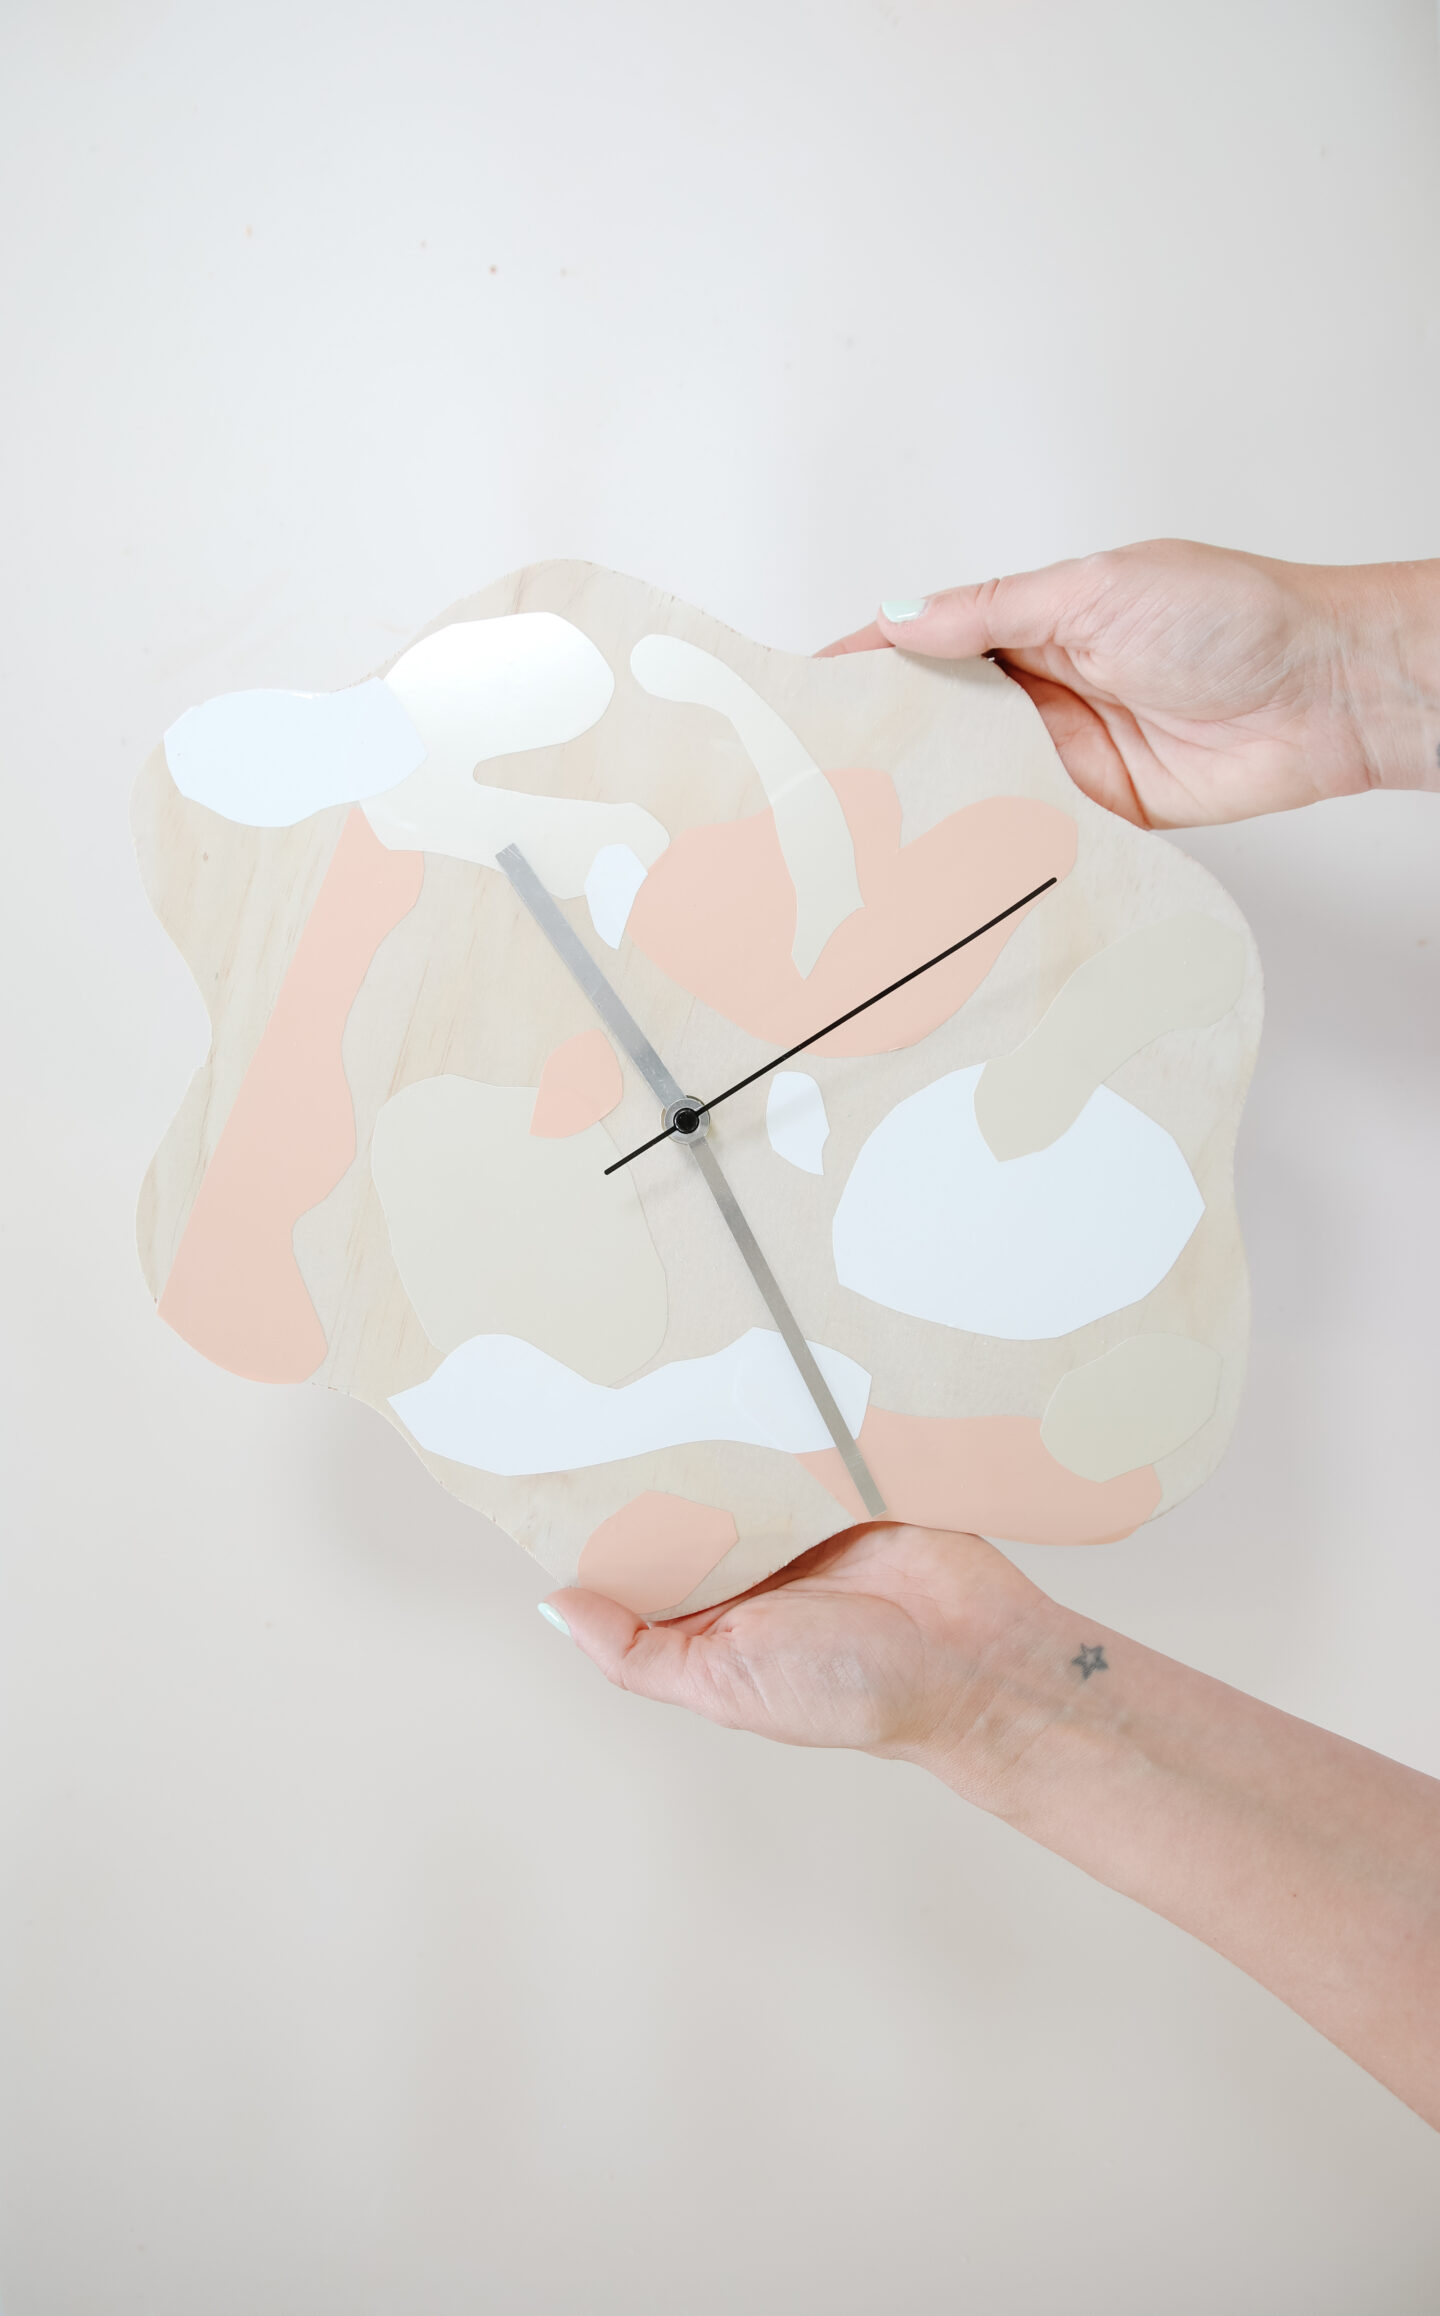
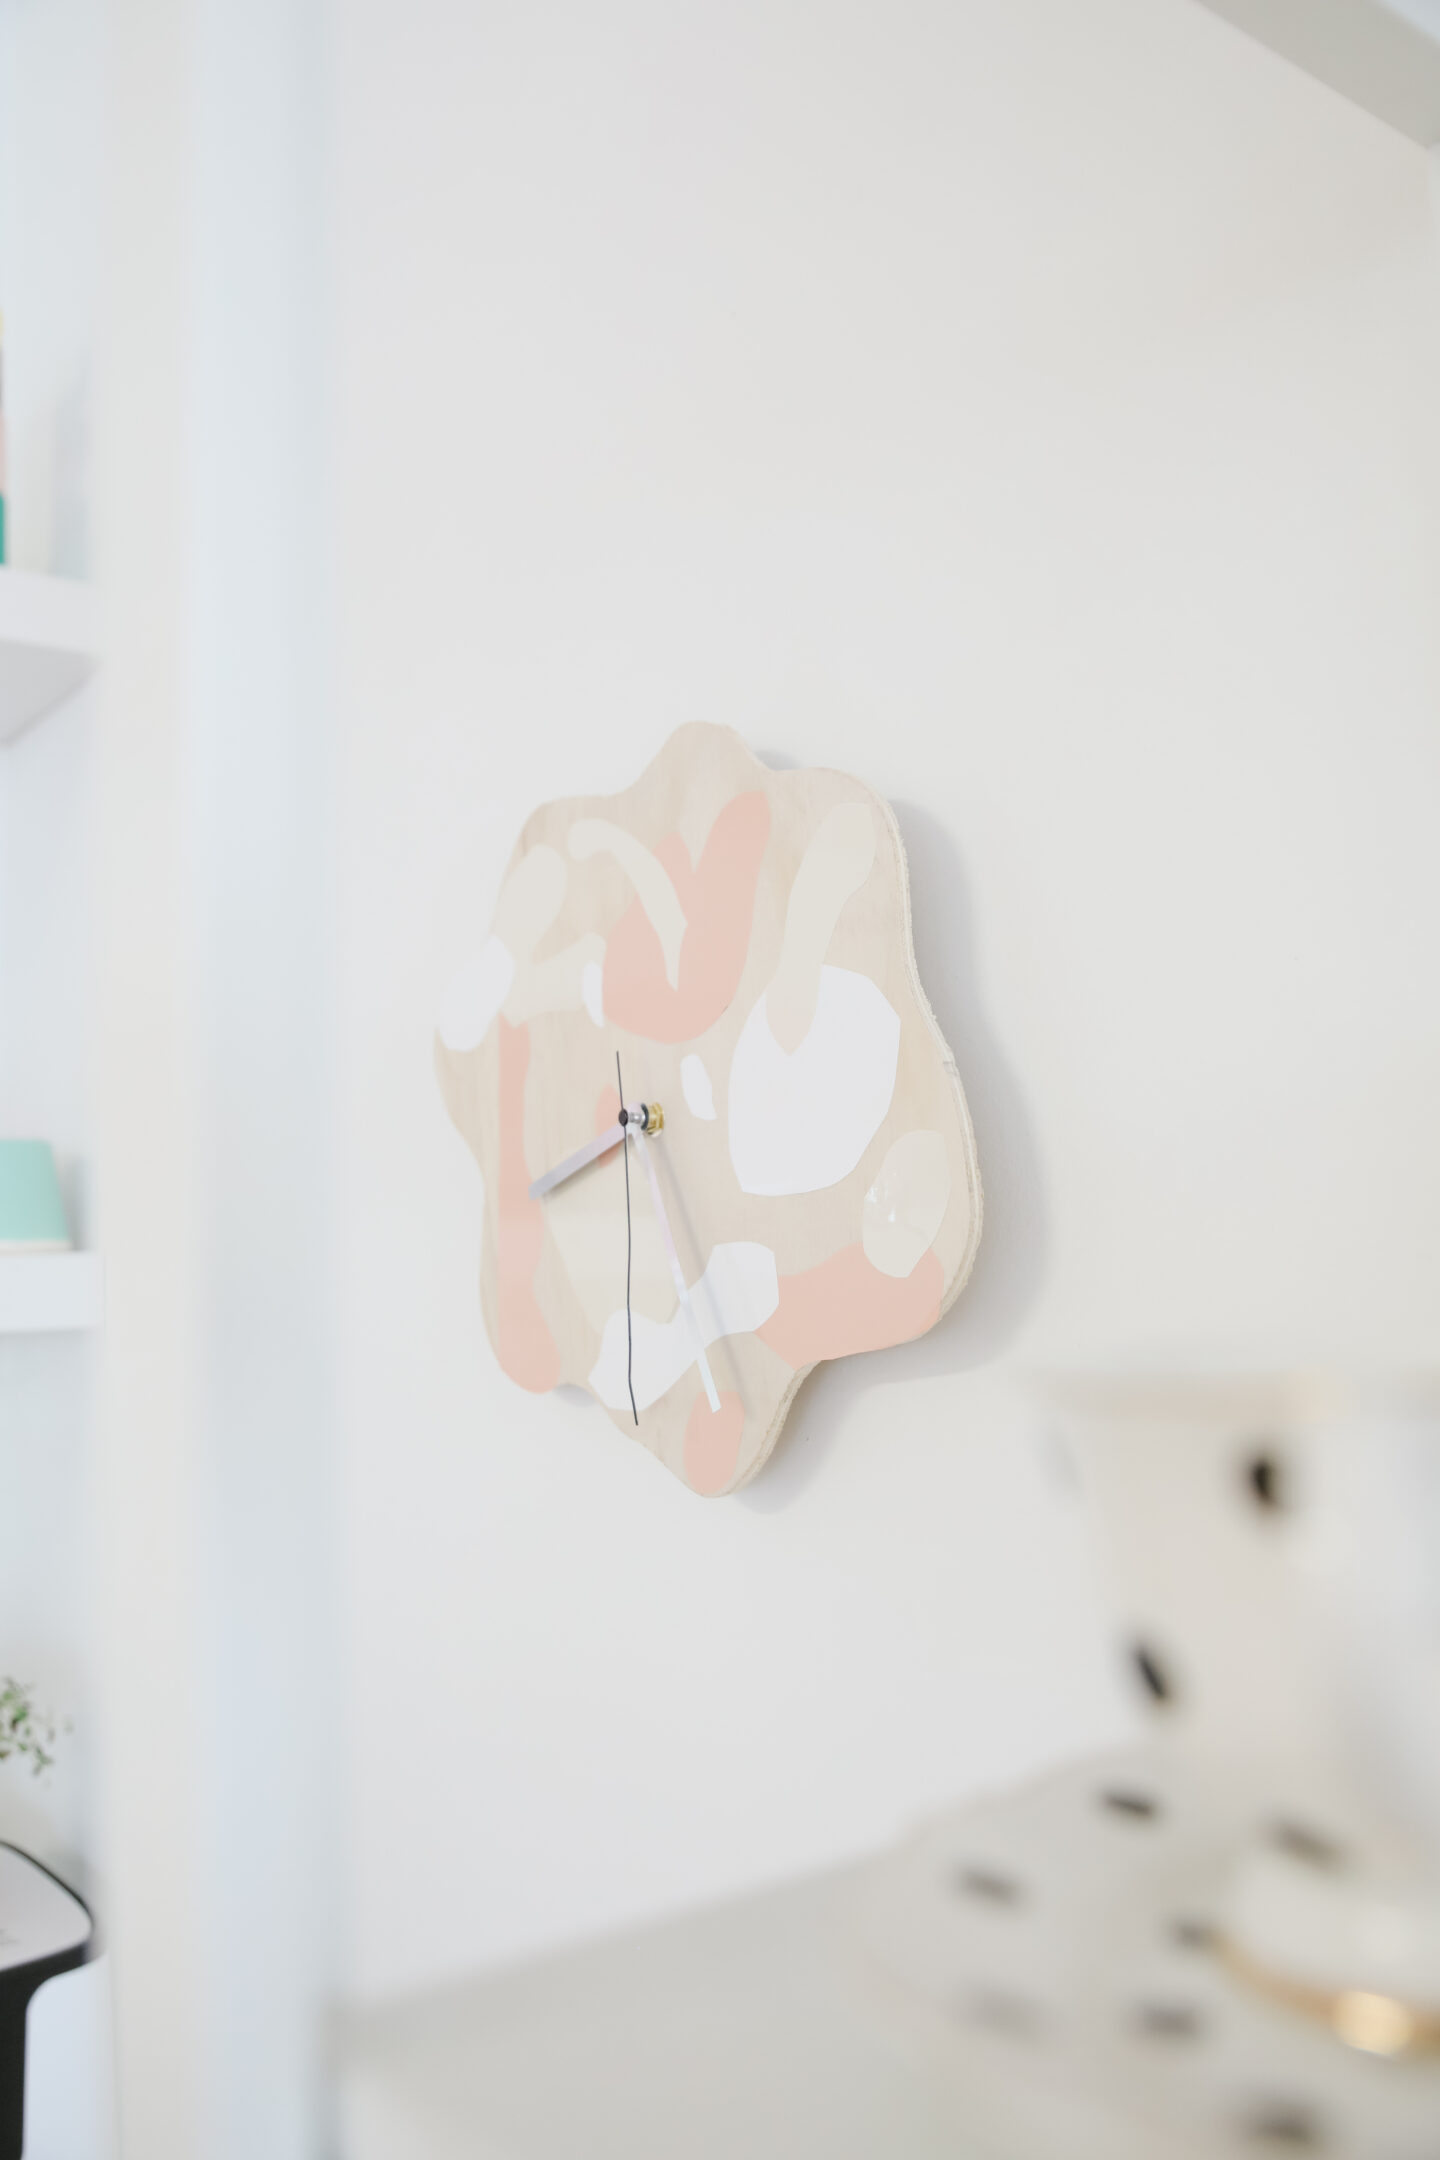
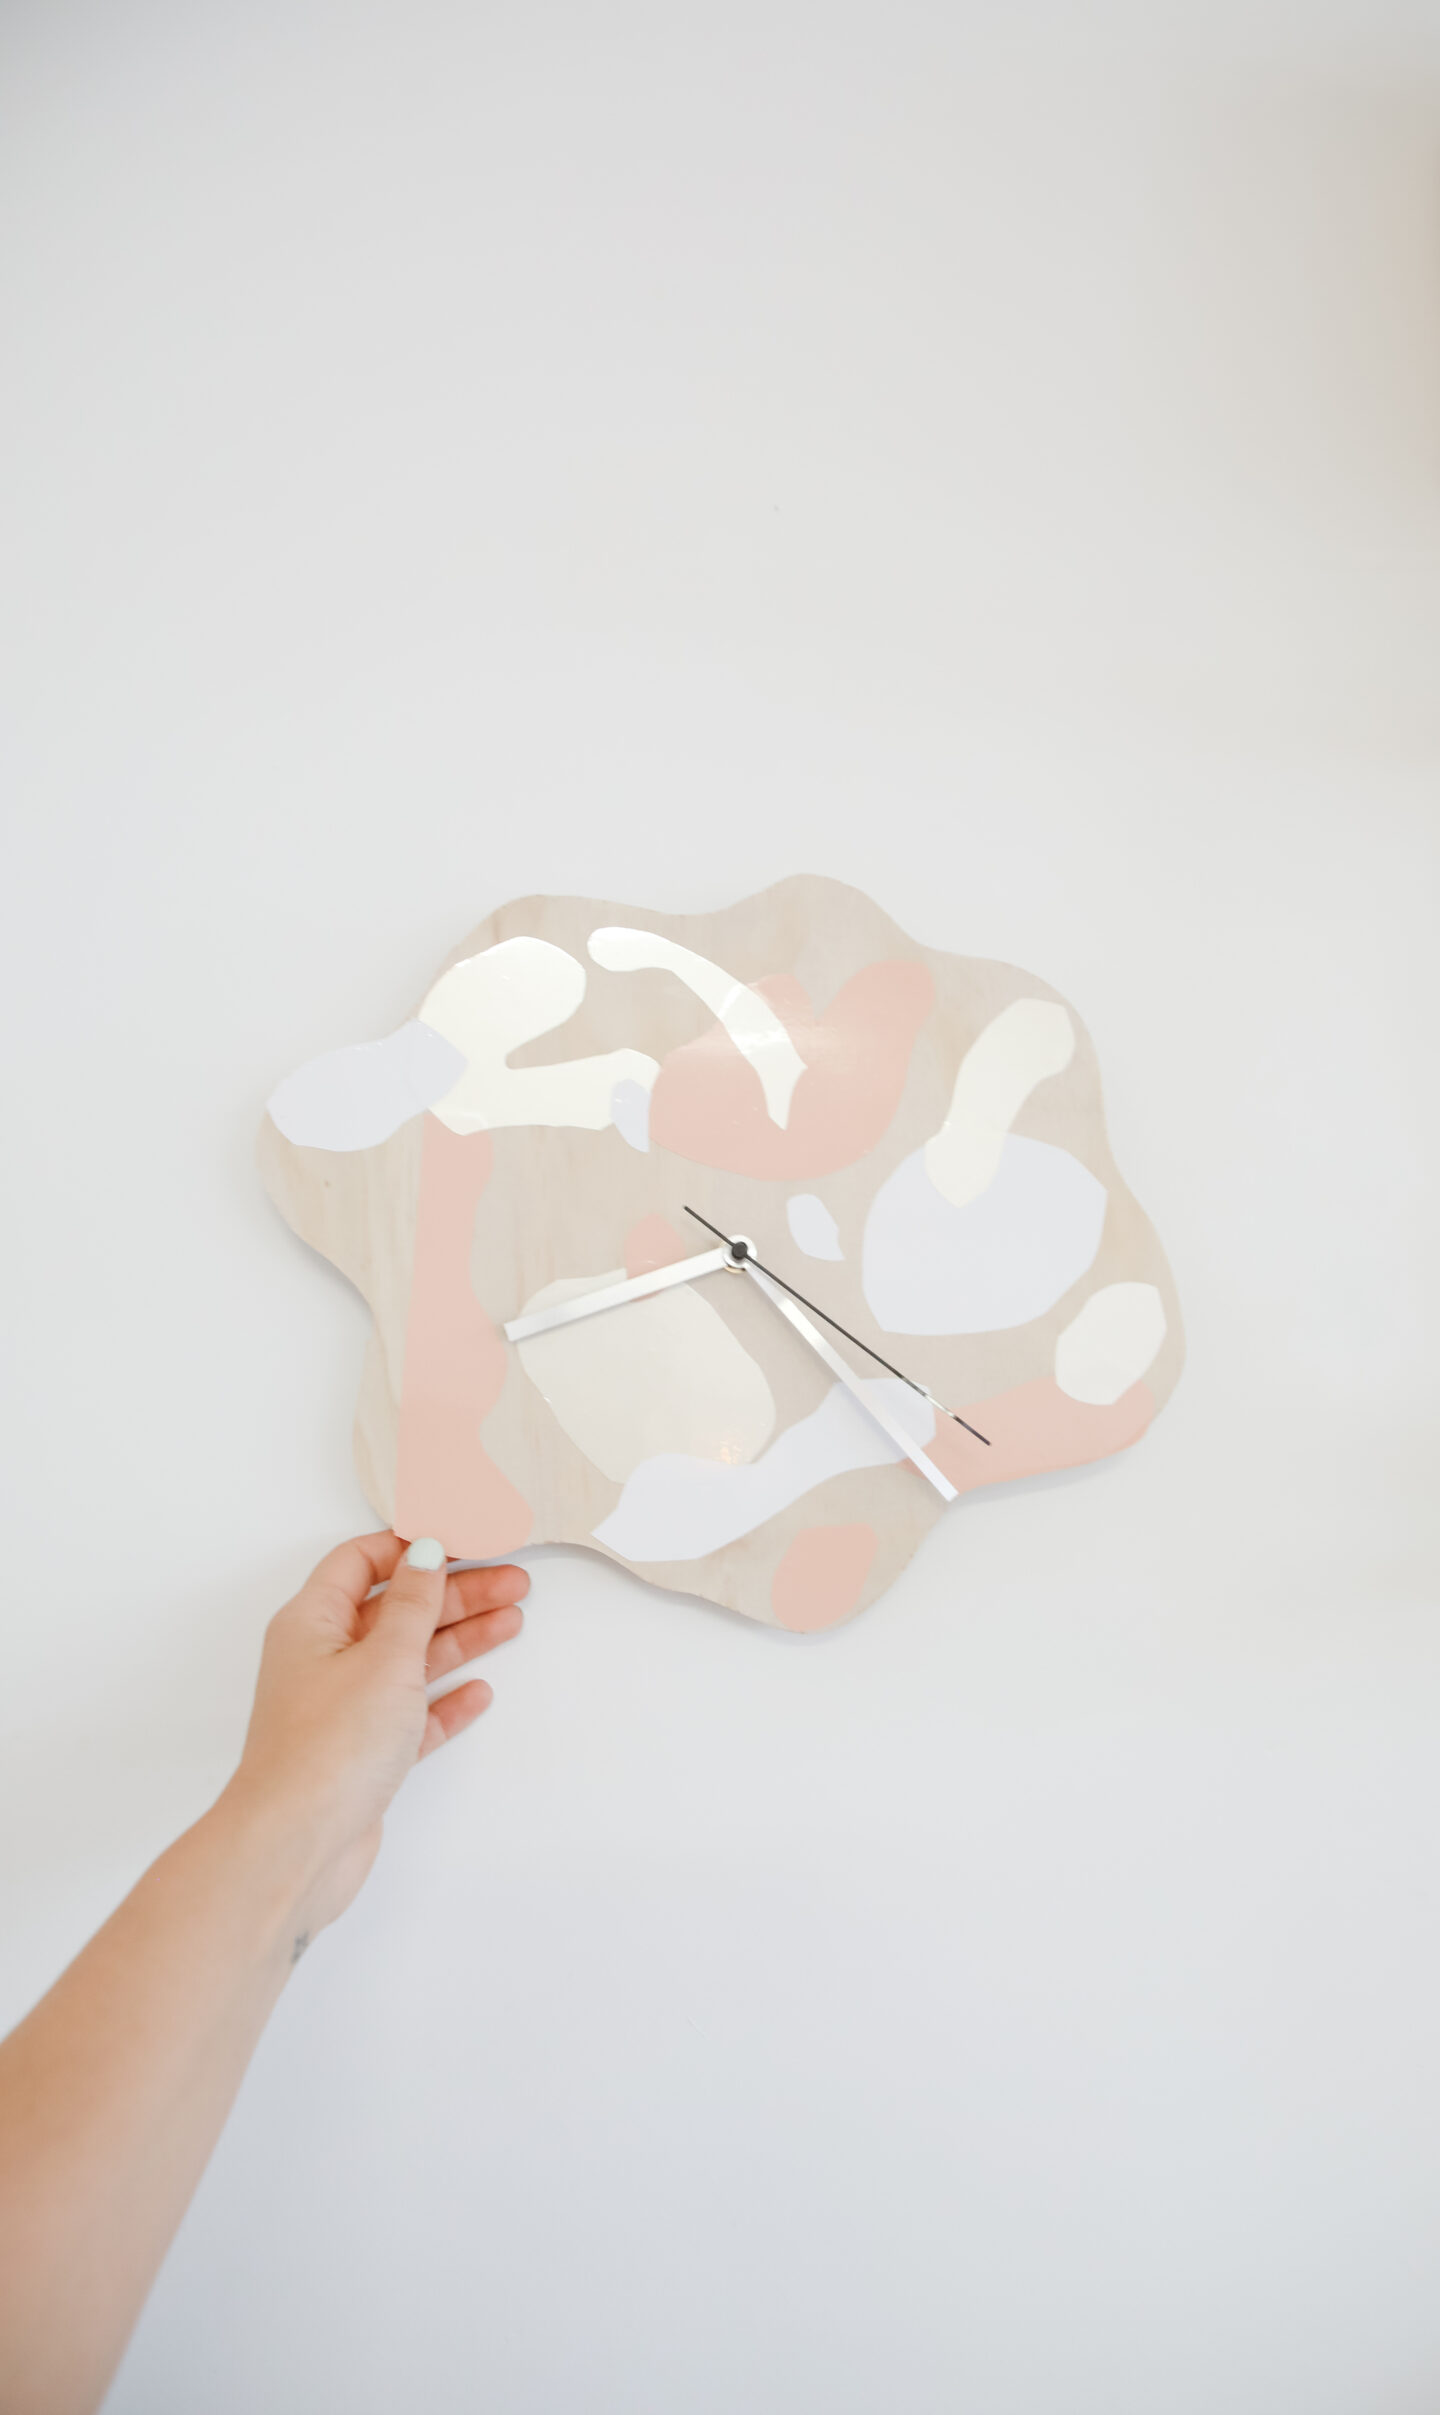
To decorate our wall clock, I decided to use vinyl, cutting unique Matisse-style stickers in three different colours: coral, white and pearl pink. Use your scissors and be creative creating big, small and tiny shapes. Ps. If you own a Cricut machine, you can also cut your stickers for a much faster process.
As soon as you cut them, remove the vinyl back protection and stick it to the wall clock base making sure to use a scraper to get rid of any air bubbles. Alternate colours, shapes and sizes for a organic style.
Assembling the clock mechanism is super simple, just attach it through the hole and secure it with the nut that comes in the package. Install the clock needles in the front by pressing down and add a battery in the back.
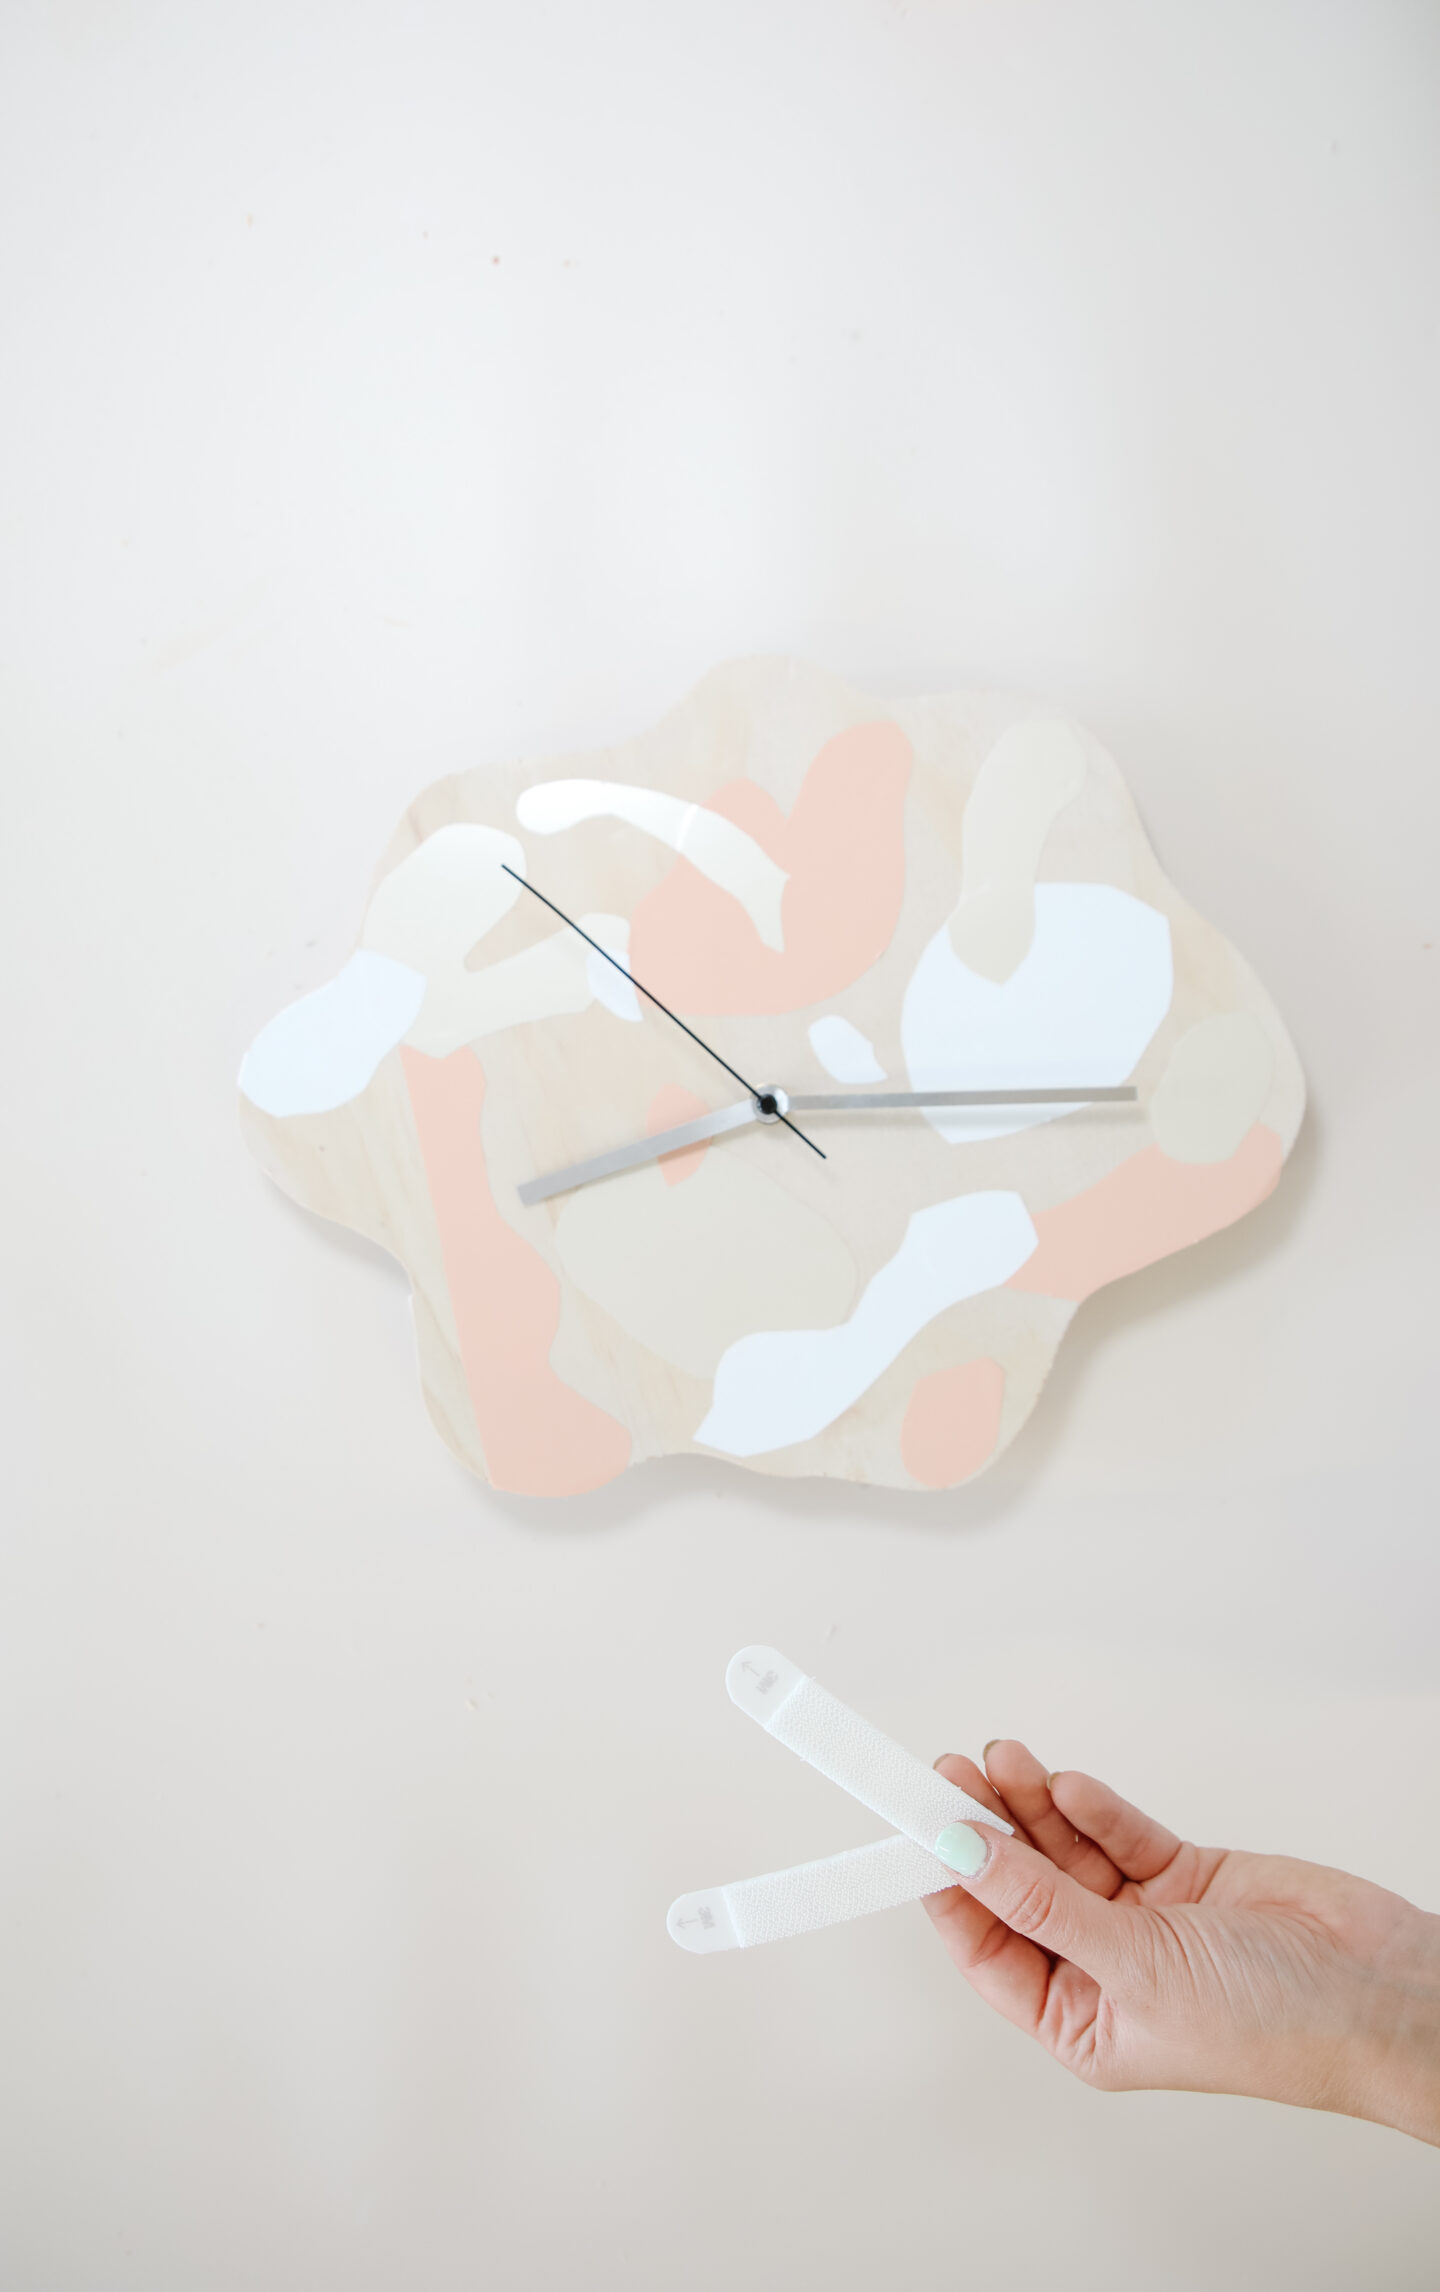
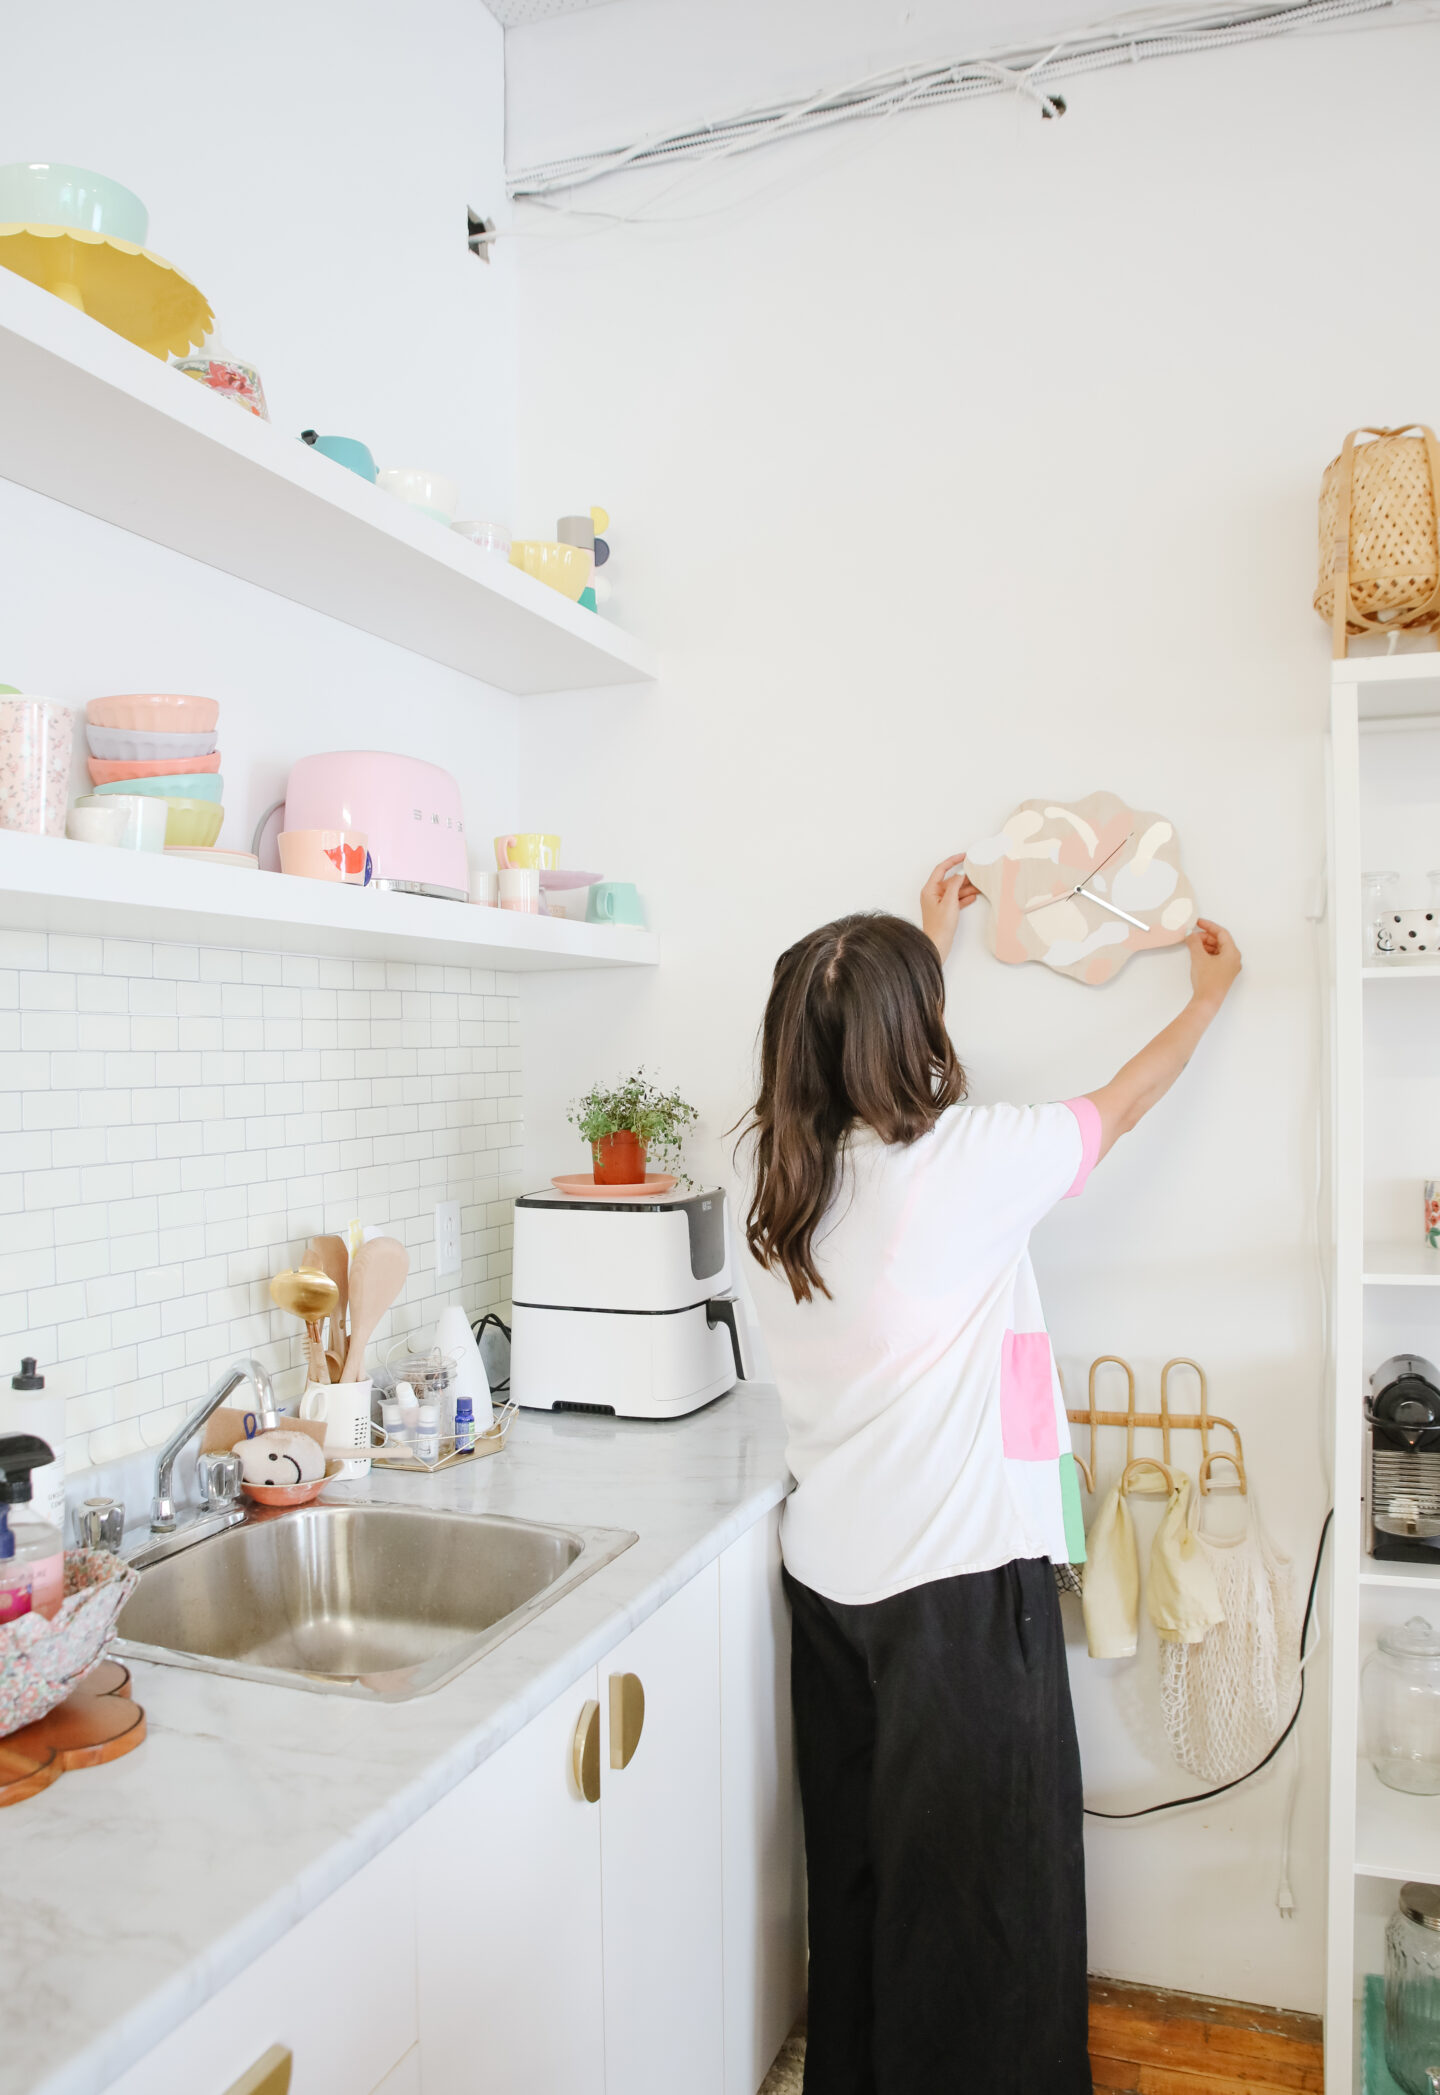
I used command strips to hang my new adorable clock on the wall, et voila!