DIY Colorful Ombre Dresser
 |
| I am SO excited today. My color journey never looked so fun.You know me, colors cheer me up, and when I found the perfect peach palette I’ve been looking for a while, I had to plan my very first (PRO) DIY project for the blog. It’s been a while since I wanted to start a dedicated section to all do-it-yo’self, and now with the official studio move, you’ll see a ton more over here.Did I say I was excited and over the moon? YAY!The ombre rainbow dresser trend has been here for a while, and I still find it so lovely when the hues are perfect. I confess I did all the colour selection planning to surprise my husband, and I’ve been dreaming of adding bold accents to our rooms, an instant eye-catcher!Here’s the step-by-step how we did it, would you try this? I cannot wait to see your creations! |
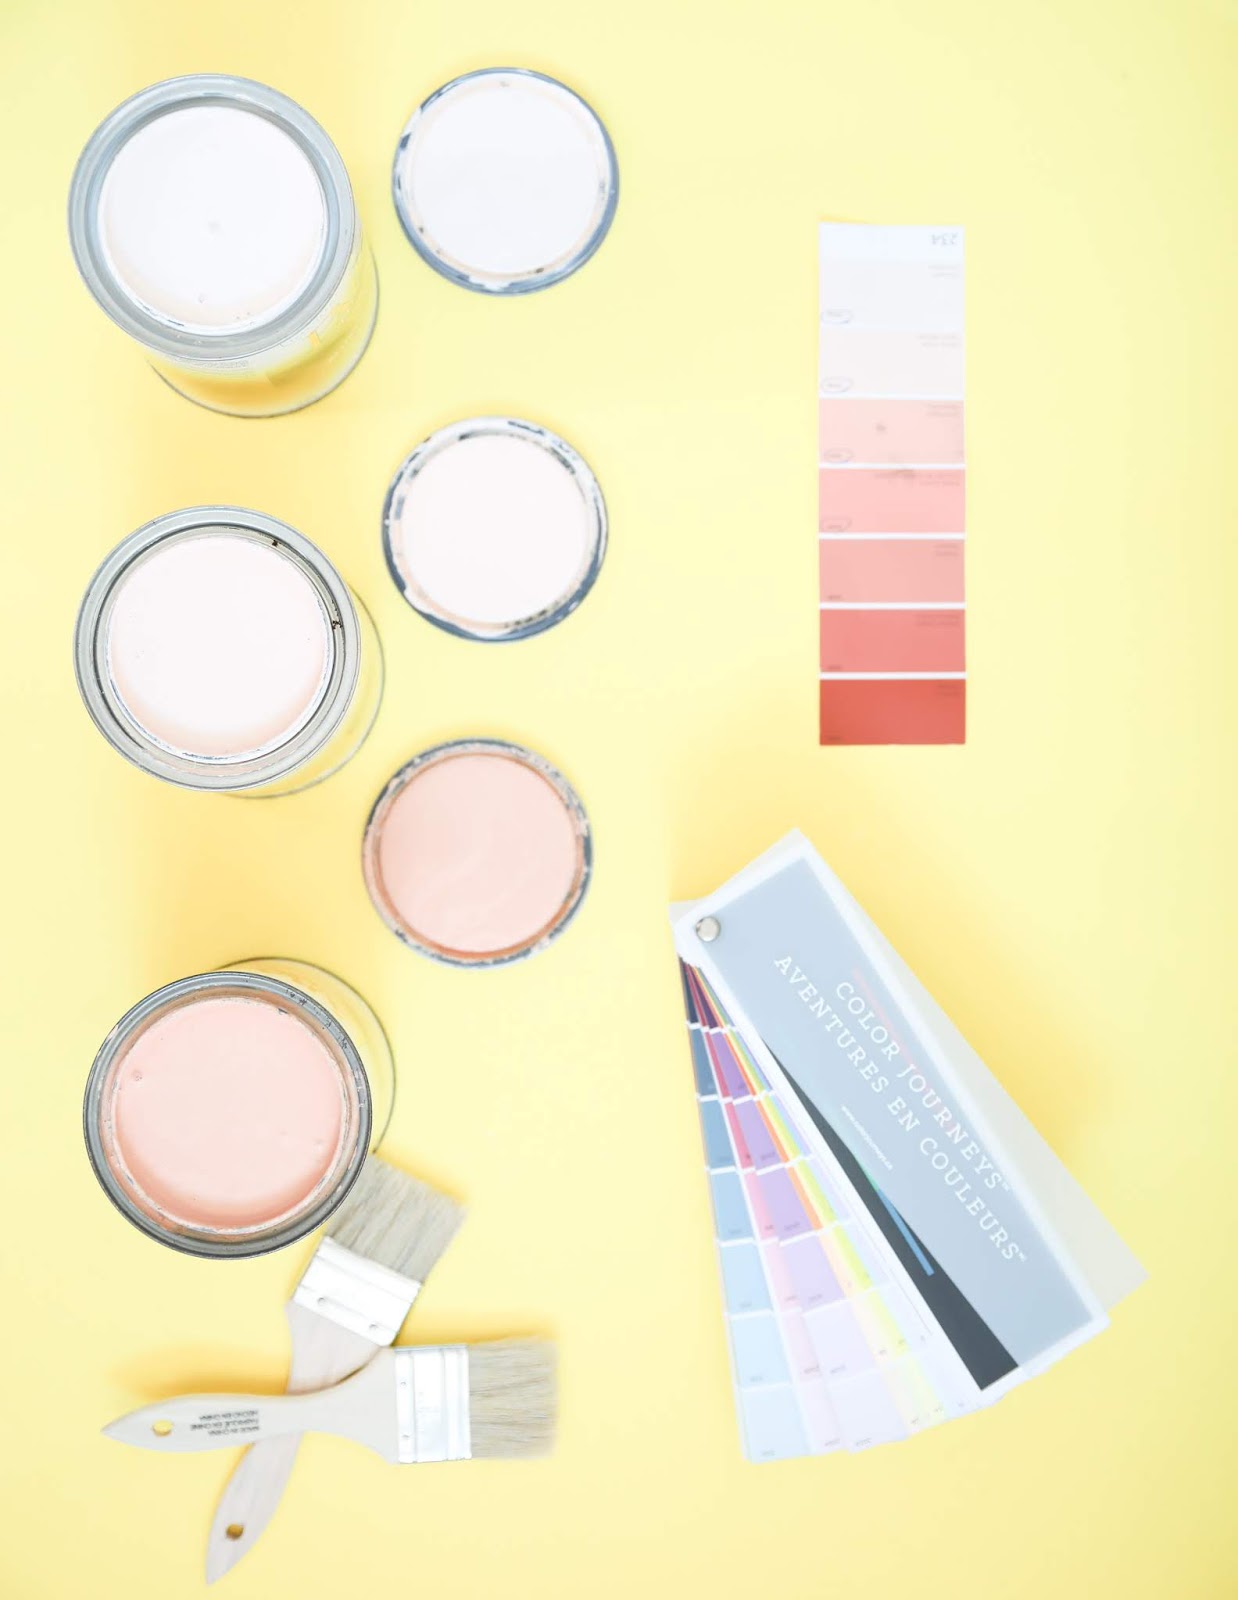 |
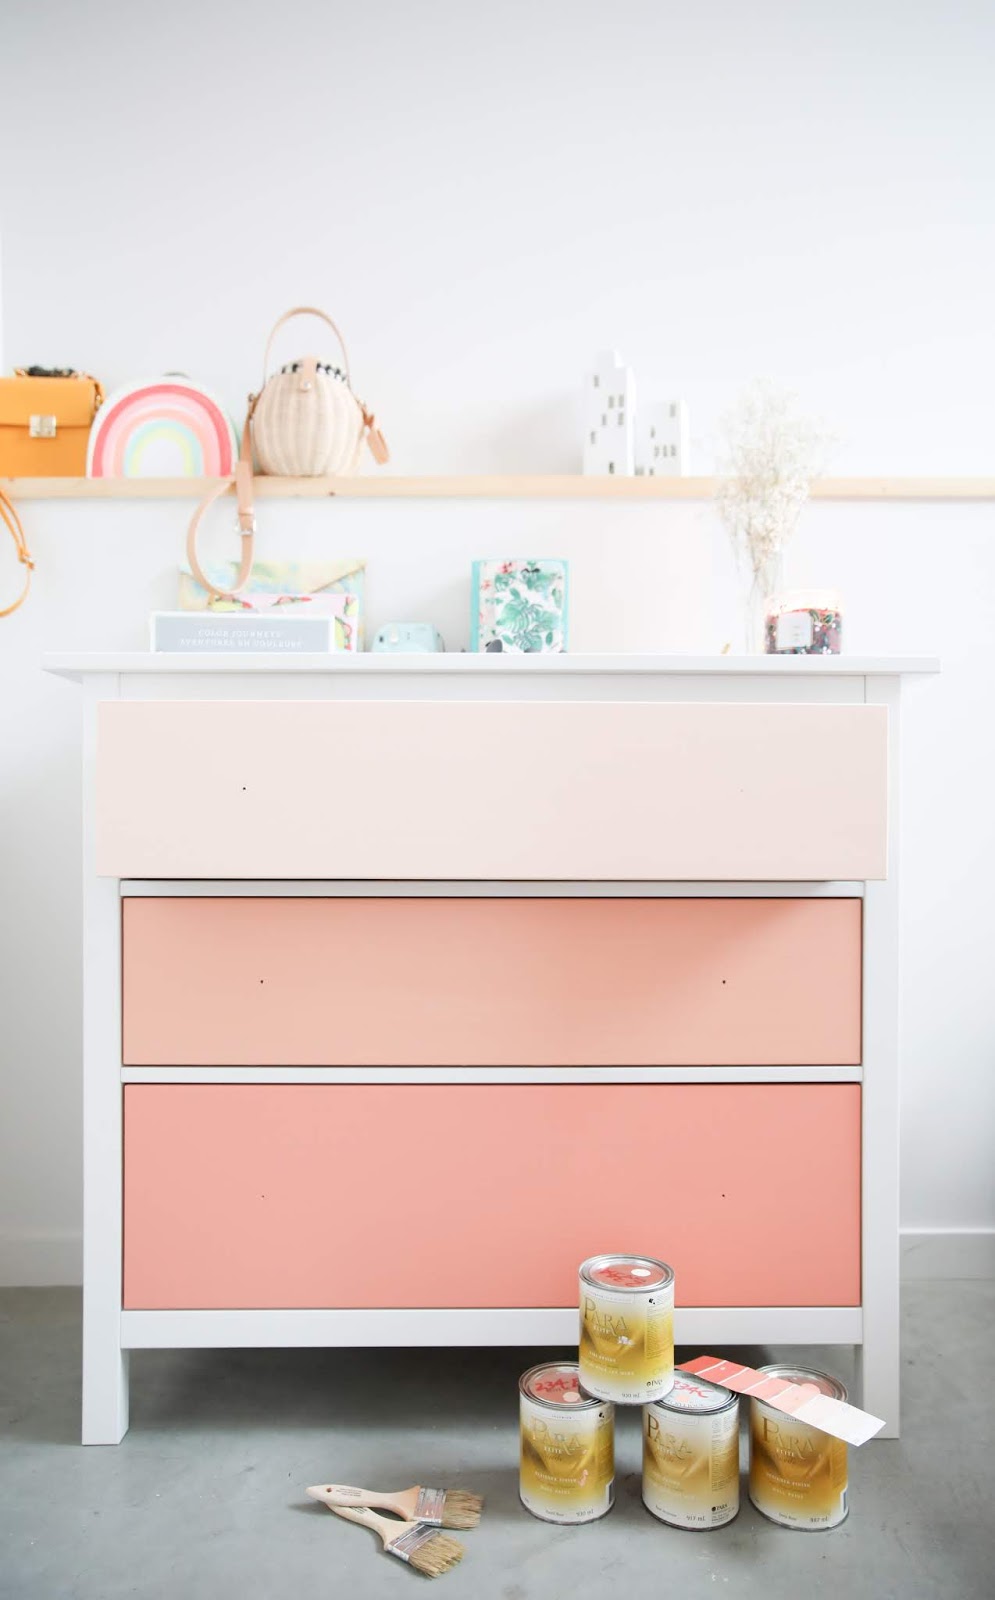
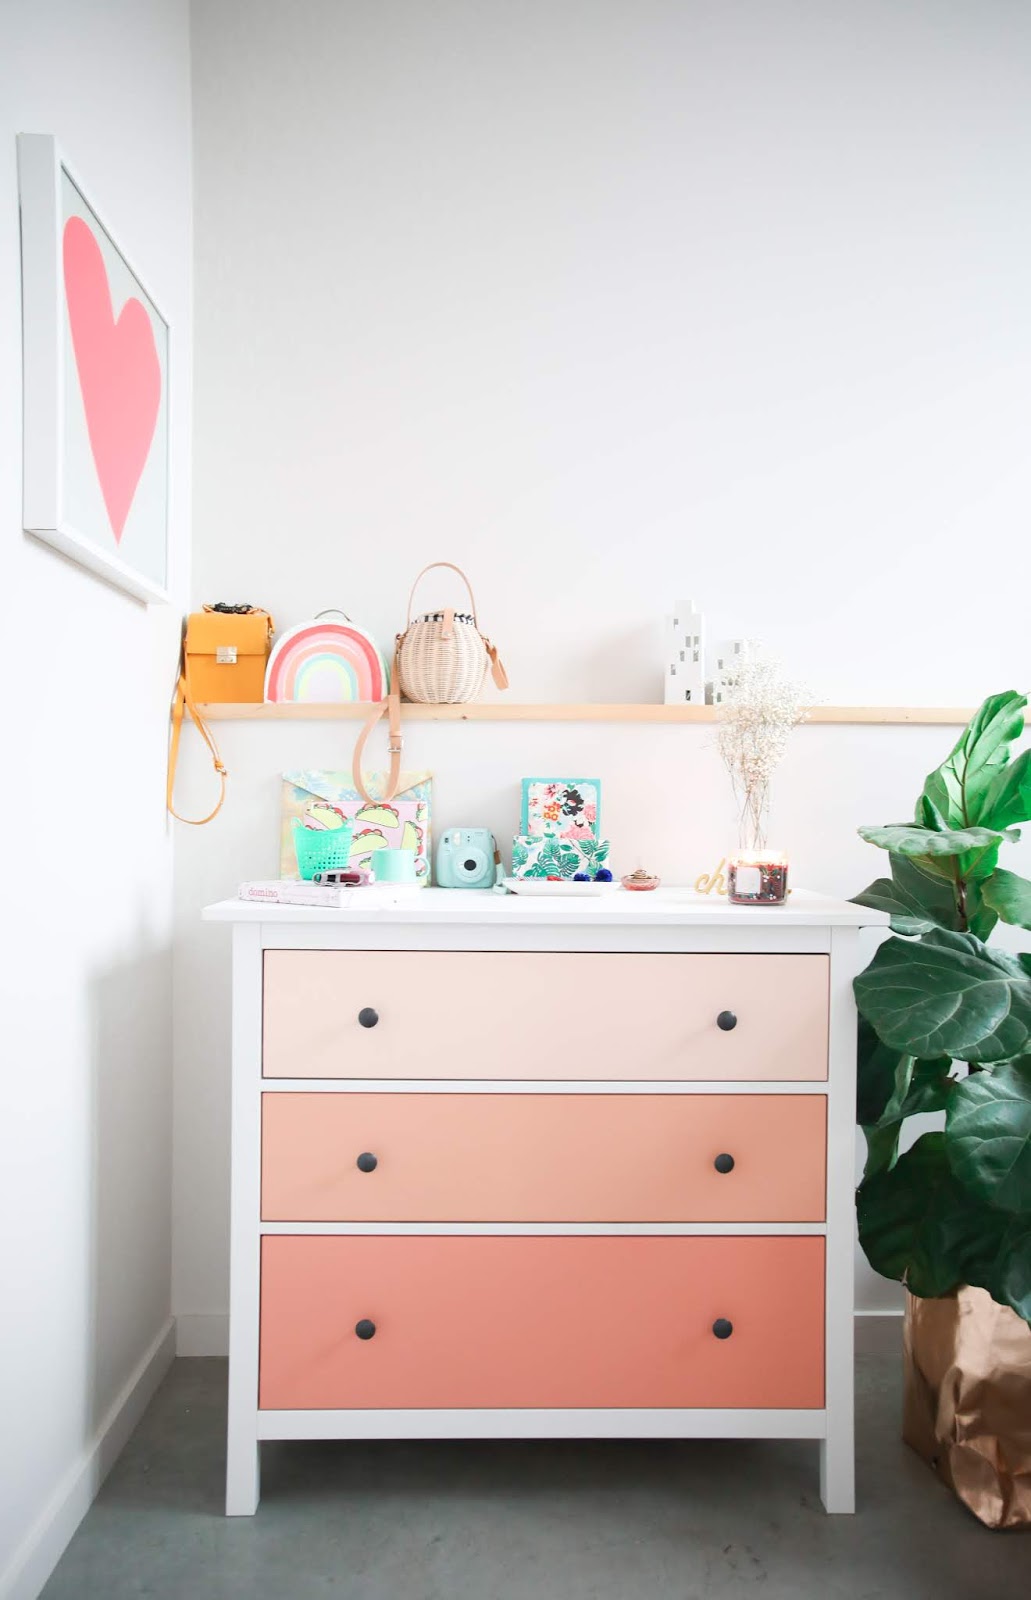
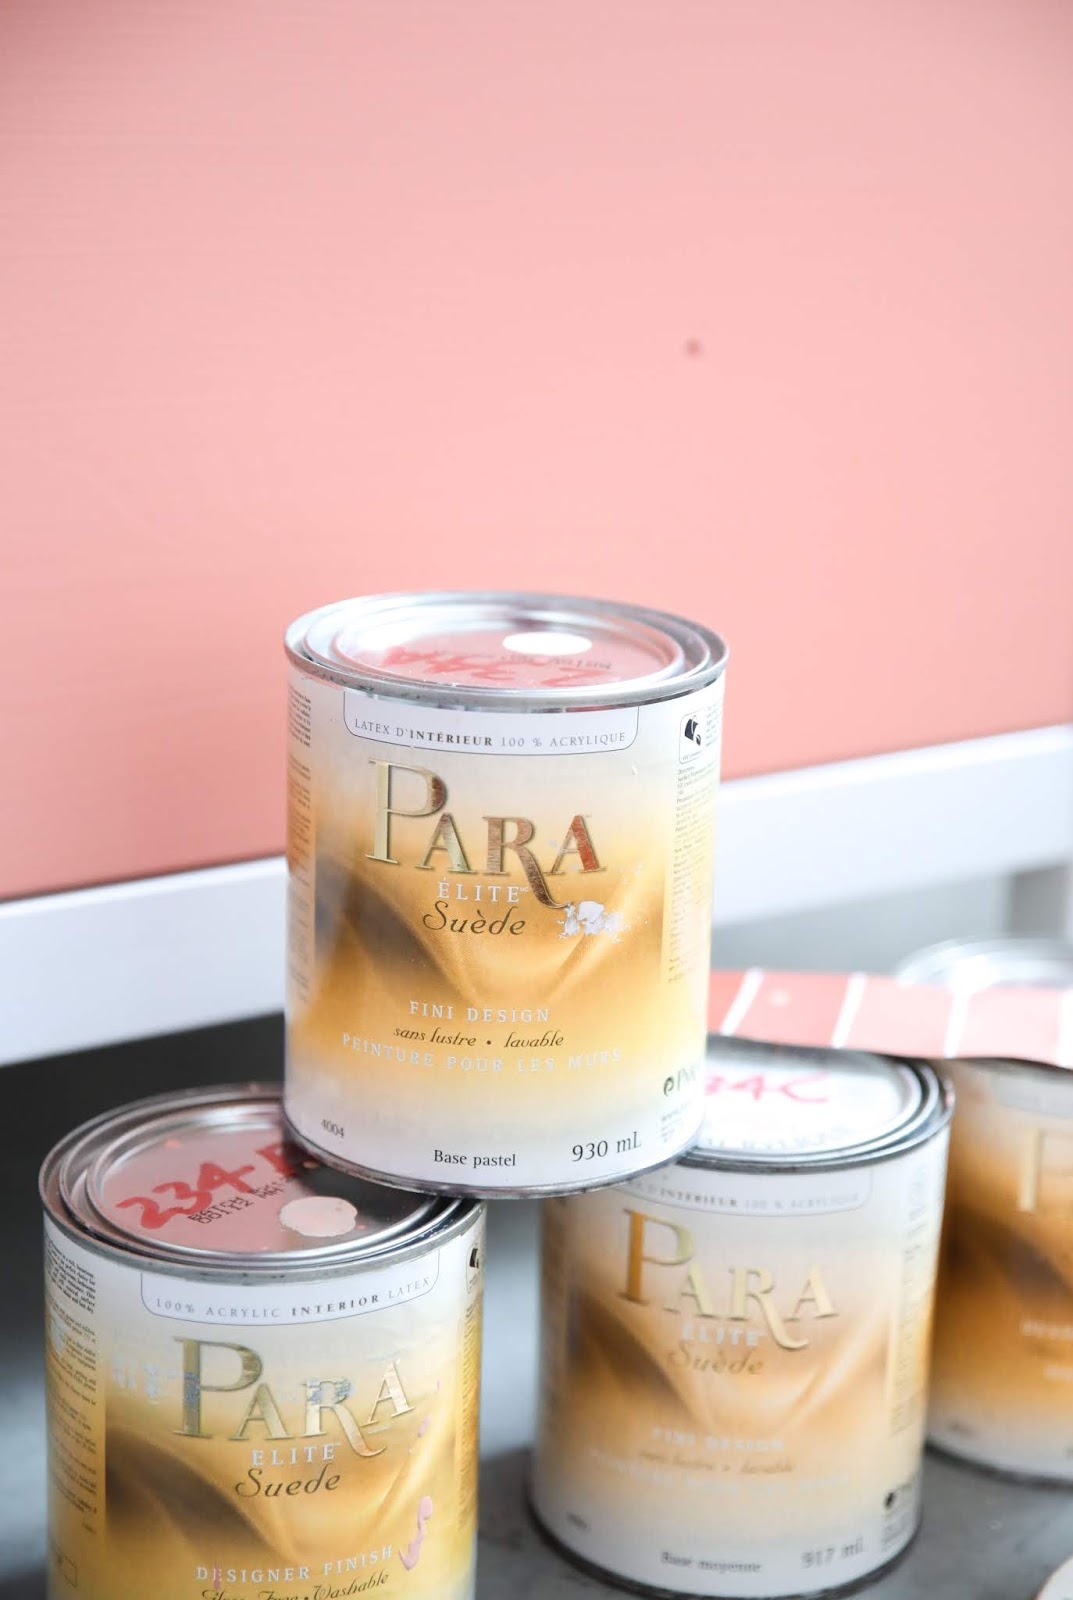
The HuesThis makeover was quite easy from start, we bought our IKEA dresser in white and I only needed to pick 3 tones to do the Ombre finish. I picked matte tones, partnering with PARA paints, we selected their 100% Acrylic Interior Latex, all washable, gloss-free and incredibly unscented (I still can’t believe the last part). Selecting the final colours was as hard as picking one single item when I shop at JCrew, (*gasp*), but well, based on my imaginary room mood board, the peach/coral selection was THE one.Darker hue: Prairie SunsetMedium hue: Posh PeachLighter hue: Dainty Peach |
 |
| The before, all white. Our dresser is this one here |

 |
The ProcessThis was hands down, the easiest way to start a DIY project, so easy and so fun!1. Select the shades you want to use and line them from darker (bottom) to lighter (top)2. In this particular case, we didn’t use an undercoat, because we had a brand new white dresser. Just check if you need to do this first step before adding the final paint.3. To keep the same original texture of the dresser (that I LOVE), we didn’t sand it.4. Remove the drawers and knobs and paint them individually5. Remember to tape the interior corners6. We added 3 coats on each color, making sure the intensity of each one was the one I had in mind7. Peel off the painter’s tape8. Install knobs and drawersVoila! |
 |
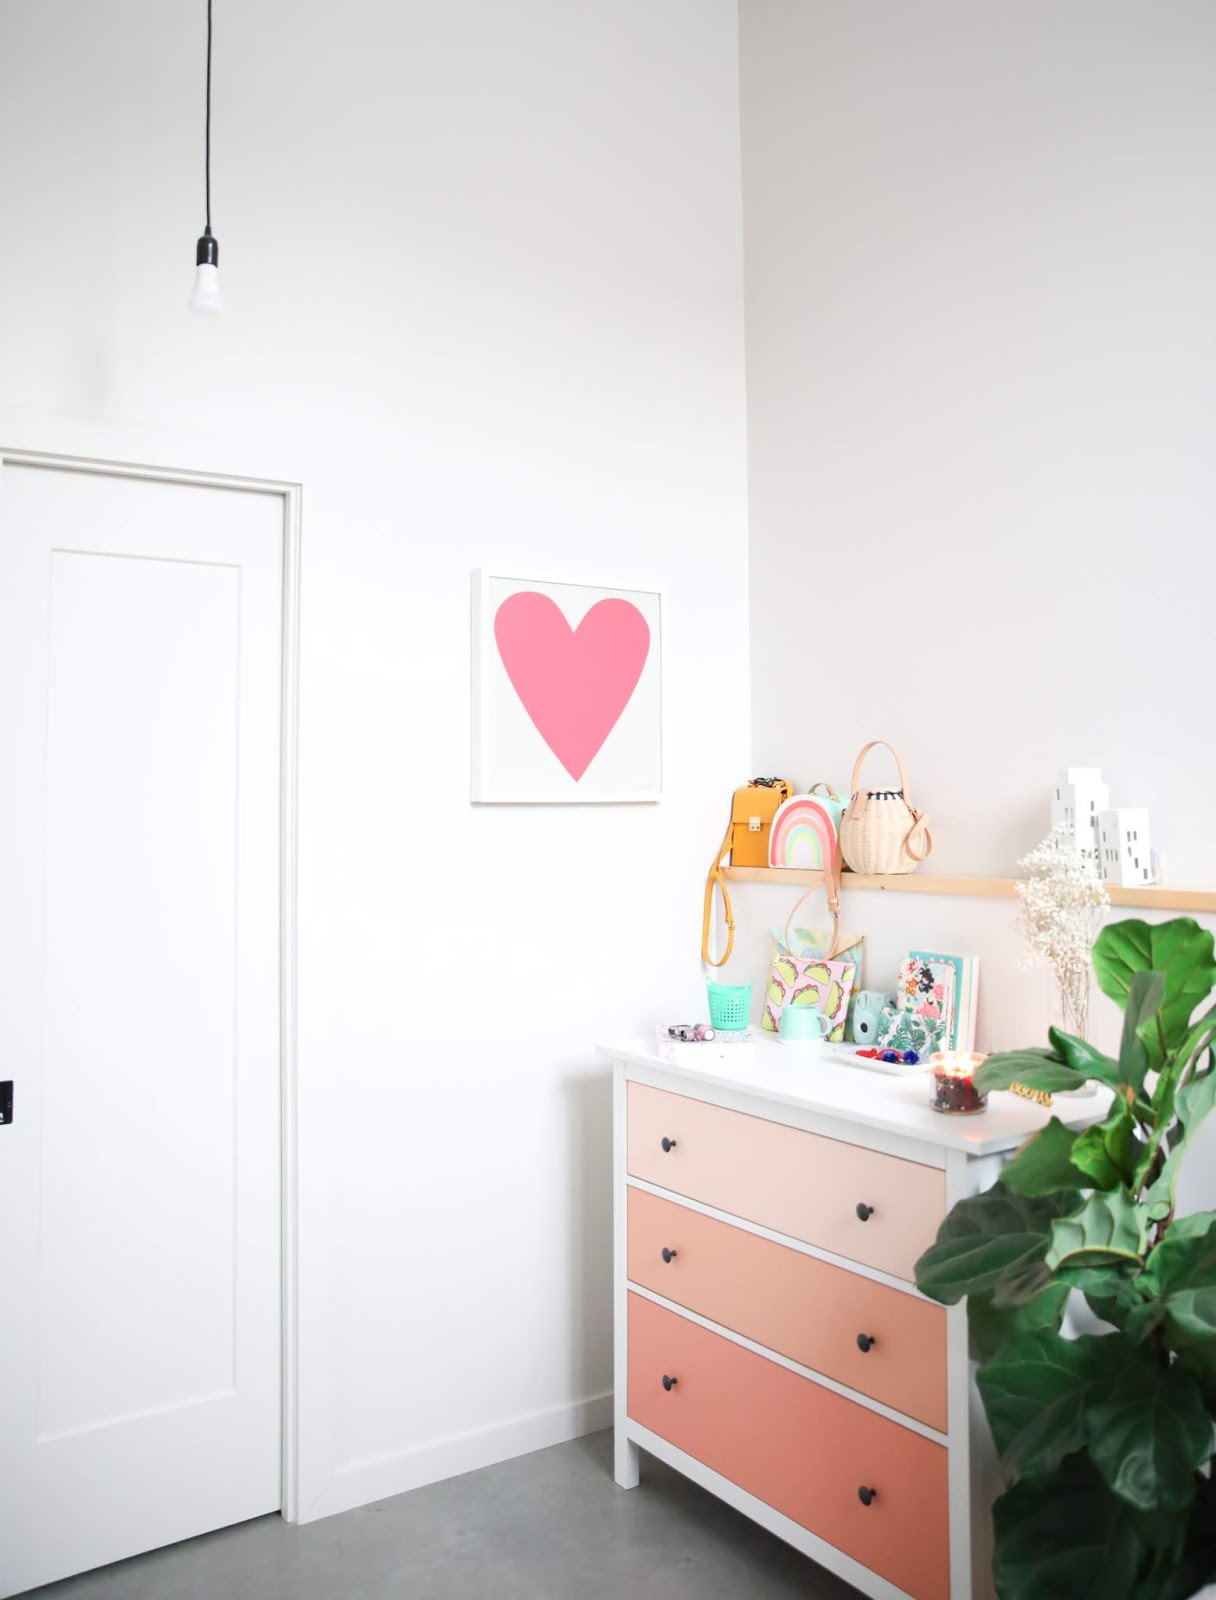
| It’sSOStinkingPRETTY! |
 |
SuppliesYou’ll need:
|
 |
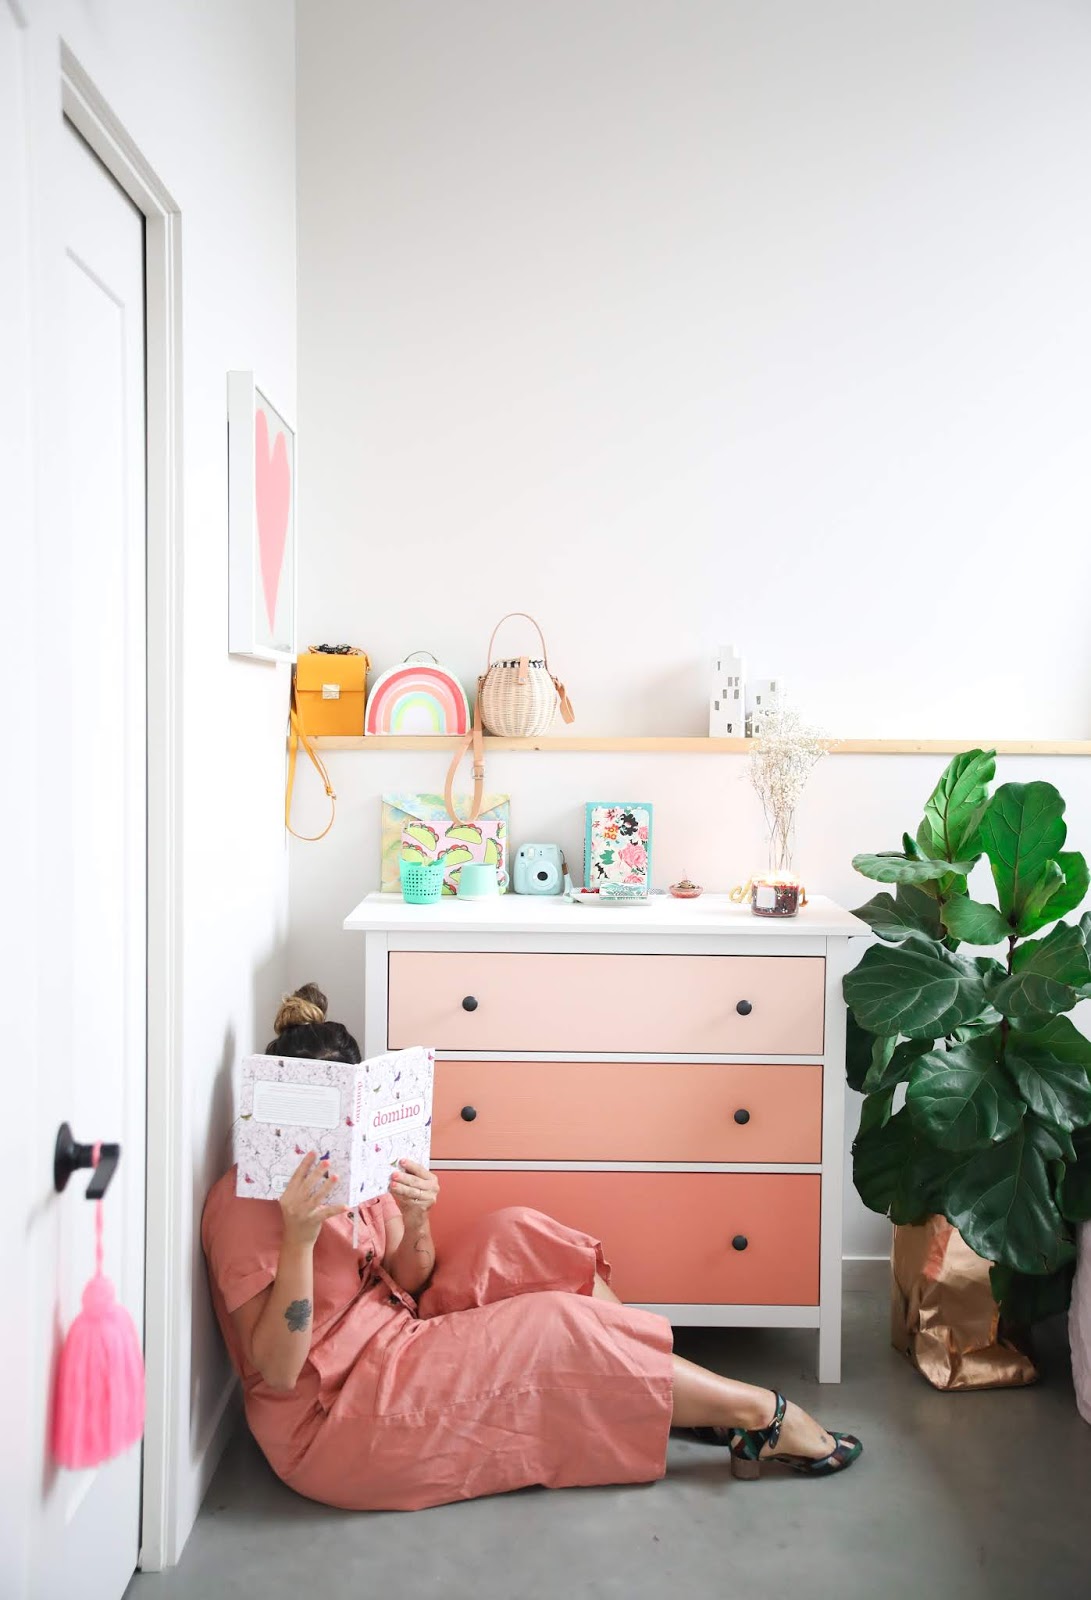
| I’ll be forever proud of this cute baby of mine.Yes, the dresser is my newest baby. |


 |
| I’m in colourful heaven! this is not a drill! |

 |
| Cannot wait to bring you more joy, fun and DIY inspiration in 2019.Endless thanks to PARA paints for partnering with us. |